In this exercise, you create a section view, a callout view of the exterior wall, and a detail callout of the parapet.
|
Before you begin, download the GSG_10_views.rvt file. Download this zip file (if you have not already downloaded the exercise files for the tutorials.)
Objectives
- Use the Section tool to create a building section view.
- Use controls to change the area included in the section and change the section head display.
- Use the Callout tool to create a wall section view.
- Use the Callout tool to create a detail view of the wall section.
 Watch the video
Create a Section View
- Open project GSG_10_views.rvt.
- In the Project Browser, under Floor Plans, double-click 01 - Store Floor.
- Click View tab
 Create panel
 (Section).
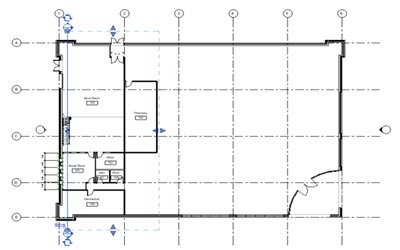
- Click outside the south wall of the building near grid 1, move the cursor up until it is outside the building on the north side, and click to place a section line approximately through the middle of the stairs, as shown.

- Click the
flip control (
 ) to flip the section so it includes the store room #103.
- Click the cycle control (
 ) on the top twice, to cycle through the section tail options and display the section head on the top and bottom.
- Press Esc.
- Double-click the section head to open the section view.
- On the View Control Bar, click
 (Hide Crop Region).
Create Callout Views
- Click View tabCreate panel
 (Callout).
- In the Type Selector, under Section, click Wall Section.
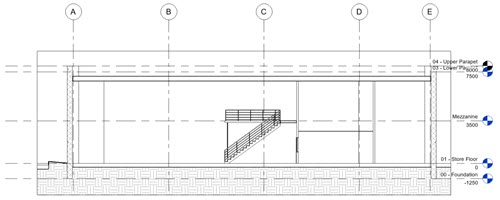
- To draw a callout around the entire north (left in the section view) wall of the building, from the foundation to the roof, click to define the lower-left corner and click to define the upper-right corner of the box.
- Select the callout, and use the Drag Head control to drag the callout head so it displays to the upper-left of the callout.
- Press Esc.
- Double-click the callout head to open the callout view.
- On the View Control Bar, click
(Hide Crop Region).
- On the View Control Bar, change the detail level to Medium.
- On the Create panel, click
(Callout).
- In the Type Selector, under Detail View, click Detail.
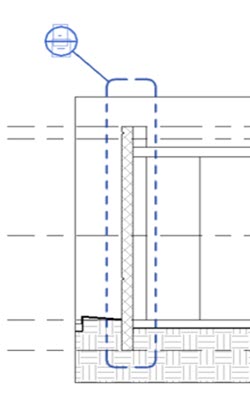
- Draw a callout around the wall parapet.
- Reposition the callout head to the upper-left position.
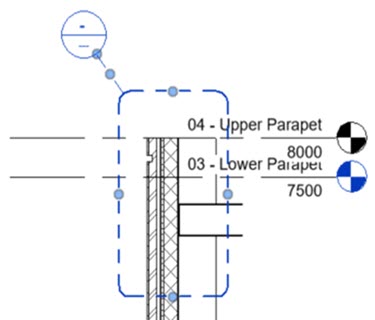
- Double-click the callout head to open the detail view.
- On the View Control Bar, click
(Hide Crop Region).