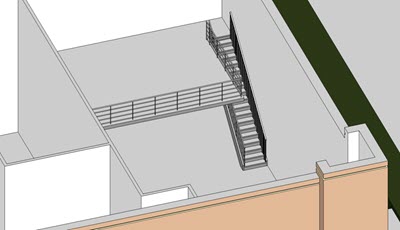
In this exercise, you complete the interior of the model by adding a staircase to the mezzanine on the lower level, then modifying the railing on the mezzanine.
|
Before you begin, download the GSG_09_stairs_railings.rvt file. Download this zip file (if you have not already downloaded the exercise files for the tutorials.)
Objectives
- Create a stair between the store floor and the mezzanine.
- Modify the stair railing to include the mezzanine.
- Change the railing type to a pipe railing.
 Watch the video
Create Stairs
- Open project GSG_09_stairs_railings.rvt.
- Verify that the 01 - Store Floor floor plan is open.
- Click Architecture tab
 Circulation panel
 (Stair).
- On the Properties palette, under Constraints:
- For Base Level, select 01 - Store Floor.
- For Top Level, select Mezzanine.
- On the Options bar, set the location line to Run:Left.
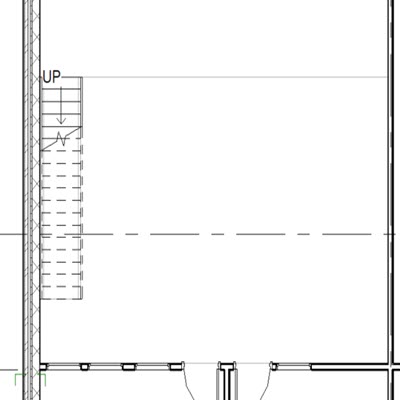
- In the store room, click the corner of the mezzanine underlay to start the stair run.
- Move the cursor down until the tooltip indicates that 0 risers remain, and click to specify the stair endpoint.
- On the Mode panel, click
 (Finish Edit Mode).
Create Railings
- Open the mezzanine floor plan from the Project Browser.
- Click Architecture tabCirculation panelRailing drop-down
 (Sketch Path).
You will create a railing at the edge of the mezzanine.
- On the Draw panel, click
 (Pick Lines).
- On the Options Bar, for Offset, enter 100.
- In the Type Selector, select 900 mm Pipe.
- Position the cursor over the long edge of the mezzanine, and when the dashed line displays, click to place the railing.
- Place another railing sketch line along the short edge of the mezzanine near the stairs.
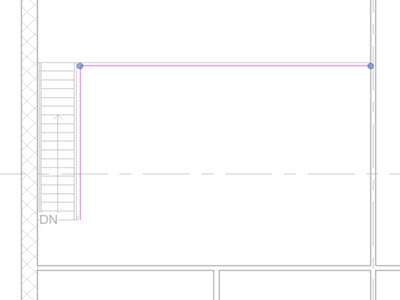
- On the Mode panel, click
(Finish Edit Mode).
Modify the Railing Type
- On the Quick Access Toolbar, click
 (Default 3D View).
- Select the flat roof and then use
 (Temporary Hide/Isolate) on the View Controls Bar and select Hide Element.
- Select the railing on the side of the stair near the wall.
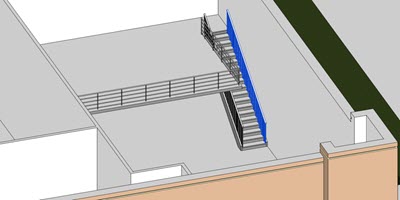
- In the Type Selector, select 900 mm Pipe Wall.
- Click Delete Type in the warning dialog.
- Select the railing on the other side of the stair.
- In the Type Selector, select 900 mm Pipe.