With the Physique component, you can use Biped to animate a deformable skin, usually a mesh object. However, some animations don't require deformation. For example, a knight clad entirely in rigid metal armor doesn't need to deform as skin does. Also, figures seen from a distance don't require the same degree of realism as figures seen close up.


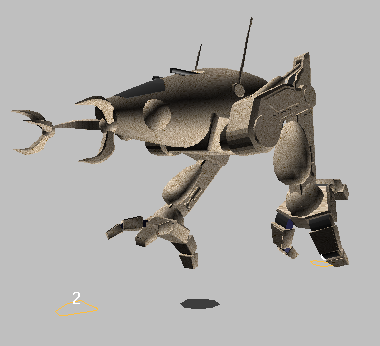
Jointed character linked with biped skeleton
Characters available commercially often come in two varieties: jointless and jointed. Jointless characters have a seamless mesh at limb joints. Jointless characters should be attached to the biped using Physique. A jointed character has separate objects with ball joint geometry for the limbs, and lends itself to the linking technique described in this topic.
Linking objects and other geometry to the biped can also be used in cases such as the following:
- Link a weapon or a flower to the biped hand.
- Link eyeballs or teeth to the biped head.
- Link extra 3ds Max bones or splines to the biped to create extra envelopes when Physique is applied.
- Link 3ds Max bones to the biped to automate mechanical assemblies when the biped is keyframed.
- Link particle emitters to the biped hands or feet to create smoke or dust. Note: If you've linked particle emitters or 3ds Max bones (with the IK controller) to the biped, the Animate button must be on when you reposition the biped.
Procedures
To link a mechanical character to the biped (without Physique):
- Load or create a mechanical or jointed model. Body parts in this model should be separate 3ds Max objects.
- Create a biped.
- On the Biped rollout, turn on
 (Figure Mode), then position and fit the biped to your mesh objects.
 - Go through the mesh objects and use
 (Select And Link) to link each object to its corresponding part on the biped.
 All of keyframe animation applied to the biped will animate the model.
Tip: If you plan to use 3ds Max linking and Physique together, link the body parts to the biped after applying Physique. In this way, Physique will not create superfluous links from the biped to the mechanical body parts when it is applied.
With mechanical or jointed characters, you can simply link objects to the biped without using the Physique modifier.