To work most efficiently with bipeds, it is important to follow the general workflow described in this topic.
Create Skin Geometry
Before you create a skeleton for a character, have a character skin ready to put the skeleton into.
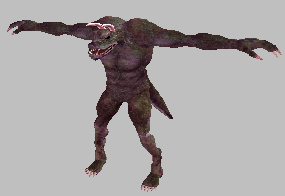
Create a basic skin shape for your character using any of the 3ds Max modeling tools and surface types. Be sure to place your character's skin in a neutral pose with arms outstretched and legs spaced slightly apart. You may also want to add sufficient detail to your skin's mesh or control points around joints to facilitate deformation during movement.

Character mesh in a neutral pose
Create a Biped Skeleton
Once you have a character mesh, you can create a biped skeleton, or rig, to fit inside. Use Figure mode to set up your biped.
Before you position the skeleton, use controls on the Structure rollout to alter the biped to match your mesh, setting the number of links for the spine, arms, neck, or fingers, or adding props to represent weapons or tools.
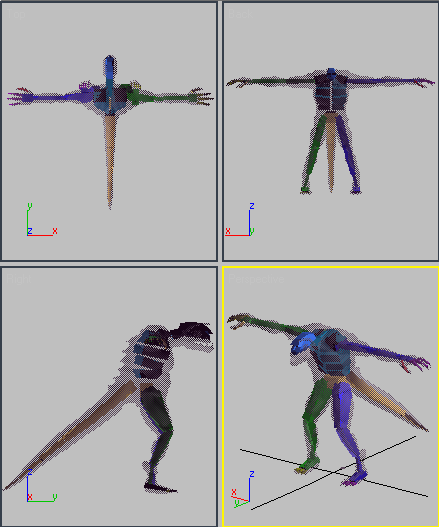
When you position the biped inside your mesh, start with the center of mass (COM), which is the parent of all objects in the biped hierarchy. The COM should be positioned in line with the hips of the mesh character. Scale the pelvis so that the legs fit properly in the mesh, and then use Move and Scale on the 3ds Max toolbar to position your biped skeleton.
The following list includes some tips for positioning your skeleton:
- Use the Page Up and Page Down keys to cycle through links.
- Use Rubber Band mode to move and scale the arm and leg links on your skeleton simultaneously.
- Use tools from the Bend Links rollout, such as Bend Links Mode and Twist Links Mode to adjust tail, neck, spine, and ponytail links.
- The head, toes, and fingertips should extend slightly beyond the mesh extents to fulfill the requirements of Physique.
- Use the minimum number of fingers and toes.
You need extra fingers or links only if you are planning on complex hand or foot animation. If your character is wearing gloves or shoes, then you probably only need one finger or toe, with one link.
- To create a biped with knees that bend backwards, rotate the biped calves or thighs of both legs 180 degrees about their local X-axis (along the length of the limb). When you exit Figure mode, the biped walks, runs, and jumps with reversed knees.
- When working with a mesh in a symmetrical pose, pose one side of the skeleton, and use controls on the Copy/Paste rollout to paste the posture to the opposite side of the biped.

When you are satisfied with your pose, check the alignment in all viewports to make sure that the skeleton is positioned correctly in the mesh.
Once you have successfully positioned a skeleton inside your character mesh, you are ready to attach the mesh with Physique. For more on this workflow, see Understanding Physique.
