Lets you apply road markings to roads.
There are two styles of road markings:
- Linear road markings, based on the geometry of existing parent shapes.
- Filled area road markings, based on the geometry of existing closed parent shapes.
This feature lets you create road-marking chevrons and other patterns.
The Road Markings Style Editor lets you apply of a range of road-marking types to a visualization model by associating a road-marking type with a series of shape label masks.
By default, linear road-marking objects use the CivilViewMarkings material.
Interface
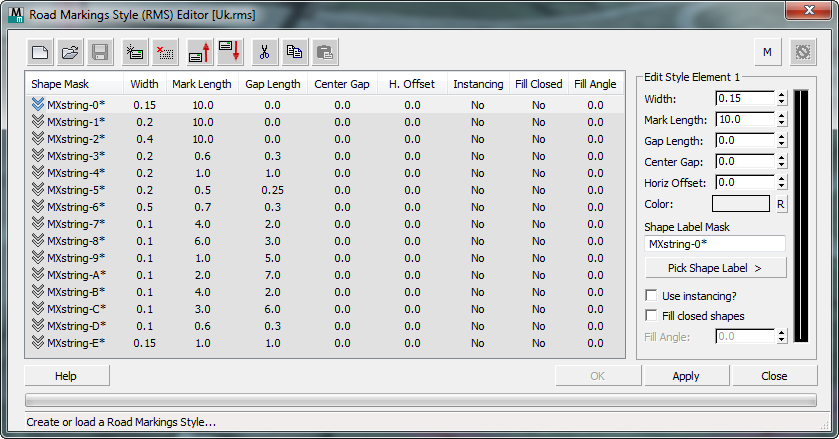
[road marking style element list]
Lists the contents of the current road marking style. Each line shows an individual element. Click to highlight an element and see its details in the element editor to the right.
-
 Start New Style
 - Click to create a new road marking style.
-
 Open Style
 - Click to open a previously created road marking style.
-
 Save Style
 - Click to save the current road marking style.
-
 Add new element
 - Click to add a new element to the current road marking style.
-
 Delete selected element
 - Click to delete the selected element from the current road marking style.
-
 Move selected element up
 - Click to move the selected element up by one position in the current road marking style.
-
 Move selected element down
 - Click to move the selected element down by one position in the current road marking style.
-
 Cut Element
 - Click to cut the selected element from the style, saving it to the Clipboard.
-
 Copy Element
 - Click to copy the selected element and save it to the Clipboard.
-
 Paste Element
 - Click to paste a cut or copied element.
You can paste a Cut element to a different location in the current style, and you can paste a Cut or Copied element to a different road marking style.
-
 Allow multiple markings per shape?
 -
Indicates whether more than one road-marking object can be applied to each parent shape. This is a global setting defined in the Civil View Preferences panel. It is off by default. You can overridde this setting locally, for an individual element, by changing the status of this button.
-
 Reset Swept Object
 - Click to delete all objects placed in the scene from the current object placement session.
- [list of elements]
- Lists each element in the road marking style, along with its style settings.
Edit Style Element group
The controls in the group to the right let you edit the settings of the highlighted road marking style element.
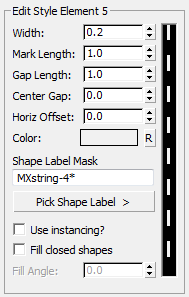
- [preview]
- At the right of the editor, a graphic preview shows the results of your edits.
- Width
- For linear road markings, sets the width of the road marking.
For filled area "chevron" road markings, this value has no effect.
- Mark Length
- For linear road markings, sets the length of each mark in a broken or dashed road marking. For continuous road marking lines, this value has no effect.
For filled area road markings, sets the width of the road-marking chevrons or stripes generated across the closed boundary of the parent shape (only valid if Fill Closed Shapes is turned on).
- Gap Length
- For linear road markings, sets the length of the gap between adjacent marks in the road marking. For continuous linear road marking lines, set this value to 0.0.
For filled area "chevron" road markings, sets the width of the gap between each chevron or stripe (only valid if Fill Closed Shapes is turned on. If a solid filled area of marking is required, set this value to 0.0.
- Center Gap
- For linear road markings, sets the width of the longitudinal gap in the center of each road-marking line. Allows you to specify double road-marking lines with a single road-marking object. The resulting width of each double line is half of the difference between the overall road marking Width and the Centre Gap width.
For filled area "chevron" road markings, this value has no effect.
- Horiz[ontal] Offset
- For linear road markings, sets the horizontal offset of the road marking from its parent shape.
For filled area "chevron" road markings, this value has no effect.
- Color
- Sets the color of the road marking. The default color is derived from the Civil View Preferences panel.
- "R" button Click to reset the road-marking color to the default color.
- Shape Label Mask
- Specifies a full or partial shape label mask (wildcard string). Civil View applies a road-marking object of this style to each shape in the scene whose name matches this mask. Valid wildcard masking examples are as follows:
- Pick Shape Label
- Click to turn on, then click in a viewport to pick a shape object. Civil View uses the name of the shape as the initial mask (wildcard) string.
- Use instancing?
- When on, uses Civil View parameter instancing for road-marking objects created from the current style element.
Parameter instancing allows parameters to be shared across multiple objects of the same type, even if the resultant geometric shape defined by the parent spline is entirely different.
For road markings, this means that two road markings of the same type can share a single instance of the parameters used to define the properties of the road marking. When two or more road-marking objects share the same instance of parameters, updates made to any one of these objects will instantly be reflected in the linked road-marking objects. This guarantees that all road markings representing a similar feature type will always look the same.
For more information, see Parameter Instancing.
- Fill closed shapes?
- When on, generates filled-area ("chevron") road markings instead of linear road markings. The parent shapes must form a closed boundary.
- Fill Angle Sets the angle of chevrons or stripes on a filled area "chevron" road-marking object. The angle is specified in relation to the bearing of the parent shape at the first point of each spline. This allows the bearing of the stripes to be expressed in relation to the direction of a highway, assuming that the bearing between the first few points on the parent shape represents the same direction as the adjacent traffic flow.