Conform is a compound object created by projecting the vertices of one object, called the Wrapper, onto the surface of another object, called the Wrap-To. There is also a space-warp version of this function; see Conform space warp.
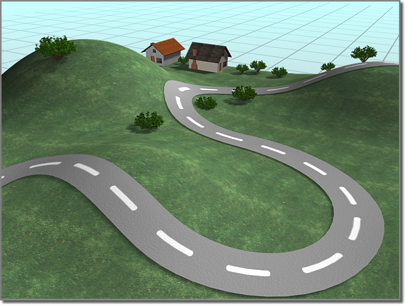
Conform fits the road to the surface of the hills.
Because the space-warp version is somewhat easier to use, it's a good idea to read that topic first, try the example, and then return here. This topic provides additional methods of projecting the wrapper vertices.
Procedures
Example: To create a Conform object:
- Position two objects, one of which will be the Wrapper, and the other the Wrap-To. (For this example, create a box as the Wrap-To object, and then create a larger sphere that completely surrounds it. The sphere will be the Wrapper.)
- Select the Wrapper object (the sphere), and on the
 Create panel, with
  (Geometry) active, choose Compound Objects from the drop-down list. On the Object Type rollout, turn on Conform. Note: Both objects used in Conform must be either mesh objects or objects that can be converted to mesh objects. If the selected Wrapper object is invalid, the Conform button is unavailable.
 - Specify the method of vertex projection in the Vertex Projection Direction group. (Use Along Vertex Normals for this example.) Note: If you were to choose Use Active Viewport, you would next activate whichever viewport looks in the direction that you want to project the vertices. For example, if the Wrapper hovered over a Wrap-To terrain on the home plane, you'd activate the Top viewport.
- Choose Reference, Copy, Move, or Instance to specify the type of cloning to perform on the Wrap-To object. (Choose Instance for this example.)
- Click Pick Wrap-To Object, and then click the object onto which to project the vertices. (You can press the H key and use the Pick Object dialog to select the box.)
The list windows display the two objects, and the compound object is created with the Wrapper object conforming to the Wrap-To object. (In the example, the sphere is wrapped into the shape of the box.)
- Use the various parameters and settings to alter the vertex projection direction, or adjust the vertices that are being projected.
To project a road onto terrain:
- Create the road and terrain objects. Tip: You can quickly make a terrain by creating a patch grid and applying the Noise modifier to it. For the road, you can use a Loft compound object by lofting a rectangle along a curved line. Both objects must have a sufficient level of detail to conform smoothly.
- Orient both the road and the terrain so you are looking straight down at them in the Top viewport. Position the road so it's completely above the terrain (higher on the world Z axis). Note: For the conform projection to work correctly, the road should not extend beyond the boundaries of the terrain when viewed in the Top viewport.
- Select the road object.
- Click Conform.
- In the Pick Wrap-To Object rollout, make sure the Instance option is selected.
- Click Pick Wrap-To Object, and click the terrain.
An instance of the terrain object is created, with the same object color as the road.
- Activate the Top viewport. In the Parameters rollout
 Vertex Projection Direction group, choose Use Active Viewport, and click Recalculate Projection.
 - In the Update group, turn on Hide Wrap-To Object.
This hides the instance of the terrain so you can clearly see the road projected onto it.
The Parameters rollout
 Wrapper Parameters group
  Standoff Distance value sets the number of units by which the road sits above the terrain along the world Z axis.
 - If necessary, adjust the Standoff Distance to raise or lower the road.
Interface
Pick Wrap-To Object rollout
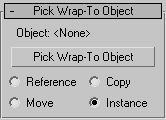
- Object
-
Displays the name of the selected Wrap-To object.
- Pick Wrap-To Object
-
Click this button, and then select the object to which you want the current object to wrap.
- Reference/Copy/Move/Instance
-
This option lets you specify how the Wrap-To object is transferred to the Conform object. It can be transferred either as a reference, a copy, an instance, or it can be moved, in which case the original is not left behind.
Parameters rollout
Contains all parameters for the Conform object.
Objects group
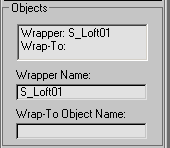
Provides a list window and two edit fields that let you navigate the compound object and rename its components.
- [list window]
-
Lists the Wrapper and the Wrap-To objects. Click to select an object in the window so that you can access it in the Modifier stack.
- Wrapper Name
-
Lets you rename the wrapper object within the compound Conform object.
- Wrap-To Object Name
-
Lets you rename the Wrap-To object.
Vertex Projection Direction group
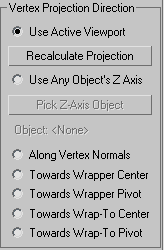
Choose one of these seven options to determine the projection of the vertices.
- Use Active Viewport
-
The vertices are projected away (inward) from the active viewport.
- Recalculate Projection
-
Recalculates the projection direction for the active viewport. Because the direction is initially assigned when you pick the Wrap-To object, if you want to change viewports after assignment, click this button to recalculate the direction based on the new active viewport.
- Use Any Object's Z Axis
-
Lets you use the local Z axis of any object in the scene as a direction. Once an object is assigned, you can alter the direction of vertex projection by rotating the direction object.
- Pick Z-Axis Object
-
Click this button, and then click the object you want to use to indicate the direction of the projection source.
- Object
-
Displays the name of the direction object.
- Along Vertex Normals Projects the vertices of the Wrapper object inward along the reverse direction of its vertex normals. A vertex normal is a vector produced by averaging the normals of all faces attached to that vertex. If the Wrapper object encloses the Wrap-To object, the Wrapper takes on the form of the Wrap-To object.
- Towards Wrapper Center Projects the vertices toward the bounding center of the Wrapper object.
- Towards Wrapper Pivot Projects the vertices toward the original pivot center of the Wrapper object.
- Towards Wrap-To Center Projects the vertices toward the bounding center of the Wrap-To object.
- Towards the Wrap-To Pivot Projects the vertices toward the pivot center of the Wrap-To object.
Note: Towards Wrapper Pivot and Towards the Wrap-To Pivot operate on the position of the original pivot point of the object before the Conform object is created. Once you create the Conform object, it's a new compound object with a single pivot point.Tip: You can animate the conforming effect by morphing between the compound object and a previously made copy of the original wrapper object. To do this, however, you must turn on Hide Wrap-To Object in the Update group so that the original object and the compound object have the same number of vertices. Using this technique, you can effectively morph between two objects with a different number of vertices.
Wrapper Parameters group
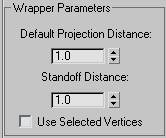
Provides controls that determine how far the vertices are projected.
- Default Projection Distance
-
The distance a vertex in the Wrapper object will move from its original location if it does not intersect the Wrap-To object.
- Standoff Distance
-
The distance maintained between the vertex of the Wrapper object and the surface of the Wrap-To object. For example, if you set Standoff Distance to 5, the vertices can be pushed no closer than 5 units from the surface of the Wrap-To object.
- Use Selected Vertices
-
When turned on, only the selected vertex sub-objects of the Wrapper object are pushed. When turned off, all vertices in the object are pushed, regardless of the Modifier stack selection. To access the Modifier stack of the Wrapper object, select the Wrapper object in the list window, open the Modifier stack, and select the base object name. At this point you can apply a Mesh Select modifier, for example, and select the vertices you want to affect.
Update group
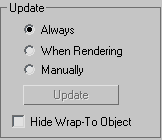
The items in this group determine when the projection for the compound object is recalculated. Because complex compound objects can slow performance, you can use these options to avoid constant calculation.
- Always The object is updated constantly.
- When Rendering The object is recalculated only when the scene is rendered.
- Manually Activates the Update button for manual recalculation.
- Update
-
Recalculates the projection.
- Hide Wrap-To Object
-
When on, hides the Wrap-To object.
Display group
Determines whether the shape operands are displayed.
- Result Displays the result of the operation.
- Operands Displays the operands.