The window object lets you control details of a window's appearance. You can also set the window to be open, partially open, or closed, and you can animate the opening over time.
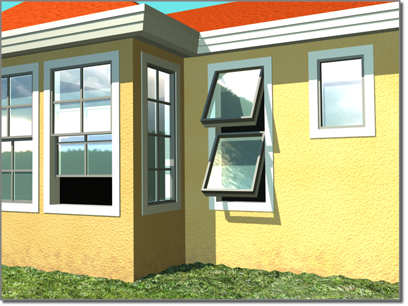
Different types of windows in a model of a house
3ds Max offers six kinds of windows:
- The Casement window has one or two door-like sashes that swing inward or outward.
- The Pivoted window pivots at the center of its sash, either vertically or horizontally.
- The Projected window has three sashes, two of which open like awnings in opposite directions.
- The Sliding window has two sashes, one of which slides either vertically or horizontally.
- The Fixed window doesn't open.
- The Awning window has a sash that is hinged at the top.
- To pan the viewport, scroll the mouse wheel or drag with the middle mouse button.
- To orbit the viewport, press and hold Alt while scrolling the mouse wheel or dragging with the middle mouse button.
- To zoom the viewport, scroll the mouse wheel or hold down Alt+Ctrl and drag forward and back with the middle mouse button.
Windows and Materials
By default, 3ds Max assigns five different material IDs to windows. The aectemplates.mat material library includes Window-Template, a Multi/Sub-Object material designed to be used with windows. Each component of the window/material is listed below along with its corresponding Material ID.
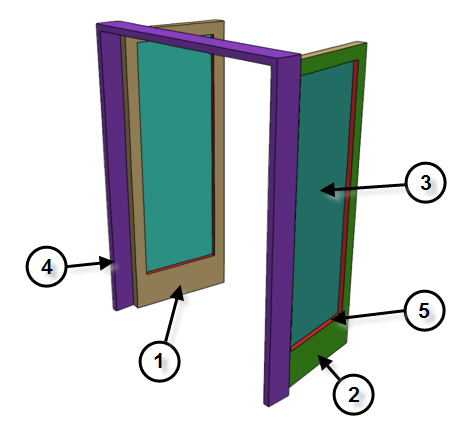
Material IDs for a door or window
| Material ID | Window/Material Component |
|---|---|
| 1 | Front Rails |
| 2 | Back Rails |
| 3 | Panels (glazing), with 50% opacity |
| 4 | Front Frame |
| 5 | Back Frame |
Making an Opening for a Window
To make an opening in a wall, you can perform a Boolean operation with the wall as Operand A, and another object, such as a box, as Operand B. Then, you can create and add a window in the opening, and link it, if you choose, as a child of the wall.
Procedures
To create a window:
- On the Object Type rollout, click the button for the type of window you want to create.
- Choose options as needed, such as changing the default creation method. Turn on Allow Non-vertical Jambs if you want an inclined window.
- Drag the mouse in the viewport to create the first two points, defining the width and angle of the base of the window.
- Release the mouse and move to adjust the depth of the window (default creation method), and then click to set.
By default, the depth is perpendicular to the line between the first two points and parallel to the active grid.
- Move the mouse to adjust the height, and then click to finish.
The height is perpendicular to the plane defined by the first three points and perpendicular to the active grid.
You can adjust the height, width, and depth values on the Parameters rollout.
In the Creation Method rollout, you can change the creation order to width-height-depth instead of width-depth-height.
To create a window material:
- Create a window or select an existing window.
- Open the Material Editor, and select a slot for the material.
- Click the Type button below the Material Editor toolbar.
The Material/Map Browser dialog opens.
- In the Material list, double-click the Multi/Sub-Object item, and then on the Replace Material dialog that appears, choose either option and click OK.
- On the Multi/Sub-Object Basic Parameters rollout, click Set Number and change Number Of Materials to 5. Click OK.
- Optionally, change the sub-material names to those specified in the above table.
- Edit the material as you would any Multi/Sub-Object material.
To animate a window:
- Create a window or select an existing window.
- If using an existing window, also access the Modify panel.
- Set the Parameters rollout
 Open parameter to the amount you want the window to be open at the start of the animation. If you want it to be closed, set it to 0.
 - Click the Auto Key button to turn it on, and advance to the first keyframe.
- Change the Open setting.
- Continue moving to any additional keyframes and changing the Open setting as necessary.
- Play the animation.
You can animate a window opening and closing by keyframing the Open setting.
Interface
Most window parameters are common to all kinds of windows, and are described here. The topic for each window type describes its unique controls and behavior.
Object Type rollout
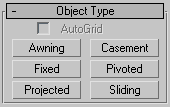
Six types of window are available in 3ds Max:
- Awning
-
Has a sash that is hinged at the top. See Awning.
- Casement
-
Has one or two door-like sashes that swing inward or outward. See Casement.
- Fixed
-
Doesn't open. See Fixed.
- Pivoted
-
Pivots at the center of its sash, either vertically or horizontally. See Pivoted.
- Projected
-
Has three sashes, two of which open like awnings in opposite directions. See Projected.
- Sliding
-
Has two sashes, one of which slides vertically or horizontally. See Sliding.
Name and Color rollout
Creation Method rollout
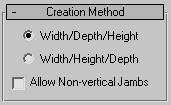
You define each type of window with four points: Drag the first two, followed by two move-click sequences. The Creation Method setting determines the order in which these actions define the window's dimensions.
- Width/Depth/Height (The default.) The first two points define the width and angle of the base of the window. You set these points by dragging in a viewport, as the first step in creating a window. This lets you align the window with a wall or opening when you place it. The third point, where you click after moving the mouse, specifies the depth of the window, and the fourth click, where you click after moving the mouse again, specifies the height.
-
Width/Height/Depth Works like the Width/Depth/Height option, except that the last two points create first the height and then the depth. Note: With this method, the depth is perpendicular to the plane set by the first three points. Thus, if you draw the window in the Top or Perspective viewport, the door lies flat on the active grid.
- Allow Non-vertical Jambs
-
Select to create tilted windows. Set snaps to define points off the construction plane. Default=off.
Parameters rollout
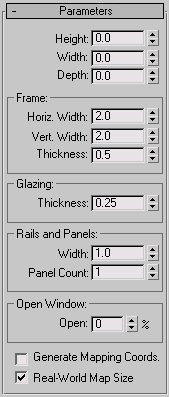
- Height/Width/Depth
-
Specifies the overall dimensions of the window.
Frame group
- Horiz. Width
-
Sets the width of the horizontal part of the window frame (at the top and bottom). This setting also affects the glazed portion of the window's width.
- Vert. Width
-
Sets the width of the vertical part of the window frame (at the sides). This setting also affects the glazed portion of the window's height.
- Thickness
-
Sets the thickness of the frame. This also controls the thickness of casements or railings on the window's sashes.
Glazing group
- Thickness
-
Specifies the thickness of the glass.
- Generate Mapping Coordinates
-
Creates the object with the appropriate mapping coordinates already applied.
- Real-World Map Size
-
Controls the scaling method used for texture mapped materials that are applied to the object. The scaling values are controlled by the Use Real-World Scale settings found in the applied material's Coordinates rollout. Default=off.