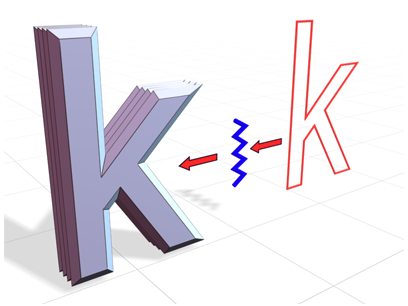
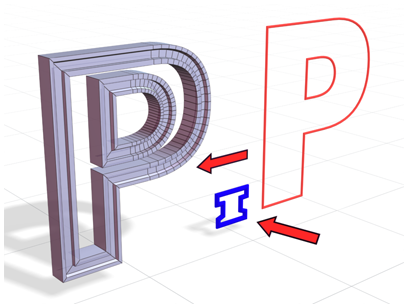
The Bevel Profile modifier extrudes a shape using another shape as the path or "beveling profile."
There are two methods to create a bevel profile. The classic method utilizes the legacy technique of creating an object such as a spline to use as the profile. The improved method utilizes the Bevel Profile Editor, which is also used with TextPlus.
Note: Although this modifier might seem similar to a loft object with varying scale settings, it differs because it uses different outline values as distances between line segments rather than as scale values. This more complex method of resizing a shape results in some levels having either more or fewer vertices than others, so it generally works better with text, for example.
Warning: Bevel Profile fails if you delete the original beveling profile. Unlike a loft object, which incorporates the shape, Bevel Profile is simply a modifier.

Creating an object using an open spline as the profile

Creating an object using an closed spline as the profile
Procedure
Classic Method
To create a bevel profile using the classic method:
- Create a shape to bevel.
Tip: For best results, use the Top viewport.
- In the Front viewport, create a shape to use as the beveling profile.
- Select the shape to which you want to apply the bevel.
- In the Command Panel, select the Modify tab and then select Bevel Profile from the Modifier List.
- In the Parameters rollout, select Classic.
- In the Classic rollout, click Pick Profile and then click on the profile shape.
Improved Method
To create a bevel profile using the improved method:
- Create a shape to bevel.
Tip: For best results, use the Top viewport.
- In the Command Panel, select the Modify tab and then select Bevel Profile from the Modifier List.
- In the Parameters rollout, select Improved.
- In the Extrude field, set the extrusion depth to a number greater than 0.
- In the Beveling group, select a bevel profile preset from the list or select custom.
- If you want to modify a preset or create a new one:
- Click Bevel Profile Editor.
- To view the profile on your shape as you work in the Bevel Profile Editor, click Auto-Update.
Note: You can also adjust the settings in the Improved rollout.
- In the Bevel Profile Editor window, click on a vertex or the curve and drag to reposition it.
- Use the tools as needed (pan, zoom, mirror, flip, etc.).
- When you are satisfied with the profile, do one of the following:
- If you want to close without saving the profile as a preset, click Cancel.
- If you modified a preset and want to overwrite it, click Save.
- If you want to save the profile as a new preset, click Save As and then enter a name and click OK.