- Classic
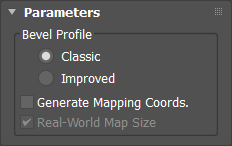
- Opens the Classic rollout, to create a bevel profile using the original method of picking a second shape to be used as the profile.
- Improved
- Opens the Improved rollout, to create a bevel profile using the same system as TextPlus which includes profile presets and the Bevel Profile Editor.
- Generate Mapping Coords.
- Assigns UV coordinates.
- Real-World Map Size
- Controls the scaling method used for texture mapped materials applied to the object. The scaling values are controlled by the Use Real-World Scale settings found in the applied material's Coordinates rollout. Default=on.
- Pick Profile
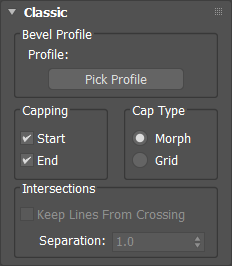
- Click the button to choose a shape or NURBS curve to be used for the profile path. After that, the name of the path object appears above the button.
- Start
- Caps the bottom of the extruded shape.
- End
- Caps the top of the extruded shape.
- Morph
- Uses a deterministic method of capping providing the same number of vertices for morphing between objects.
- Grid
- Creates caps with grids, better for cap deformations.
- Keep Lines From Crossing
- Prevents beveled surfaces from self intersecting. Available after you specify the profile object.
Note: This option requires more processor calculation and can be time-consuming in complex geometry.
- Separation
- The distance sides should be kept apart to prevent intersections.
- Extrude
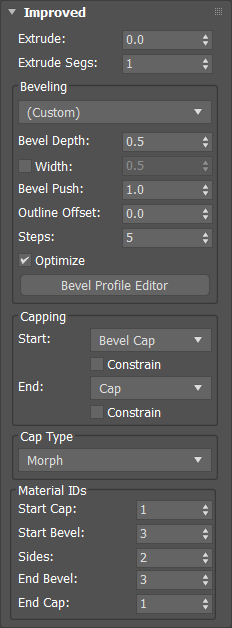
- Sets the extrusion depth.
- Extrude Segs
- Specifies the number of segments created in the extrusion.
- Presets list
- A list of previously created bevels. Select Custom to use a bevel you create using the Bevel Profile Editor. Presets include: Concave, Convex, Engrave, Half Circle, Ledge, Linear, Ogee, Three Step, and Two Step.
Note: Any bevels you create and save will appear in the Presets list.
- Bevel Depth
- The depth of the beveled area.
- Bevel Width
- The checkbox toggles the ability to modify the width of the beveled area. When off, the width is constrained to the depth parameter. Default=off.
- Bevel Push
- The intensity of the bevel curve. For example: using a concave bevel preset a value of 0 is a perfect linear edge, -1 is a convex edge, and +1 is a concave edge.
- Outline Offset
- The outline's offset distance.
- Steps
- The number of vertices used to divide the curve. The higher the number of steps, the smoother the curve.
- Optimize
- Removes unnecessary steps from straight segments in the bevel. Default=on.
- Bevel Profile Editor
- Toggles the Bevel Profile Editor window, enabling you to create your own custom profiles.
- Start
- The cap for the front face of the object. Options include: Cap (simple cap without bevel), No Cap (open face), Bevel Cap, and Bevel No Cap. Default=Bevel Cap.
- End
- The cap for the back face of the object. Options include: Cap (simple cap without bevel), No Cap (open face), Bevel Cap, and Bevel No Cap. Default=Cap.
- Constrain
- Uses selection constraints on the selected face.
- Morph
- Creates cap face using triangles.
- Grid
- Creates cap face in a grid pattern.
- Subdiv
- Creates cap face that deforms using a subdivision pattern.
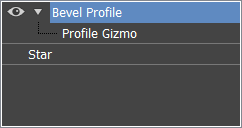
Modifier Stack

Parameters rollout

Bevel Profile group
Classic rollout
Bevel Profile group

Capping group
Cap Type
Intersections
Improved rollout

Beveling group
Capping group
Cap Type group
Material IDs group
Use this group to apply individually selected materials to the Start Cap, Start Bevel, Sides, End Bevel, and End Cap.