Learn about the options to define bolts, nuts and washers, either by starting from existing configurations or by creating complete new ones.
Duplicate an Existing Bolt
When setting up to create new bolts, it is easier and faster to start from an existing configuration that is closest to your requirements and modify only some of the parameters to obtain your desired customization.
To duplicate a bolt:
- Expand the Bolt headline in the left part of the Management Tools application window, while in the Bolts category.
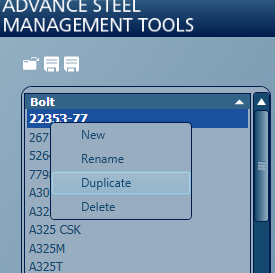
- Right-click on an existing bolt name.
- Choose Duplicate in the contextual menu.

- Enter a new name and start customizing the properties as required.
Note: Duplicating an existing bolt will keep the properties of the original intact. Make sure you select the name of the bolt you duplicated in the Parameters tab, Name field.

- Click Apply to save your changes for the created bolt.
Create and Customize Nut and Washer Types
Before you create a bolt/anchor assembly (in the Set tab) you need to first define the washers and the nuts, in order to add them to your assembly. While there is a number of predefined nuts and washers, you can also create your own customized ones.
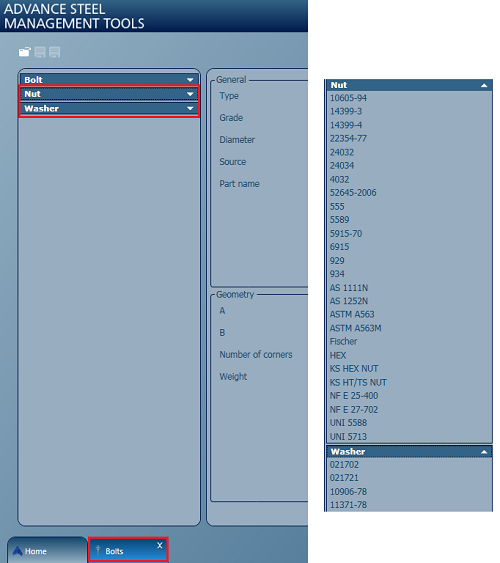
On the left side of the Management Tools application window, while in the Bolts or Anchors category, you also have two other headlines for Nut and Washer. If you expand the lists, you will see the already defined nut and washer types:

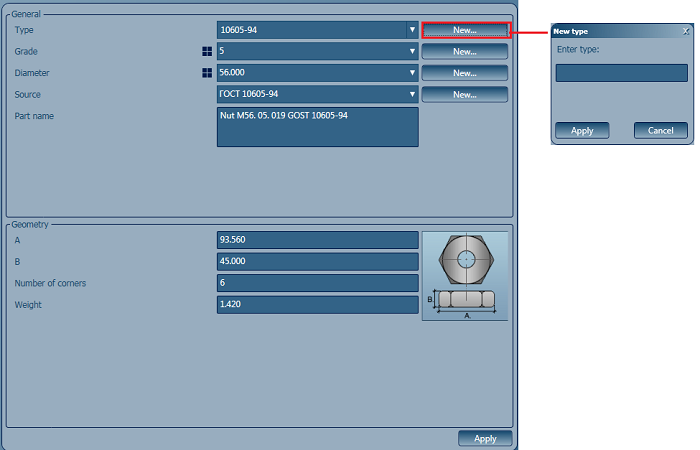
Clicking on one of the nut or washer types brings up their properties page on the right side of the application window. Here you can modify the parameters of existing types, duplicate an existing type or create new types by clicking the New button next to the Type drop-down list.

You need to choose valid parameters in order to be able to create the new type and save your settings. After entering all the required parameters, click Apply to save your new nut or washer type.
Create a New Bolt
If you need to create a completely new bolt, with blank properties fields that you can define as required:
- Expand the Bolt headline in the left part of the Management Tools application window, while in the Bolts category.
- Right-click on an existing bolt name.
- Choose New in the contextual menu. This will create a new blank properties page on the right part of the application window.
- Click the New button next to the Name field drop-down list.
- Enter a new name and start customizing the properties as required.
Note: You need to choose valid parameters and make the settings inside the Parameters tab and the Set tab (define the name of the bolt assembly), in order to be able to create the new bolt and save your settings.
- After defining the required settings, click Apply to save the settings of the newly created bolt.