Learn how to create the main part of an assembly and other assembly parts.
Create the main part of an assembly
This tool allows you to manually define the main part of an assembly and enter the main part mark. The main part mark does not change after running the numbering process.
Access the command
In the Output tab  Part Marks panel, click
 (Create main part of assembly).
Command line: _AstM4CommCreateMainPart
Create the main part of an assembly
- In the Output tab
 Part Marks panel, click
 (Create main part of assembly).
- Select the part to make the main part. The object dialog box appears with the Naming tab selected.
- Enter the assembly mark.
- Close the dialog box.
Create an assembly part
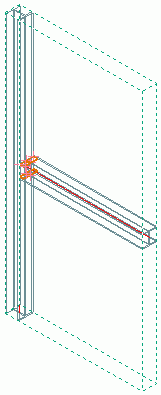
Connected parts (by shop welds shop bolts) can be assigned to an assembly part. The parts connected to the assembly part automatically become attached parts. A blue box object (the assembly part) is created around the connected parts.
Access the command
In the Output tab  Part Marks panel, click
 (Create assembly part).
Command line: _AstM4CommCreateAssemblyMainPart
Create an assembly part
- In the Output tab
 Part Marks panel, click
 (Create assembly part).
- Select one of the connected parts and press Enter. The object dialog box appears with the Naming tab selected.
- Enter an assembly mark.
- Close the dialog box.
- The selected objects turn into a main part with the defined assembly mark. A blue box object (the assembly part) is created around the connected parts and this becomes the main part of the assembly.

Example:
Stairs normally have one stringer as the main part and all other parts are attached parts. Thus, identical stringers get different marks (depending on the numbering method). The Create an assembly part tool ( ) creates an assembly part box that becomes the main part title in the structured BOM. All parts within the blue box are attached parts and are listed with single part marks (i.e. both stringers will then have the same mark).