Use this procedure to add a slope roof with settings that you specify. You can create a single slope or a double slope roof object.
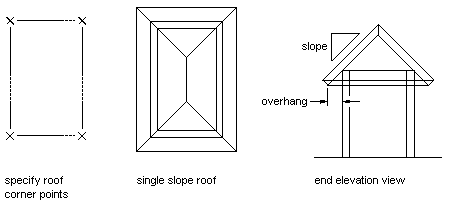
Creating a single slope roof
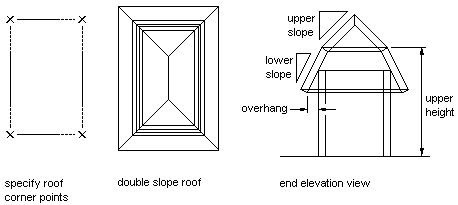
Creating a double slope roof
- Open the tool palette that contains the roof tool you want to use, and select the tool.
Alternatively, you can click
 .
. 
- On the Properties palette, expand Basic, and expand Next Edge.
- Select Single slope or Double slope for Shape.
- Enter a value for Overhang.
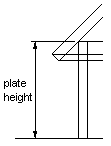
- Expand Lower Slope, and enter values for Plate Height, Rise, and Slope.
Plate height is the height of the bottom surface of the roof at its lowest edge (where the overhang begins). This is usually the height of the top plate of the wall that the roof sits on.
- For a double slope roof, expand Upper Slope, and enter values for Upper Height, Rise, and Slope. Tip: After specifying the desired settings, you can move or hide the Properties palette to expose more of the drawing area.
- In the drawing area, specify points for the corners of the roof.
- When you are finished specifying points, press Enter.