In the Scale tab, you can do the following things:
- Display the available annotation scales
- Create new annotation scales
- Assign an annotation scale to a display configuration.
The annotation scale determines how many drawing units in the drawing represent one inch (for imperial drawings) or one millimeter (for metric drawings) in the plotted drawing. A drawing scale of 1/8”=1’-0” (or 1:96 - eight eighths per inch times 12 inches per foot) in a drawing that has inches as default drawing units means that 8 feet in the drawing are represented by 1 inch on the plotted out plan. Likewise, if a drawing has a scale of 1:200 and a drawing unit of millimeters, then 200 millimeters in the drawing will be represented by one millimeter on the plotted out plan.
Annotation plot size, multiplied by the scale factor, determines the height of plotted annotation text. Scale-dependent objects in a drawing are scaled automatically upon insertion to reflect the units that are specified in a drawing. Any content that you create can be built to take advantage of these settings and is thus scaled appropriately.
- Click

 .
. - Click the Scale tab.
Specifying default scale options for the current drawing
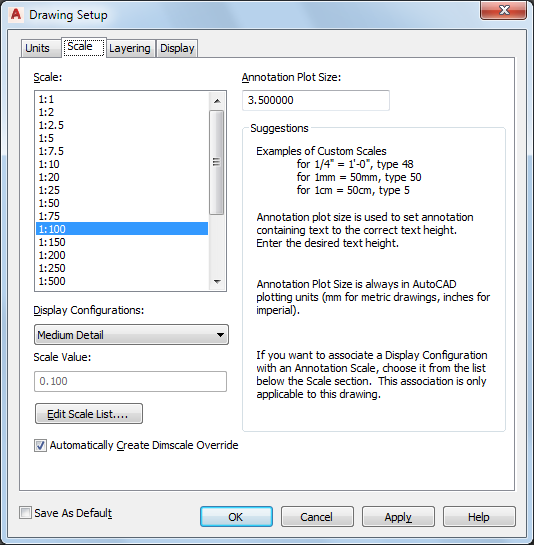
- Under Scale, the available annotation scales are displayed. Note: The scale values in the list reflect the current drawing units.
- To assign an annotation scale to a specific display configuration, first select the desired annotation scale from the Scale list, and then select the display configuration to associate it with from the Display Configurations list.
Under Scale value, the currently used annotation scale for this display configuration is displayed.
- To edit an existing scale or add a new scale, click Edit Scale List.
- To edit an existing scale, select it, and click Edit.
- To add a new scale, click Add, and enter a display name and scale values.
- To rearrange the order of the scale entries, use the Move up and Move down buttons.
- Click OK.
- Select Automatically Create Dimscale Override, if you want to make the dimension scale match your drawing scale.
The override applies a scale factor to the dimension style properties.
Note: AEC dimensions added with tools are not affected by the dimension scale override because an AEC dimension style depends on which display representation is active.If you clear Automatically Create Dimscale Override, the software is prevented from automatically applying an override to the current dimension scale style in the drawing.
- Enter a value for Annotation Plot Size.
The annotation plot size is always measured in millimeters for metric drawings and in inches for imperial drawings. Annotation plot size, multiplied by the drawing scale factor, determines the height of plotted annotation text.
- Save the scale settings:
If you want to… Then… save the scale settings as default settings for new drawings that you start from scratch or from templates that do not contain drawing setup information select Save as Default. Settings on the Units and Layering tabs are also saved as default settings. save the scale settings only for the current drawing clear Save as Default, and then click Apply. Note: You can save one default drawing scale set per unit type with the Save as Default option. Define a set of imperial drawing scale defaults, and click Save as Default. Next, define a set of metric scale defaults, and click Save as Default again. When you start a drawing without a template with imperial units, the imperial default scale will be used. When you start a drawing without a template with metric units, the metric default scale will be used. If you start a new drawing with a template, the settings saved within that template file will be used regardless of the saved default settings. - Click OK.
If you also changed the drawing units, you are prompted to specify whether existing objects in the current drawing should be scaled for the new units.