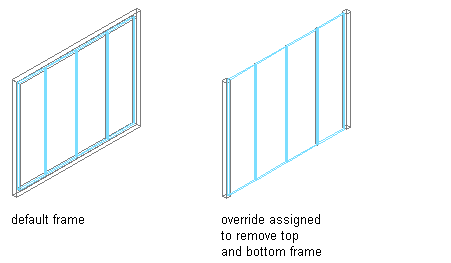
Use this procedure to select a different element definition for a selected frame edge or mullion by using an edge assignment override.
To exchange a frame or mullion, the new definition must already be defined in the door/window assembly style.

Overriding a Door/Window Assembly frame definition
- Select the door/window assembly on which you want to override an edge.
- Click


 .
. - Select the frame or mullion edge you want to override.
- Create the override:
If you want to… Then… exchange the existing edge for another select a new edge definition from the list. remove the frame or mullion edge select Remove. - Click OK.
- Specify where you want to save the door/window assembly override:
If you want to… Then… save the override only on this specific door/window assembly no further steps are necessary. The override is saved to the door/window assembly. save the override to a door/window assembly style select the door/window assembly, and click 

 .
. - If you have chosen to save the override to a door/window assembly style, select the door/window assembly again, click


 Save to Style and decide to which door/window assembly style you want to save the override.
If you want to… Then… save the override to the current door/window assembly style select Transfer Edge Overrides to Style, and click OK. Note: If you have created only a frame or mullion edge override, only the Transfer Edge Overrides to Style check box is active. If you have also created other overrides, such as a cell merge or a division override, these check boxes are available as well. If you also want to save these overrides to the style, select their check boxes too.save the override to a new door/window assembly style select Transfer Edge Overrides to Style, and click New. Then, enter a name for the new door/window assembly style, and click OK. Note: If you have created only a frame or mullion edge override, only the Transfer Edge Overrides to Style check box is active. If you have also created other overrides, such as a cell merge or a division override, these check boxes are available as well. If you also want to save these overrides to the style, select their check boxes too.Note: If you do not want to save the override back to a style at all, click

 Revert to Style Design Rules. The overrides remain on the door/window assembly, where they can be removed, but they are not saved back to a door/window assembly style.