Use this procedure to add an elevation label with settings that you specify.
- Click
 .
. 
- Select an elevation label tool.
If necessary, scroll to display the tool that you want to use.
- In the drawing area, specify the insertion point of the elevation label.
You can move or hide the Properties palette to expose more of the drawing area.
The Add Elevation Label dialog box is displayed.
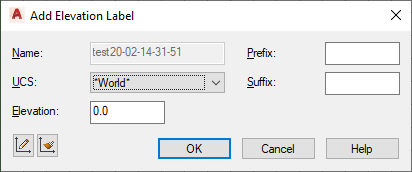
- Select the coordinate system for the elevation label:
If you want to… Then… select an existing coordinate system from the drawing under UCS, select the coordinate system from the list. create a new named user coordinate system (UCS) click  (Define UCS), and define the new UCS on screen.
 use the UCS of an existing elevation label click  (Match UCS) and select the elevation label on screen.
 - Enter the elevation value of your label.
The value you enter here is always calculated in relation to the coordinate system you have selected. When you redefine the coordinate system, the Z-value of the elevation label is recalculated accordingly.
For example, you have a UCS named “First Floor,” with its Z-origin at 3 m. When you insert an elevation label in WCS and set it to 2 m, and then change the coordinate system to “First Floor” the Z-value of the elevation label is changed to ‑1 m.
- If necessary, enter a prefix and suffix for the elevation label.
- Click OK.