Do you commonly share your drawings as PDF files with others? Did you know you can automate PDF creation or quickly create PDF files with a few clicks?
Well, you're in luck. AutoCAD includes two features that let you quickly create PDF (or DWF) files.
- Auto Publish - Enables creation of a PDF (or DWF) file when saving or closing a drawing. The publishing can be fully automatic or prompted, giving you more control.
- EXPORTPDF - Enables the creation of multi-sheet PDF and access to page setup overrides all in one. That PDF is just a few clicks away.
Setup Automatic Publishing
Now, we'll setup Auto Publish to create a PDF of the layouts in fully automatic mode. Each time you save, Auto Publish will create a PDF for each layout.
- Open the Options dialog using the OPTIONS command (or the OP shortcut).
- In the Options dialog, click the Plot and Publish tab.
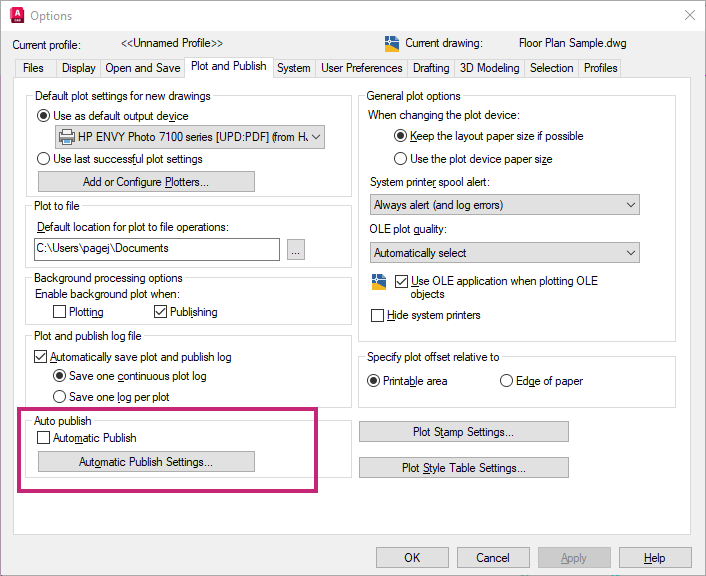
- Select Automatic Publish.

- Click Automatic Publish Settings.
- In the Auto Publish Settings dialog box, there are a few settings that you may want to change.
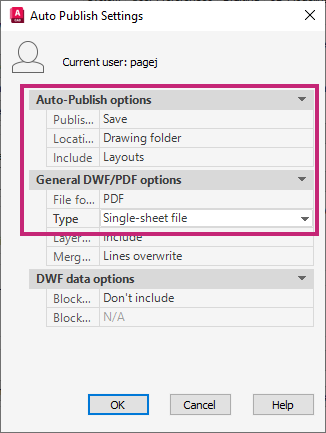
- Set Include to
Layouts.
Include - Allows you to control whether to publish the model, the layouts or both the model and layouts to the PDF.
- Set Type to
Single-sheet file.
Type - Controls whether to create a single-sheet for each layout or all layouts in a multi-sheet PDF.
File naming
- When the Type is set to Single-sheet file, the PDF (or DWF) files are named using the drawing filename and the layout name separated by a hyphen, for example, A-02-ELEVATIONS.pdf.
- When Type is set to Multi-sheet file, the PDF (or DWF) file is named using the drawing file name, for example, A-02.pdf.
- Set File format to
PDF.
File format - Sets the output format for publishing. You can select from PDF, DWFx, or DWF.
- Click OK.
- Click OK again in the Options dialog.
Additional Auto Publish Options
- Publish on - Specifies when the publishing takes place: on drawing Save or Close. In addition, you can choose to have the publish occur automatically or you can be prompted.
- Location - Sets the folder where exported files are saved when you publish drawings. There are three options: in the same folder as the drawing, in a sub-folder under the drawing's folder, and a folder you select. Once you select a folder, it is remembered in a list of recent locations.
-
For more information about Auto Publish settings, see Auto Publish Settings Dialog Box.
Automatic Publish
Now that you have configured Auto Publish, let's give it a try.
- Open a drawing.
- Set one of the layouts current.
- On the Quick Access Toolbar, click Save.
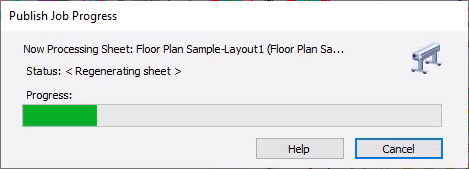
You'll see the Publish Job Progress dialog briefly appear.
Automatic Publish with Prompts
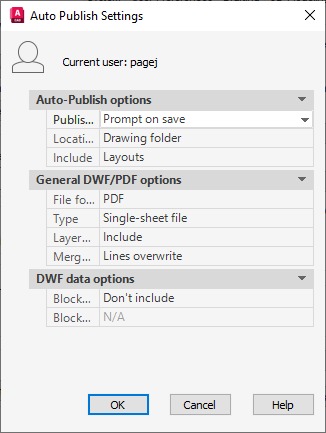
If you want to control whether a PDF or DWF is created, you can set the Publish on setting to Prompt on save or Prompt on close.
- Open the Options dialog using the OPTIONS command (or the OP shortcut).
- In the Options dialog, click the Plot and Publish tab, enable Auto Publish if it's not already set.
- Click Automatic Publish Settings.
- In the Auto Publish Setting dialog, specify the following:
- Publish on to Prompt on Save.
- Set Type to Single-sheet file.
- Set File format to PDF.
- Click OK.
- In the Options dialog box, click OK.
- Now open a DWG and save it.
You will see the Auto-Publish message dialog.
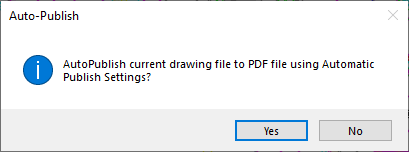
- Click Yes to create the PDF, or No to skip it.
Start Auto Publish Manually
You can also start Auto Publish manually or with a script. Below are the steps to manually start Auto Publish.
- At the Command prompt, enter AUTOPUBLISH.
- At the AutoPublish DWF or specify override [Location] <AutoPublish>: prompt, press Enter to select the AutoPublish option and start the publish.
To publish to a specific location, select the Location option.
- At the Command prompt, enter AUTOPUBLISH.
- At the Command prompt, enter L to select the location option.
- Select the folder where the PDF is to be created.

Quick Export to PDF from a Layout
The first time using the Quick Export feature, you may need to select the output format; PDF, DWF, or DWFX. After the format is selected, the Export button can be clicked directly.
- Open a drawing.
- Set one of the layouts current.
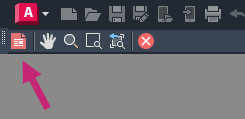
- Click
.
Find
 Note: Alternatively, enter EXPORTPDF at the Command prompt.
 - Select the folder for the PDF.
- Name the PDF.
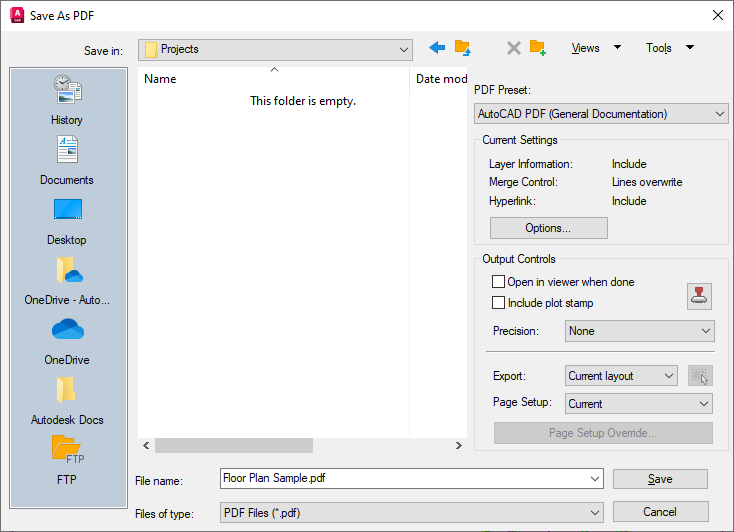
- Click Save.
- The last folder selected used is remembered for the next time.
- If you want to automatically see the resulting PDF, choose Open in viewer when done.
Quick Export to a PDF from Model Space
The first time using the Quick Export feature, you may need to select the output format, PDF, DWF, or DWFX. After the format is selected, the Export button can be clicked directly.
- Open a drawing.
- Set the Model tab current.
- Click
.

- In the Export to DWF/PDF - Specify Window Area message box, click Continue to select the area.
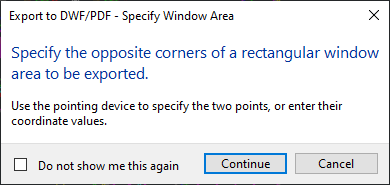
- In the Export to DWF/PDF - Preview Window Area message box, click Display a preview.

- Review the preview.
- Click Export on the Preview toolbar to output the window area.
- Select a folder for the PDF.
- Name the PDF.
- Click Save.
Related Commands and System Variables
Here are some frequently used commands and system variables related to publishing PDF and DWF automatically.
| Command | Description |
|---|---|
| AUTOPUBLISH | Publishes drawings to DWF, DWFx, or PDF files automatically to a specified location. |
| EXPORTPDF | Generates a PDF file from a single layout, all layouts, or a specified area in model space. |
| EXPORTDWF | Creates a DWF file and allows you to set individual page setup overrides on a sheet-by-sheet basis. |
| EXPORTDWFX | Creates a DWFx file where you can set individual page setup overrides on a sheet-by-sheet basis. |
| System Variable | Description | Default Value | Saved in |
|---|---|---|---|
| AUTODWFPUBLISH | Controls whether DWF (Design Web Format) files are created automatically when you save or close drawing (DWG) files. | 0 | Registry |
| EXPORTEPLOTFORMAT | Sets the default electronic file output displayed on the ribbon: PDF, DWF, or DWFx. | 2 | User-settings |