Modifies existing or creates new terminal strips. Produces graphical or tabular representations.
Click 
 . Find
Terminal Strip Editor Overview
- Select which terminal strip to edit on the Terminal Strip Selection dialog box and click Edit.
- Select the tab to edit: Terminal Strip, Catalog Code Assignment, Cable Information, or Layout Preview.
- Terminal Strip tab: Modify the terminal block properties, spare terminals, accessories, multi-level terminals, and destination locations.
- Catalog Code Assignment tab: In addition to what can be done in the Terminal Strip tab, you can assign, delete, copy, or paste catalog part numbers to terminal blocks.
- Cable Information tab: View the terminal destination locations based on the cable assignments. Modify the terminal block properties, spare terminals, and terminal tag or number.
- Layout Preview tab: Create graphical terminal strip or table object drawings of the selected terminal strip. You can preview the terminal strip in the Preview window before inserting the terminal strip.
- Modify the terminal strip and click OK.
To place the terminal strip, click Insert on the Layout Preview tab. You can also click Rebuild or Refresh to update the edited graphical or table object terminal strip in place.
Renumber Terminals
- Select which terminal strip to edit on the Terminal Strip Selection dialog box and click Edit.
- Select the Terminal Strip tab.
- Select the terminal rows you wish to renumber.
- Click
 .
. 
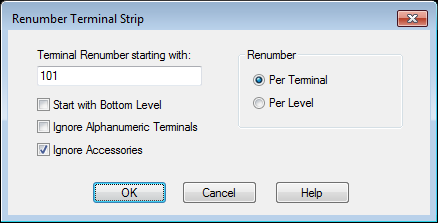
- Enter a starting number.
- If any multi-level terminals are part of the selection, select whether to renumber by:
- Terminal - renumbers in order of the terminal listing including multiple levels.
- Level - renumbers all single-level terminals and the first level on multi-level terminals, then the second level, and so on.
- Check any other options as necessary.
- Click OK.
Modify Terminal Block Properties
- Select which terminal strip to edit on the Terminal Strip Selection dialog box and click Edit.
- Select the Terminal Strip tab.
- Select the terminal row you wish to modify.
- Click
 in the Properties section.
 - Enter the number of levels.
- Enter description, wires per connection, and pin values for each level.
- To jumper levels together, select the levels and click
 .
. - To remove a jumper, select the levels and click
 .
. - Click OK.
Associate Terminals for Multi-Level Terminals
- Select which terminal strip to edit on the Terminal Strip Selection dialog box and click Edit.
- Select the Terminal Strip tab.
- If all of the terminals you wish to associate are single level terminals do one of the following:
- Modify the terminal properties of one of the terminals defining it as multi-level.
- Assign a catalog value for a multi-level terminal.
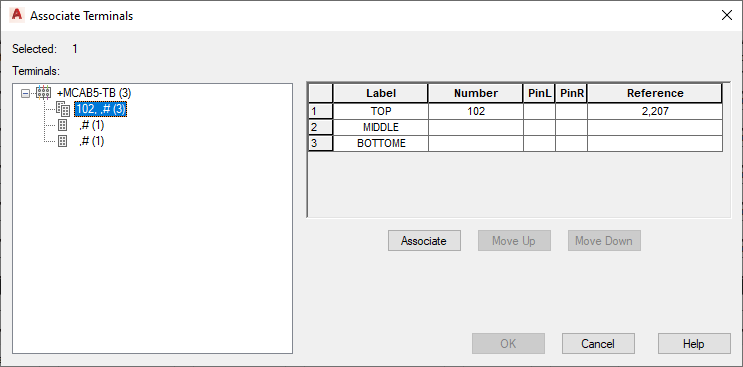
- Select the terminal rows you wish to assign to specific levels on the multi-level terminal.
- Click
 in the Multi-Level section.
 - Select the terminal you want to push the selected rows into.

- Click Associate.
- To move a terminal from one level to another, select the row and click Move Up or Move Down.
- Click OK.
Assign Catalog Values
- Select which terminal strip to edit on the Terminal Strip Selection dialog box and click Edit.
- Select the Catalog Code Assignment tab.
- Select the terminal rows you wish to assign a catalog value.
- Click
 in the Catalog section.
 - Search for the catalog value on the Catalog Browser.
- Select the catalog value.
- Click OK.
Add Spare Terminals and Accessories
- Select which terminal strip to edit on the Terminal Strip Selection dialog box and click Edit.
- Select the Terminal Strip tab.
- Select the row where you want to insert the spare above or below.
- Click
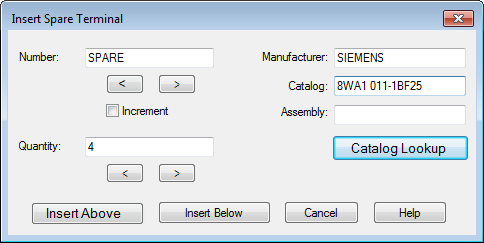
 in the Spare section to insert a spare.
 - Enter the number or text to use for the first spare terminal. If you do not select to increment the number, the value is used for all the spares added during this operation.
- Enter the quantity of spares to add.
- Assign a catalog value if necessary.

- Click to Insert Above or Insert Below the selected row.
- Select the row where you want to insert the accessory above or below.
- Click
 in the Spare section to insert an accessory.
 - Enter the number or text to use for the accessory.
- Enter the quantity of accessories to add.
- Assign a catalog value if necessary.

- Click to Insert Above or Insert Below the selected row.
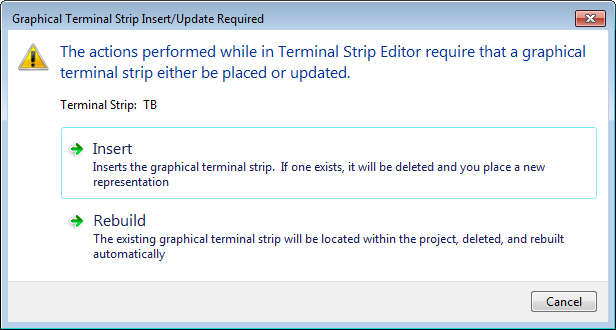
- Click OK to exit the terminal strip. Note: A graphical terminal strip must be inserted or rebuilt, otherwise spare terminals and accessories are not maintained.

Assign Connected Components as Internal or External
The components on the left side of the grid are considered internal and the components on the right side are external. Default internal and external assignments are based on the drawing property for the default wire sequencing method.
- Select which terminal strip to edit on the Terminal Strip Selection dialog box and click Edit.
- Select the terminal rows or level rows containing the connected components you want to change. Note: Hold down the Ctrl key to select rows that are not next to each other.
- Choose from the following options in the Destination section:
-
 - opens the Toggle Location Codes dialog box where you can select location values and the direction to toggle.
 -
 - opens the Toggle Installation Codes dialog box where you can select installation values and the direction to toggle.
 -
 - opens the Toggle Terminal Destinations dialog box where you can select to toggle internal to external or external to internal.
 -
 - switches connected devices on the internal side to the external side, and external devices to internal. Note: Limited to a single terminal or levels within a multi-level terminal.
 -
 - opens the Destination Move dialog box where you can move the selected destinations up or down within the level they belong to.
-
- Select the Save Destinations check box to maintain the internal and external assignments.
Assign a Jumper
- Select which terminal strip to edit on the Terminal Strip Selection dialog box and click Edit.
- Select the terminal rows you wish to jumper together. If you wish to jumper to a specific level within a multi-level terminal, select the row for just that level. Note: The rows you select are considered one jumper and can receive only one catalog assignment.
- Click
 in the Jumpers section.
 - (Optional) Enter catalog data on the Edit/Delete Jumpers dialog box.
- Select OK.
Note: Use the Edit Jumper tool to jumper terminals that belong to different terminal strips.