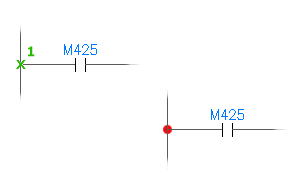
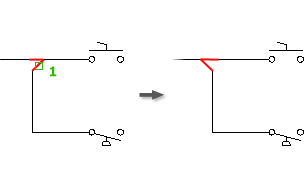
Insert dot or angled tee markers and change the orientation of angled tee markers.
Use the tee marker tools to insert dot tee markers or angled tee markers at existing wire tee intersections. If a tee marker is present, the tools change existing markers from dot to angled or from angled to dot. This dot and angled tee insertion happens automatically when you use the Insert Wire tool and the drawing is set up (in the Drawing Properties  Styles dialog box) for dots or angled tee symbols at intersections.
You cannot insert a tee connection symbol into empty space. A valid line wire ending (not crossing) at a tee intersection somewhere along the length of another line wire is needed. It does not insert a tee connection symbol at a simple 90-degree wire turn. You can right-click on any inserted tee markers for access to editing tools such as Toggle Angled Tee Markers, Delete Component, Scoot, or Insert Wire.
Insert dot tee markers
Inserts wire connection dots at tee intersections.
Replaces any existing angled wire connection symbol with a dot connection symbol. To insert the dot tee markers automatically as each wire tee intersection is created, set the default Wire Tee connection in the Wiring Style section of the Drawing Properties: Styles dialog box.

-
Click Schematic


 . Find
- Select at or near the intersection point.
Right-click on the marker and select Delete Component to remove an inserted tee connection symbol and heal the wires.
Insert angled tee markers
Inserts an angled tee connection symbol at an existing wire intersection.
Replaces any existing dot wire connection symbol with an angled connection symbol. To insert the angled tee markers automatically as each wire tee intersection is created, set the default Wire Tee connection in the Wiring Style section of the Drawing Properties: Styles dialog box.

-
Click


 . Find
- Select at or near the intersection point.
If a dot marker is present, it is deleted and replaced by the angled tee symbol.
- After the symbol inserts and reconnects to the wiring, press the spacebar or Enter to switch the inserted tee through four different orientations. Press Esc when the appropriate orientation displays. Note: To change the orientation of the tee symbol after insertion, right-click on the marker and select Toggle Angled Tee Markers (or select the tool from the ribbon or toolbar). To customize the appearance of these symbols, edit the tee symbols stored in the selected schematic symbol library. These tee symbol names are HT0_###.dwg and VT0_###.dwg where # = combinations of 1,2,4, and 8. Each symbol carries attribute WDWSEQ with a three-digit value indicating wire connection sequence priority for the three wire connection points of the symbol.
Right-click the marker and select Delete Component to remove an inserted tee connection symbol and heal the wires.
Toggle Angled Tee Markers
Toggles an existing angled tee connection symbol, or windowed symbols, through a total of four possible orientations.
Right-click or press the spacebar to step through the various tee connection orientations. Press ESC when the appropriate orientation displays.

-
Click


 . Find
- Select or window the tee connections to change.
- Right-click or press the spacebar to toggle through the various tee connection orientations, and press Esc when the appropriate one displays. Replaces any dot tee symbols with angled tee symbols and then cycles through the four possible orientations for each.