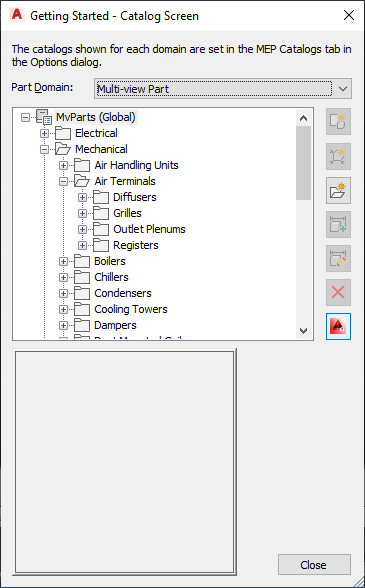
When you start Content Builder, the Getting Started - Catalog Screen dialog box is displayed. This task-specific dialog box acts as a toggle, giving you quick access to the different working environments. The Getting Started - Catalog Screen dialog box has a part catalog browser and an icon bar. You select a catalog from the list of loaded part catalogs that are specified on the MEP Catalogs tab in the Options dialog box. To learn more about a part catalog and how parts are stored in a catalog, see Essentials of Part Catalogs.
When selecting a part to create or modify, the Getting Started - Catalog Screen dialog box detects the part domain, and guides you by activated icons to ensure that you use the correct building environment. Icons are activated based on the selected domain and part in the part catalog browser, whether parametric or block-based. For example, if you select an MvPart part catalog, both the New Block Part and New Parametric Part icons are available. However, if you select a component part catalog such as duct or cable tray, only the New Parametric Part icon is available.
Block-based parts are created and modified through the block-based building environment, and parametric parts are created and modified through the parametric building environment. For more information about the building environments in Content Builder, see Approaches to Creating Parts.
To start Content Builder and open a building environment
- Click Manage tab
 MEP Content panel Content Builder Find.
 The Getting Started - Catalog Screen dialog box is displayed.
- Select a part catalog. Tip: Be sure to select the correct catalog when creating a new part. Each catalog domain creates specific data that is added to the parts in the respective catalog. The catalog path is determined by the settings used in the catalog tab of the Options dialog box.Attention: To facilitate the process of upgrading to a new version of AutoCAD MEP 2022 toolset, add all your custom parts to custom catalogs. Do not add custom parts to the catalogs provided with the software. When you upgrade, this allows you to easily move all your custom catalog content as a whole to the catalog folders for the new version (where new versions of the catalogs provided with the software are also located). You can use both types of catalogs during layout if you specify multiple catalogs for a domain, as described in Specifying Part Catalogs and Style-Based Content Locations.
- In the Getting Started - Catalog Screen dialog box, do one of the following:
If you want to… then select a chapter and … create a new block-based MvPart click  . Enter a name and description for the MvPart, and click OK. The block-based building environment is opened for part creation.
 create a new parametric MvPart click  . Enter a name and description for the MvPart, and click OK. The parametric building environment is opened for part creation.
 add a new chapter for an MvPart click  , and enter a name. You can add chapters to the catalog or to another chapter.
 add a new part size to an existing MvPart select the MvPart, and click  . The appropriate building environment is opened for modifying the part.
 modify an existing part size select the MvPart, and click  . The appropriate building environment is opened for modifying the part.
 delete an MvPart select the MvPart, and click  . The part is deleted from the catalog and is removed from the tree. Note: After selecting an MvPart, if the model geometry is unavailable, you are accessing legacy content. Legacy content can only be modified. It is recommended to modify legacy content using Catalog Editor.