AutoCAD MEP 2022 toolset adds pipe fittings as you draw a pipe run based on the default fittings specified in the pipe routing preferences. However, you can also add a pipe fitting manually to an existing segment or to a run.
Routing preferences specify the common fittings used for most pipe layouts. However, the default pipe parts catalog includes many other fittings you can use.
To add a pipe fitting manually
- In the Piping workspace, to select a fitting, click
 .
. Tip: You can also use the Fitting tool palette.
 - On the Properties palette, under General, click the part image next to Part.
- In the Select a Part dialog box, choose a part from the catalog.
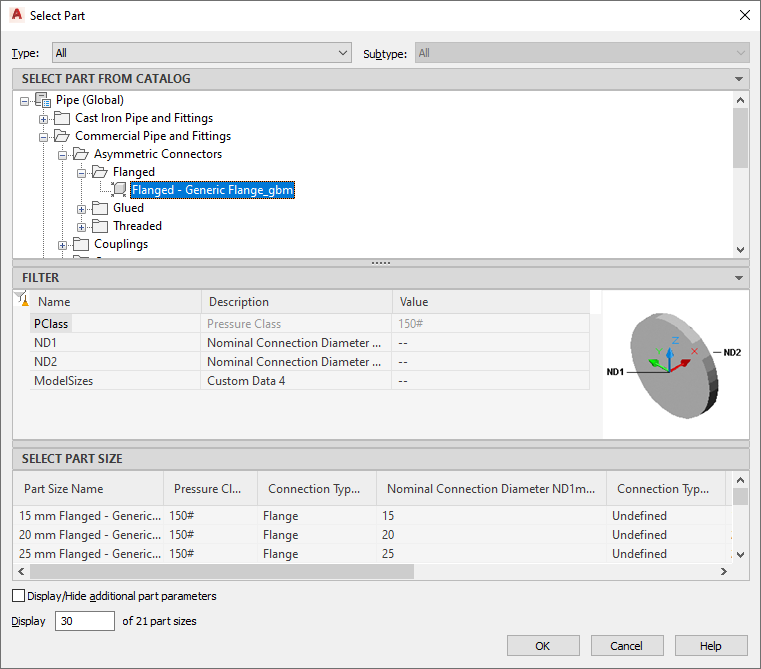
Select a Part dialog box
Under Select Part from Catalog, the dialog box organizes pipe fittings based on material type in the US Imperial and US Metric profiles. For more information, see Pipe Parts Catalog.
- (Optional) Select Display/Hide additional part parameters to expand the contents of the parameters table.
- Under Filter by Dimensions, filter the list of parts. Note: The part catalogs and content locations determine the parts that you can select.
- Select a part size.
- On the Properties palette, under Placement, enter an elevation. Note: If you insert a fitting in an existing pipe run, you do not need to specify the elevation. The fitting inherits the elevation and system settings from that pipe run.
- Specify an insertion point in the drawing, and use the compass to specify a rotation angle.
You can use pipe curve or pipe end connectors to insert the fitting on an existing pipe object.