You can add a takeoff perpendicular to the pipe centerline and rotate it at any angle around the pipe. The simplest way to add a takeoff is to connect a pipe segment to a pipe curve connector on an existing segment. If a takeoff is the specified connection type in the pipe layout preferences, a takeoff is automatically inserted to connect the new segment to the existing segment.
To add a takeoff to a pipe segment
- In the Piping workspace, click


 .
.
- Select a fitting, tap, or takeoff from the Piping tool palette.
- On the Properties palette, under General, click the part image.
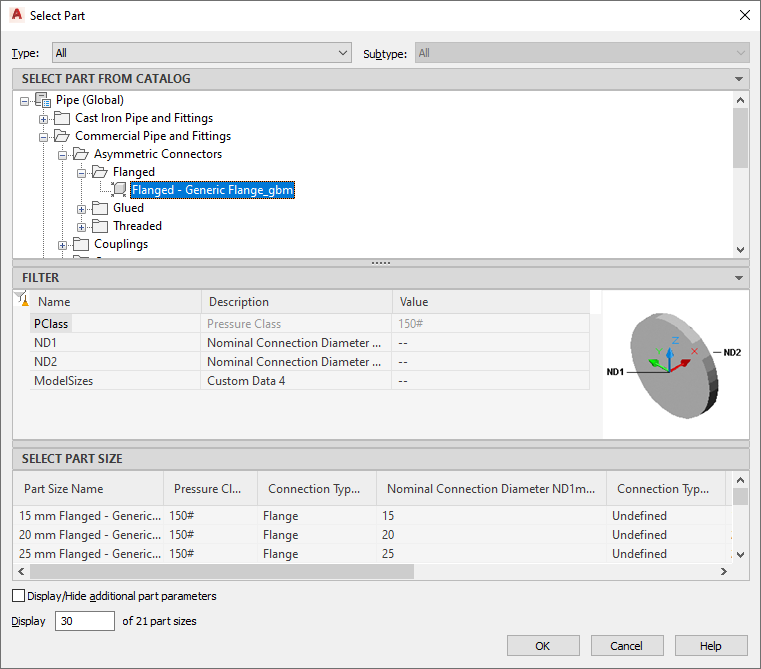
- In the Select a Part dialog box, choose a part from the catalog.

Select a Part dialog box
Under Select Part from Catalog, the dialog box organizes pipe parts based on material type in the US Imperial and US Metric profiles. For more information, see Pipe Parts Catalog.
- Select Display/Hide additional parameters to expand the contents of the parameters table.
- Under Filter by Dimensions, filter the list of parts. Note: The part catalogs and content locations determine the parts that you can add.
- Select a part size and click OK.
- In the drawing, move the cursor to the location on the pipe segment to add the takeoff.
- Click the pipe curve connector. Tip: For 1-line pipe, a pipe curve connector appears when you move the cursor over the pipe centerline. For 2-line pipe, a pipe curve connector appears when you move the cursor over the contour lines of the pipe.
- (Optional) To change the insertion point after you place the takeoff, enter sl (slide), and specify a new insertion point.
- Enter an angle to rotate the takeoff around the pipe, or use the compass to specify an angle.
Tip: You can use rotate grips to rotate the newly added takeoff.