Vanes are considered annotation, but are not considered objects. You can add turning vanes to all fittings or to specific fittings.
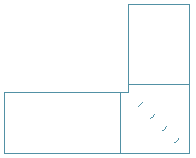
Top view of a mitered elbow with turning vanes
- Select a fitting to add vanes.
- Click
 .
.
- The vane settings are displayed on the command line.
To change the settings, enter s (settings), and specify the vane settings in the following table:
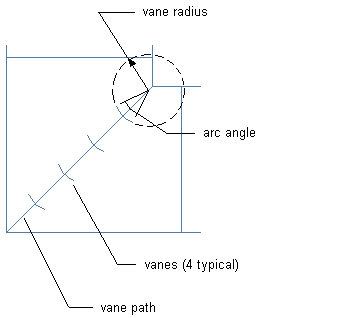
Setting Description radius radius of curvature for the vanes arc angle determines the size of the vane arc relative to the circular path that defines the vane; for example, 45 degrees is 1/8 of the circular path number of vanes total number of vanes to add to each fitting; the vanes are spaced equally along the vane path mirror current vanes for tees; mirror the first set of vanes around a specified line 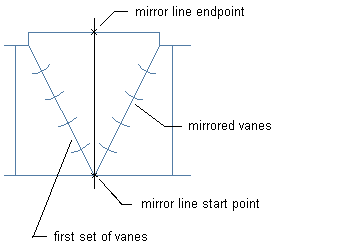
keep vane path displays vane path on the fitting; specify no to not show the vane path - When prompted to select a start point, specify the inside corner of the fitting.
- Specify the outside corner of the fitting as the vane path endpoint.
Vanes are added to each fitting of the same size and subtype.
- If you are mirroring vanes, specify the start and endpoints of the mirror line.
A second set of vanes is added to the tee.
Tip: To apply or remove turning vanes on selected fittings, select a fitting and choose Yes or No for Vanes under Advanced on the Properties palette.