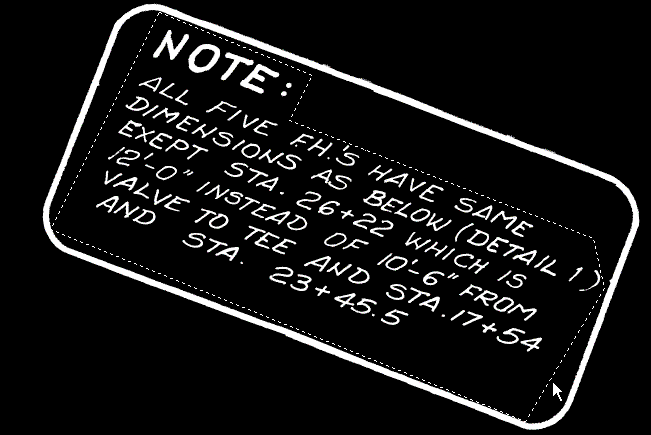
In this exercise you change hand-printed raster text to AutoCAD text in your drawing.
The general process is as follows:
- Enter the parameters for the recognition engine.
- Select a hand-printed note in raster text using the polygonal selection method.
- Make corrections to the recognized text using the tools in the Verify Text window.
- Insert the AutoCAD text into the drawing at an angle.
Related Exercises
Before doing this exercise, ensure that AutoCAD Raster Design toolset options are set as described in the exercise Exercise A1: Setting AutoCAD Raster Design Toolset Options.
Open the drawing file for this exercise
Exercise
- In the \Tutorial9 folder, open the drawing file
textrec_03.dwg.
Choose an image to insert
- To display the
Insert Image dialog box, click
Raster
 Insert.
- From the Files of Type list, choose All Image Files.
- If necessary, navigate to the \Tutorial9 folder. Select the image file text_rec_hand.tif.
- In the
Insert Options area, click
Quick Insert and
Zoom to Image. Click
Open.
The image is inserted.
Convert hand-printed raster text to AutoCAD text
- To display the
Text Recognition Setup dialog box, click
Raster
 Text Recognition
 Recognize Setup.
- In the
Input section, select the following settings:
- Selection Shape is Polygonal.
- Select the Spelling dictionary.
- Select English in the Spelling Language list.
- Select the AutoCAD Custom dictionary.
- Click Language Character Set and select English.
- In the Recognize section, select Uppercase, Numbers, Punctuation and Miscellaneous.
- In the
AutoCAD Output section, select the following settings:
- Output Type is MText.
- Text Height is Style Height.
- AutoCAD Style is Note.
- Removal Method is Rub.
- In the Verification Display section, clear the check boxes for Italic, Underline, and Enable Verifier.
- Click OK.
- Click
Raster menu
 Text Recognition
 Recognize Text.
- Zoom to the handwritten note in the upper right section of the drawing.
- Enter a at the command line for angle and enter the rotation angle of the text. You can do this either by selecting two points to draw a baseline for the text (parallel to the long side of the enclosing rectangle) or by entering 339. Press Enter.
- Draw a polygon around the text within the border, then press
Enter to finish the polygon.

The Verify Text window opens.
- Review the areas of highlighted text in the Edit pane (lower pane). You can revise text directly in the Edit pane, or use the editing buttons. Click
Find Next to display the first suspect word or rejected character in the
Change To box. Select a word from the
Change To list or enter the correct word in the box and click
Replace. Click
Add to Dictionary if you want to add the word or acronym to the recognition dictionary. When you click
OK, you are prompted to add the word to the AutoCAD custom dictionary too.
Attention: Because no recognition engine is 100% accurate, you should carefully review the results in the Edit pane, not just the highlighted areas, and make all necessary changes.
- Click
OK to insert the new note in the drawing, and then press Esc to end the Text Recognition command.
Tip: You can use the AutoCAD MOVE command to align the text block. To edit the text, select it, then right-click and click MText Edit.
- Close the drawing without saving changes.