In this exercise you use REM Operations tools to correct imperfections in scanned bitonal drawings.
Related Exercise
Before doing this exercise, ensure that AutoCAD Raster Design toolset options are set as described in the exercise Exercise A1: Setting AutoCAD Raster Design Toolset Options.
Exercise
- In the Tutorial2 folder, open the drawing file Scanned_07.dwg.
Note that several of the lines in the drawing overshoot (extend beyond) their intersection and require trimming. Others undershoot and must be extended to form a proper intersection.
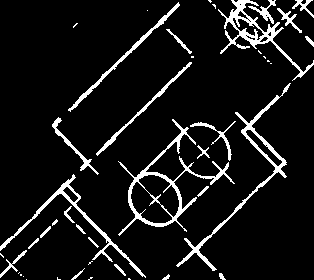
Trim Lines
- Click
Raster menu
 Raster Entity Manipulation
 Create Primitive
 Line.
Line.
- Click a line that you want to trim (shorten). A REM line is created over the raster line.
- Right click and click
Repeat Line. Click another line that you want to trim.
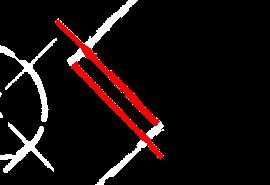
- Use the
Repeat Line command again to create a “cutting edge” for each REM line to be trimmed. The cutting edge in this case is an intersecting raster line where the trimmed line will end. In other contexts, you can use a vector line as a cutting edge.
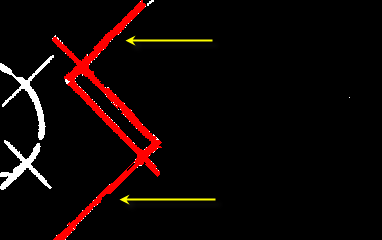
- Click
Raster menu
 Raster Entity Manipulation
 REM Operations
 Trim.
Trim.
- Click one or more cutting edges, then right-click to end the selection process.
- Click the ends of the lines that you want to remove (trim). They are deleted along with the underlying raster.
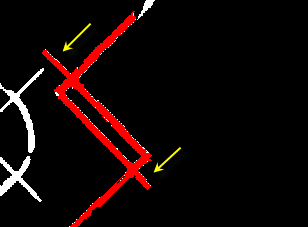
- Right-click and click Enter to end the command.
- Click
Raster menu
 Raster Entity Manipulation
 Merge To Raster Image.
- Click the REM lines that you want to convert to raster data, then right-click to end the selection process.
- Right-click, then click
REM
 Clear All. The REM lines are deleted, leaving the edited raster data.

Extend Lines
- Click
Raster menu
 Raster Entity Manipulation
 Create Primitive
 Line.
Line.
- Click a line that you want to extend.
- Right click and click Repeat Line. Click another line that you want to extend.
- For each line that you want to extend, create a REM line on the other side of the gap to act as a boundary edge (endpoint) for the extended line.
- Click
Raster menu
 Raster Entity Manipulation
 REM Operations
 Extend.
- Click the boundary edge for the extended line, then right-click to end the selection process.
- Click the object that you want to extend. It is extended.
- Right-click and click Enter to end the command.
- Click
Raster menu
 Raster Entity Manipulation
 Merge To Raster Image.
- Click the REM lines that you want to convert to raster data, then right-click to end the selection process.
- Right-click, then click
REM
 Clear All. The REM lines are deleted, leaving the edited raster data.
Create a Corner Fillet
- Click
View menu
 Named Views. Set the current view to
Fillet View. You see a corner fillet that needs repair.
- Click
Raster menu
 Raster Entity Manipulation
 Create Primitive
 Line.
Line.
- Click one of the lines that extends toward the corner fillet.
- Right click and click Repeat Line. Click the other line that extends toward the corner.
- Click
Raster menu
 Raster Entity Manipulation
 REM Operations
 Fillet.
- To create a rounded corner, enter
r, then specify the radius by drawing a line or entering a numeric value.
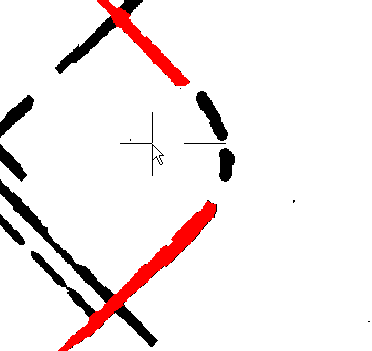
- Click one of the two lines that extend toward the corner.
- Click the other line that extends toward the corner. The corner is created.
- Click
Raster menu
 Raster Entity Manipulation
 Merge To Raster Image.
- Click the REM lines that you want to convert to raster data, then right-click to end the selection process.
- Right-click, then click
REM
 Clear All. The REM lines are deleted, leaving the edited raster data.
Offset a Line
- Click
Raster menu
 Raster Entity Manipulation
 Create Primitive
 Line.
Line.
- Click a line that you want to copy and offset. The line is converted to a REM line.
- Click
Raster menu
 Raster Entity Manipulation
 REM Operations
 Offset.
- Click the REM line that you want to offset.
- Click and drag a line perpendicular to the REM line to specify the offset distance, then click to specify an endpoint.
- Click the REM line to offset, then click on the side of the line where you want the offset line. The offset line is drawn.
- Further exploration: Offset a circle. Select named view Circle-A and convert the existing circle to a REM object, then use the Offset command to create a larger concentric circle.
- Keep the drawing open and continue with the next exercise, Exercise S5: Using Touchup Tools, or close the drawing without saving changes.