In this exercise, you view and change properties of a selected image or of a group of selected images.
Access the Properties window using the following methods:
- Click
Modify menu
 Properties.
- Select one or more images, right-click, then click Properties.
- On the AutoCAD Standard toolbar, click Properties
 .
.
Related Exercises
Before doing this exercise, ensure that AutoCAD Raster Design toolset options are set as described in the exercise Exercise A1: Setting AutoCAD Raster Design Toolset Options.
Exercise
- In the \Tutorial1 folder, open the drawing file GettingStarted_03.dwg.
- Select the image frame of the tractor image.
- Right-click and click Properties to display the Properties window.
- Scroll to the end of the properties list.

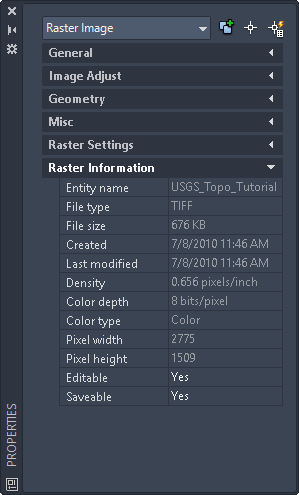
This example shows the appearance of the Properties window when an image is selected. Raster Image is selected, and the image data appears at the end of the properties list in the Information section.
- Click the
Editable row, then click
 at the end of the row.
The Edit Status dialog box indicates that this image can be edited and saved. When an image cannot be edited or saved, you can open the Edit Status dialog box to determine why.
- Click Close.
- Press Esc to deselect the tractor image, but do not close the Properties window.
- Select the image frame of the USGS quad sheet in the lower left of the drawing window.
- In the Properties window, in the General section, change the layer to TU_image_usgs.
- Select the image frame of the aerial photograph.
Raster Image (2) appears at the top of the Properties window, indicating that two images are selected. Properties common to both images are displayed.
- Close the Properties window.
- Close the drawing without saving changes.
Open the drawing file for this exercise
View image properties
View the edit status of an image
Change image properties
View properties for multiple images