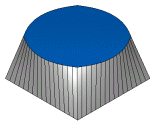
A 4-axis Punch feature needs two closed curves, an upper curve and a lower curve. The wire travels on the outside of the curves.
The Thickness parameter is used to access the appropriate cutting data table.
The A parameter is used to rotate the feature around the Z-axis of the current Setup.
To create a 4-axis Punch feature:
- Create the curve that defines the shape of the feature.
- Click the
Features
 step in the
Steps panel to open the
New Feature wizard.
step in the
Steps panel to open the
New Feature wizard.
- In the 4 Axis section, select Punch.
- Click Next to open the New Feature - Upper Curve page.
- Click Next to open the New Feature - Lower Curve page.
- Click Next to open the New Feature - Location page.
- Click Next to open the New Feature - Dimensions page.
- Click Next to open the New Feature - Start page.
- Click Next to open the New Feature - Match Curves page
- Click Next to open the New Feature - Strategies page.
- Click Next to open the New Feature - Operations page.
- Click Next to open the New Feature - Cutting Data page for the first operation.
- If you have more than one operation, clicking Next opens the New Feature - Cutting Data page for the next operation. If you have no more operations, clicking Next opens the New Feature - Summary page.
- Click Finish to create the feature and exit the wizard or click Back to return to previous pages.
Note: You can
edit the feature later.