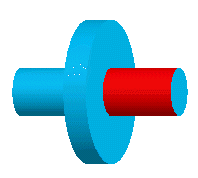
Use the Align UCS wizard to align a UCS to items in the document such as the stock or geometry.
To open the Align UCS wizard
- Select Home tab > Create panel > UCS
- Click Align.
To align a UCS to the stock
- In the Align UCS wizard, select Stock.
- Click Next.
- Select a stock face.
- Select the center or one of the corners of the stock face.
A preview UCS is displayed in the Graphics window.
- Click Finish.
To align a UCS to a feature
- In the Align UCS wizard, select Feature.
- Click Next.
- Select a feature to place the UCS at predetermined location on the feature.
- Click Finish.
To align a UCS using points
- In the Align UCS wizard, select Three Points.
- Click Next.
- Specify the locations of an origin, a point anywhere on the new X axis, and any point in the new XY plane.
- Click Finish.
To align a UCS using lines
- In the Align UCS wizard, select Two Lines.
- Click Next.
- Select two intersecting lines in the model to specify the new X and Y axes.
- Click Finish.
To align a UCS to the center of a circle
- In the Align UCS wizard, select Circle.
- Click Next.
- Select a circle.
The UCS is positioned at the center of the circle.
- Click Finish.
To align a UCS using a curve
- In the Align UCS wizard, select Curve.
- Click Next.
- Select a curve.
The UCS is positioned at the start point or end point of the curve. The Z axis is aligned with the curve normal.
- Click Finish.
To align a UCS to an existing UCS
- In the Align UCS wizard, select UCS.
- Click Next.
- Select an existing UCS.
The UCS is now a copy of the UCS you selected.
- Click Finish.
To align a UCS using a surface
- In the Align UCS wizard, select Surface.
- Click Next.
- Select the surface and a point on the surface.
The UCS is positioned at the point on the surface with the Z axis aligned with the surface normal.
- Click Finish.
To align a UCS to the axis of a revolved surface
This method is typically used to align the UCS to the axis of a turned part. This alignment method works only for surfaces of revolution. For many imported models, flat disks are not represented as surfaces of revolution.
- In the Align UCS wizard, select Revolved Surface.
- Click Next.
- Select a revolved surface.

- If you want to use the other end of the surface, select Flip direction.
- Click
Finish.
If the selected surface is not a surface of revolution, the error message Can’t construct UCS from the selected surface is displayed.