The Compass node is a node that can be used to define and identify an area in the Batch, Batch FX or Modular Keyer schematic, by encompassing the nodes of your choice in your process tree. Adding the Compass node to the schematic creates a box that you can resize and place over the nodes you want it to encompass. All the nodes that are included in the Compass are automatically selected when you click on the Compass header and all the nodes included in the Compass will follow when moving the Compass. The Compass node makes it easier to manage your process tree, particularly if it is very large.
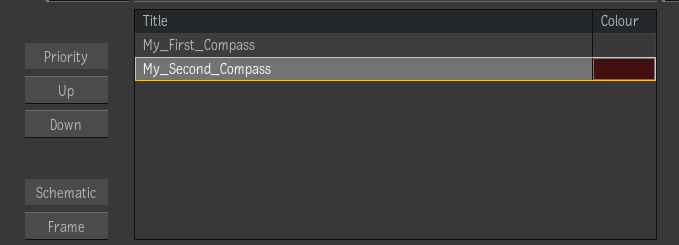
The Compass menu, which appears when a Compass node is selected in the schematic, contains a table that enables you to sort the different compasses in Z space, using the Up and Down buttons. You can also assign a colour to each Compass object in the schematic. The default colour is grey.

Adding a Compass Node to the Schematic
- By dragging the Compass node from the Node bin. This creates an object of fixed width and height. The width and height can be modified afterwards.
- By double-clicking the Compass object from the Node bin and drawing the Compass, enabling you to immediately determine its size.
- By using the “Draw Compass” Edit mode. As above, this enables you to determine the Compass size as you draw the object.
- The Draw Compass Edit mode is assigned to the following shortcuts by default:
- Flame: C
- Smoke Classic: Space-V
- Smoke FCP: X
- Lustre: C
Naming / Renaming a Compass Node
Once a Compass node is added to the schematic, the naming field, in its header, is immediately activated.
You can rename a Compass node by clicking on the selected item name within the Compass menu table.
Resizing a Compass Node
Compass nodes can be resized by selecting a corner or an edge of the box and dragging to the desired size.
Assigning a Colour to a Compass Node
- By clicking the colour pot on the right side of the Compass title header. This displays the Colour Picker for colour selection.
- By clicking the colour pot to the right of each item in the Compass menu table. This displays the Colour Picker for colour selection.
- You can also define a default colour for Compass nodes from the Preferences tab in the Batch Prefs menu, in the Compass section of the Schematic header.
Framing a Compass Node
You can frame a Compass to the center of the schematic by selecting it in the Compass menu table and clicking the Frame button, on the bottom left. This is also achieved by double-clicking a Compass node entry in the Compass menu table.
Manipulating Compass Objects
You can Copy, Cut, Paste, Duplicate or Delete a Compass, from the contextual menu. However, it is not possible to save or load a Compass setup.
Keyboard Shortcuts
- You can move the Compass away from the nodes included in it using the "Enable Smart Extract of Nodes and Tabs" keyboard shortcut.
- You can navigate between Compasses using the Find in Schematic function (Meta + F) and the Select Previous / Next Node keyboard shortcuts.