Use Search to quickly add nodes to your schematic. With Search, you can add to your schematic any tool from any node bin. This includes all of the tools, Matchbox, Lightbox.

To display Search:
- With the Schematic displayed, do one of the following:
- Press Spacebar+TAB
- Press F12
- Click Ctrl+Pointer Button 2
- Select Search from the contextual menu
To add a node:
- Display Search.
- Start typing the name of node. Try
GMask Ellipse.
As you start typing, the list below displays the search results. The highlighted tool represents the current selection.
- To insert
Axis you can do one of the following:
- Finish spelling out GMask Ellipse and press Enter.
- Use the arrow keys to highlight the node, and then press Enter.
To connect to an existing node:
- Select the node.
- Display Search and select a node.
The new node is added, and connected to the first one.
Note: Because of the node hierarchy used in the Action schematic, you can only add children nodes, not parent nodes. If the node you search for cannot the child of the selected node, it is added as a free node.
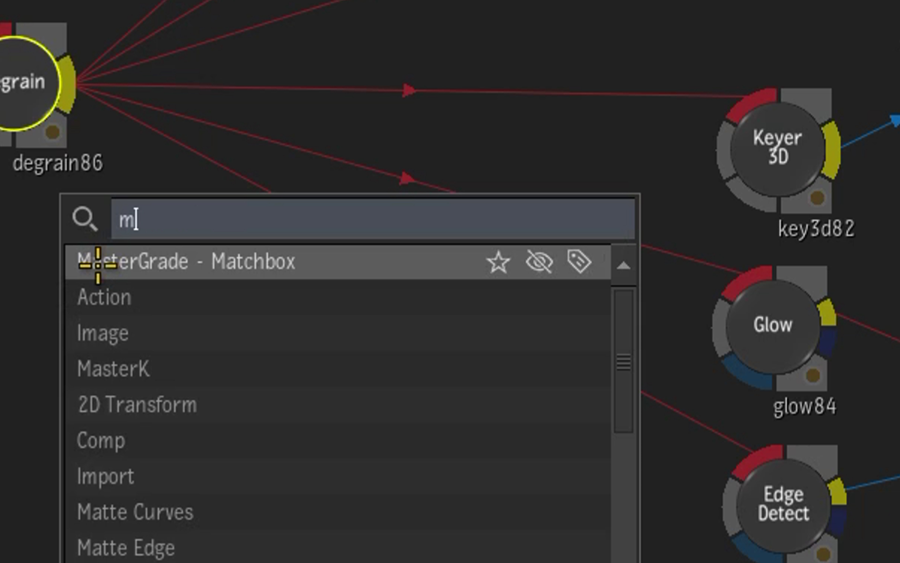
To add a node to a Selective:
- Select a Selective with the HUD.
- Display Search and find MasterGrade.
- Press Enter.
The MasterGrade Matchbox is now available under the Selective.
Favourite Tools
Every time you add a node with Search, Flame notices how often you use it. Search sees the tools you use and automatically displays the most used tools at the top.
So if you add the same node a few times, it starts appearing at the top of the search list. This is dynamic and will change the more you use Flame.
But you can also ensure that you favourite tools always make it to the top of Search results by making them your favourites.
To favourite a tool:
- Search for the tool.
- Click the Star next to the tool you want to favourite.

Next time you display Search, Keyer YUV appears at the top of the search results.

To un-favourite a tool:
- Do one of the following:
- Open and remove the tool from the Favourites list.
- Display Search and search for the tool, and then click the Star to un-favourite the tool.
You can favourite as many tools as you want.
Hiding Tools
Chances are that you don't always need access to every single tool available to you. Maybe the Keyer RGBCMYL is not for you, or you only want to use the GMask Tracer and hide the legacy GMask tool.
This is why you can hide tools from Search results.
To hide a tool from the Search results:
- Search for the tool.
- Click the Hidden icon next to the tool.

The Keyer RGBCMYL will no longer appear in any Search results.
To make a tool appear once again in Search results:
- Open and remove the tool from the Hidden list.
Tagging Tools
Tagging makes it easy to find the tools you need even if you don't know exactly what you are looking for. So if you want to do 3D compositing but don't know the name of the tool, open Search and type 3D... and Action appears in the results.
Same goes for a pattern generator. Open Search, type generator, and Substance Noise appears.
Flame has tools tagged with industry keywords, and these tags are displayed in .
You can add, rename, and remove tags from the Preferences. If a tool is not displayed in the Tags list, you must first add a tag from Search results.
To add a tag to a tool directly from Search:
- Search for the tool.
- Click the Tag icon next to the tool.
- Add the tag to the dialog box.

From now on, searching for Salient displays Image tool as a top result.
Exporting and Importing Search Preferences
From , you can import and export you search preferences.
Your Search preferences include:
- Favourites
- Hidden status of tools
- Tags
- Search weights
Search weights are those values assigned by Flame to each node as you use them, with the most added appearing at the to of the search results. Combined with Favourites, Hidden status, and Tags, it shapes the search results to your usage.
To carry your Search customization over to another Flame Family product, use the Export and Import options available in the Search Preferences.
Using Search with Custom Matchbox
To use your custom Matchbox shaders with Search, make sure they are located in the path defined in .
You can organise the shaders using sub-folders within those paths.