Since Action as a timeline FX uses only one front/matte media, stereo clips are not supported. If you need to work with stereo clips, access Action from Batch or Batch FX, or from the Tools menu.
Stereo Object Axis Settings
Use the Axis tab of the Stereo Object menu to position, rotate, scale, and shear an axis, as well as adjust the convergence, parenting, and autoscaling of stereo objects.
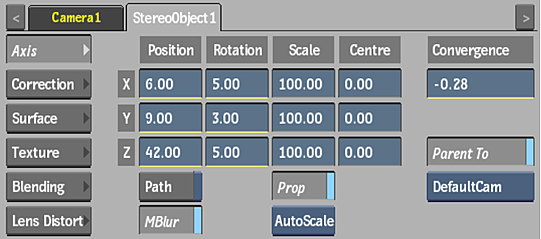
The Position, Rotation, Scale, and Centre settings are the same as in the Axis menu. The following Axis settings are specific to the Stereo Object:
- Autoscale box
- Select whether to autoscale when settings are changed relative to the camera.
Select: To: Auto Off Not use autoscaling on the image. Auto Z Link the Position Z parameter with Convergence. This allows you to see how a change in the Convergence value makes the object appear to move closer or farther from the camera. This preserves the same visual aspect while scaling the textures up or down accordingly. Note: The result camera must be set to the stereo camera.AutoScale Change the left and right texture parameters when the Position Z or a Scale parameter is changed. When you create a stereo object, it is automatically oriented towards the camera and automatically scales. That is, the apparent size of the images scale to compensate when you move the stereo object along the Z axis. If you move a stereo object away from the camera, it grows, and vice versa. Note: The result camera must be set to the stereo camera.
- Convergence field
- Displays the equal amount of convergence in opposite directions horizontally, between left and right images. Positive values make the image appear farther from the camera. Editable.
- Parent To button
- Enable to associate a stereo object with the camera selected in the Parent Camera box. Enabled by default to force the stereo object to face the 3D camera at all times when the camera is moved around.
- Parent Camera box
- Select which camera in the scene is associated with the stereo object. Setting found in the Axis and Correction tabs.
Stereo Object Correction Settings
Use the Correction tab of the Stereo Object menu to indicate how the footage was shot, and make interaxial offset and FOV offset adjustments to the left/right images.

- Keystone Correction box
- Select whether to apply keystone corrections manually in this menu, use the automatic settings derived from the selected analyzer, or inherit the Stereo Mode settings from the stereo camera (Pass Through).
In most cases, a keystone correction is needed if the stereo types of the camera and the stereo object do not match, but there may be cases when you want to sync the two.
- Correction Analyzer box
- Select which analyzer is used to provide automatic keystone corrections.
- Interaxial Offset Left Eye field
- Displays the offset distance between the left eye compared to the 3D camera. Editable.
- Interaxial Offset Right Eye field
- Displays the offset distance between the right eye compared to the 3D camera. Editable.
- Interaxial Offset Current Camera field
- Displays the interaxial offset of the selected camera. Non-editable.
- FOV Offset Left field
- Displays the offset field of view between the left eye compared to the 3D camera. Editable.
- FOV Offset Right field
- Displays the offset field of view between the right eye compared to the 3D camera. Editable.
- FOV Offset Current Camera field
- Displays the offset field of view of the selected camera. Non-editable.
- Stereo Clip Type box
- Specify how the footage was shot: Parallel, Off Axis, or Converged.
- Parent Camera box
- Select which camera in the scene is associated with the stereo object. Setting found in the Axis and Correction tabs.
- Camera Number field
- Displays the number of the selected camera. Non-editable.
- Tools box
- Select whether to sync the left and right eye correction values.
When synced, a change to one value affects the other value. The left eye position is a combination of the camera’s left eye position and the left interaxial offset; the same applies for the right eye. The effective FOV for the correction is the sum of the camera’s FOV and the FOV offset.
- Sync Type box
- Select whether the relationship between the left and right eye correction values is absolute or relative. Available when Sync L+R is selected in the Tools box.
Stereo Object Surface Settings
Use the Surface tab of the Stereo Object menu to adjust surface and shading properties of the stereo object.

The Surface tab settings are the same as in the Object Image menu for non-stereo objects. See Surface Settings.
Stereo Object Texture Settings
Use the Texture tab of the Stereo Object menu to set the built-in diffuse maps (as well as any added texture maps) of a stereo object.

- X Position field
- Displays the position of the X axis. Editable.
- Y Position field
- Displays the position of the Y axis. Editable.
- Z Position field
- Displays the position of the Z axis. Editable.
- X Rotation field
- Displays the rotation of the X axis. Editable.
- Y Rotation field
- Displays the rotation of the Y axis. Editable.
- Z Rotation field
- Displays the rotation of the Z axis. Editable.
- X Scale field
- Displays the scale of the X axis. Editable.
- Y Scale field
- Displays the scale of the Y axis. Editable.
- Z Scale field
- Displays the scale of the Z axis. Editable.
- Proportional button
- Enable to change the fields proportionally.
- X Shear field
- Displays the shear of the X axis. Editable.
- Y Shear field
- Displays the shear of the Y axis. Editable.
- Z Shear field
- Displays the shear of the Z axis. Editable.
- X Centre field
- Displays the centre of the X axis. Editable.
- Y Centre field
- Displays the centre of the Y axis. Editable.
- Z Centre field
- Displays the centre of the Z axis. Editable.
- Tools box
- Select whether to sync the left and right eye texture values.
- Sync Type box
- Select whether the relationship between the left and right eye texture values is absolute or relative. Available when Sync L+R is selected in the Tools box.
- Texture Eye box
- Select whether to apply changes to the left or right eye and display the values of the left or right texture.
Stereo Object Blending Settings
Use the Blending tab of the Stereo Object menu to adjust the blending curves of each stereo surface separately. The blending curve is similar to the Keyer luminance blending curve, but you can adjust it per eye.

You can switch between the stereo surface blend curves and the keyer blend curves. This gives you a good comparison to luminance curve work you have already done in the Keyer.
The Blending tab settings are the same as in the Object Image menu for non-stereo objects. See Applying Blending Curves per Surface. One extra setting is available for stereo objects, allowing you to select which eye to apply blending curves.
- Eye Selection box
- Select which eye to apply the blending curves. Select Both Eyes to apply the same blending settings to both eyes. In this case, the settings of the last selected eye apply to both eyes.
Stereo Object Lens Distort Settings
Differences in camera lenses or perspective irregularities cause lens distortion that results in skewed angles. Use the settings in the Lens Distort tab to rectify or simulate these types of distortions in your stereo images.

The Lens Distort tab settings are the same as in the Object Image menu for non-stereo objects. See Lens Distort Settings.