
You use UDIM texture tiles in Action.
You can import and export UDIM textures from Action FBX import/export, or just import it through a texture node Read File menu.
To import an FBX with UDIM files.
- Right-click the Schematic and select Import...
- Select the FBX to import.
- Enable UDIM.
- Click
Load.
This imports the FBX, and parents it with a texture that contains all of the UDIM tiles.
To export an FBX with UDIM tiles.
- Right-click the scene and select Export...
- Select a destination and click
Export.
Any textures attached to a geometry with enabled generates UDIM tile files.
To import UDIM tiles directly in a texture map:
- In the schematic, select the texture map and display its menu.
- Open the menu Read File and click Load.
- Navigate to the location of the UDIM files.
- Enable the UDIM
Active
button.

The UDIM Active option detects UDIM files and creates a single UDIM file in the browser. It indicates the number of tiles part of the UDIM texture.
- Set the Individual Tile Size. This size is automatically set to the largest UDIM tile of the set (within the limits of the GPU VRAM), but you can size it down for performance.
- Click
Load.
The UDIM tilesd texture is now load in the Action texture map. See the section What is UDIM for additional details.
About Loading a UDIM Texture Through Batch or MediaHub
You don't have to import a UDIM texture through Action Import. You can import one through MediaHub or Batch. But if you do, it must be loaded a one texture that contains all the tiles.

In Action, you need to tell the texture map how the tiles are distributed according to the U- and V-axis. In the above example, U = 4, and V = 2.

The Action schematic with the a cube and the UDIM texture.
To manually set UV coordinates for a UDIM tiles texture:
- Load the untextured FBX attach a Material node to the Geom node.
- Attach the required map to the Material node. In the example above, a Diffuse map.
- Display the menu for the Diffuse map, and select the
Texture menu.
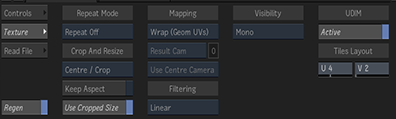
- In the UDIM section:
- Enable Active.
- Set the number of tiles along the U and the V axis. In the above example, this is U-4, V2.
The map should texture the Geometry nicely. If not, either you have the wrong texture/coordinates combination, or your geometry has the wrong UV mapping.
Every Texture Map Texture menu has a UDIM section to apply the UDIM scaling, based on the number of tiles contained in the resulting texture. On import, if UDIM is enabled, it is set automatically to Active with the appropriate U and V values. Whether the resulting texture comes from MediaHub or Batch, you can set the U and V values for the grid, allowing the scaling to be properly applied.
What is UDIM
UDIM stands for U-Dimension and was developed by Richard Addison-Wood at Weta Digital. There's a great article describing UDIM in details at fxguide.
The key takeaway is that UDIM is a numbering system used to ties files to UV coordinates. The following files:
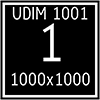
- UDIM.1001.jpg
- UDIM.1002.jpg
- UDIM.1003.jpg
- UDIM.1004.jpg
- UDIM.1011.jpg
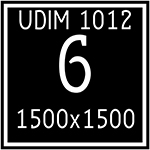
- UDIM.1012.jpg
Represent the following tileset.

|
|
||
|

|

|

|
These 6 tiles can be wrapped on an FBX geometry.
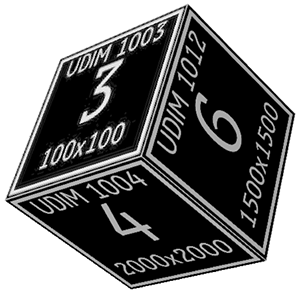
But Action cannot load UDIM tiles in multiple textures. When you load a UDIM, a texture that contains all the tiles is created.

The 6 UDIM tiles got combined into a single Action texture.
The Action schematic with the FBX cube and the UDIM texture.
This differs from other application because Action cannot stream UDIM tiles to the GPU, must must rather load a single texture to it.