Creating a Lens Blur
Lens blur simulates the blur created by a camera lens, such as a rack defocus.
The primary input of the 3D blur node is the front clip and the matte clip. A blur effect can be created with a front clip only. However a matte clip allows you to determine how the matte is used. The Blending settings also determine how the input is composited in the Result view.
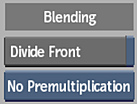
- Divide Front button
- Enable to unpremultiply the front clip using the matte clip. This button is active when a matte is in use.
- Output box
- Select an option to determine how to composite the output in the Result view. The output can be a blurred premultiplied or unpremultiplied result using the front clip and the matte clips, or a composite of the blurred front clip over a background clip. Premultiplied output is equivalent to compositing the resulting front on a black background using the resulting matte.This button is active when a matte is in use.
Use the 3D Blur type settings to refine and constrain the amount of blur to apply to the image and to constrain the amount of blur. Higher blur values increase rendering time. You can increase rendering performance by decreasing the blur quality. When you are ready to create a result clip and an output matte, you can select the highest quality blur.
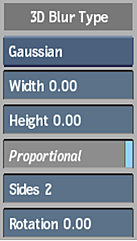
- Blur Type box
- Select the type of 3D Blur to apply. Some of the settings differ based on the blur type you choose.
- Blur Width field
- Displays the horizontal blur amount in pixels. Editable.
- Blur Height field
- Displays the vertical blur amount in pixels. Editable.
- Blur Proportional button
- Enable to constrain blur amount proportions.
- Sides field
- Displays the number of sides in a Gaussian blur shape.Available when Gaussian is chosen as the blur type. Editable.
- Rotation field
- Displays the angle of rotation of a Gaussian blur shape. Available when Gaussian is chosen as the blur type.Editable.
- Kernel Precision box
- Select the quality and speed of the defocus blur. For example, a 1x1 Kernel results in a fast, but coarse defocus blur.Available when Defocus is chosen as the blur type.
- Z Slicing field
- Displays the amount of slices to blend to determine the Z-Depth interpolation of a defocus blur. Available when Defocus is chosen as the blur type.Editable.
You can offset the light and colour values in the source image. Highlights are applied to the image before the blur is applied.
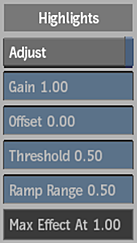
- Adjust button
- Enable to activate highlight controls.
- Gain field
- Displays the light values of the image. Editable.
- Offset field
- Displays each colour value adjusted by this increment. Editable.
- Threshold field
- Displays the minimum colour value included in highlights. Editable.
- Ramp Range field
- Displays the difference between the Threshold value and the value at which the highlights take full effect. Editable.
- Max Effect At field
- Displays the value at which the highlights take full effect. Non-editable.
Changing the Blur Pattern
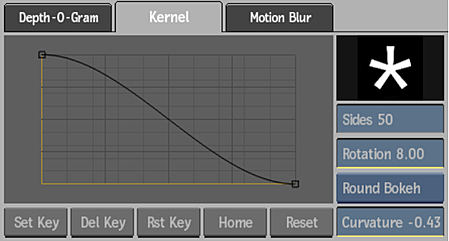
Use the Kernal tab to edit the blur kernel pattern.
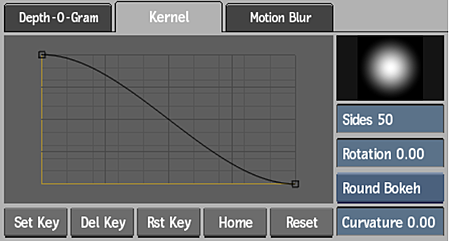
The kernel is the basic blur shape. The shape of the kernel is determined by its number of sides, its rotation, and the shape of its S-curve. This curve represents the shape of the pattern, from its centre to the outside. The default S-curve defines the softness of the blur. You can change the curve by manipulating the two points that define the curve, or you can add points to the curve. Use the Tools box to add and delete points on the curve.
- Sides field
- Displays the number of sides in the kernel shape. Editable, if kernel information is not attached to the node.
- Rotation field
- Displays the angle of rotation of the kernel shape. Editable, if kernel information is not attached to the node.
- Bokeh Type box
- Select whether to use a round or angle bokeh curve to define the kernel shape.
- Curvature field
- Displays the amount of curvature applied to a round bokeh kernel shape. Editable.
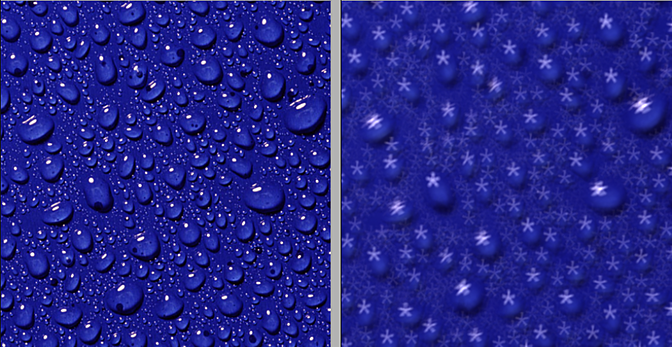
You can define the blur shape using external kernel information by attaching an input to the Kernel tab. The input can be a different resolution than the other node inputs.
External blur information is not editable. Like the default blur shape selections, the shape determines the influence of the kernel’s pixels on each pixel in the front input.
Simulating a Depth of Field Effect
Depth blur effects control the amount of blur based on a depth of field matte. Depth blur settings are displayed in the Depth-O-Gram tab.

A depth of field map (Z-depth map) can be connected to the node. Black portions of the map are in focus. White portions display the highest level of blur. Note that a Z-depth map imported from another application may use the opposite convention and may need to be inverted.
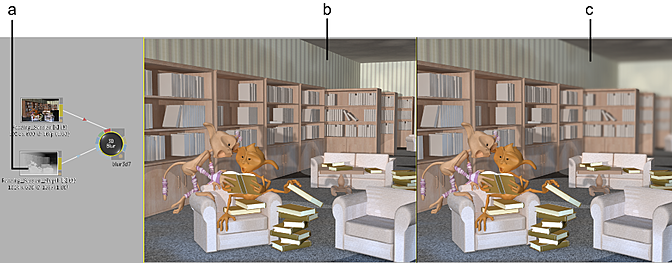
(a) Z-depth map (b) Front View (c) Blurred portion in Result View
.Image courtesy of Jean-Marc Belloncik
Depth Map settings can be used to invert colour values in the Z-depth map for reuse with the 3D Blur node.
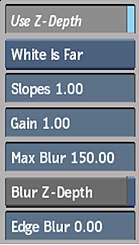
- Z-Depth button
- Enable to activate depth-of-field controls and apply the effect to the image.
- White Value box
- Select whether white pixels represent the furthest point or nearest point on the Z-axis.
- Slopes field
- Displays the gamma value. Applies a gamma curve to the Z-depth map before it is used. Editable.
- Gain field
- Displays the white balance value. Applies a gain curve to the Z-depth map before it is used. Editable.
- Max Blur Field
- Displays the maximum total horizontal and vertical blur amount to clamp the value and avoid unnecessary rendering. The cumulative effect of the high blur amount (Basic tab), and gamma and gain correction applied to the Depth map (Depth tab) may result in very large values, which greatly increases the rendering time. Editable.
- Blur Z-Depth button
- Enable to allow pre-blurring of the Z-Buffer. Disable to increase performance time.
- Edge Blur field
- Displays the minimum blur value of "in focus" pixels. In some instances, an out-of-focus object that appears closer to the camera (that is, in front of the focus plane) can have hard edges. In this case, increase the value in the field to add a blur to these edges. Editable.
Use the Depth-O-Gram settings to refine focus values.
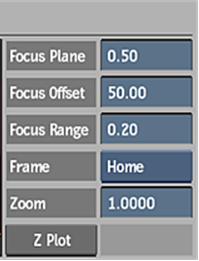
- Focus Plane field
- Displays the distance of your focus point, which is the point at which there is no blur on the image. Editable.
- Focus Offset field
- Displays the distance between the focus plane and the near offset represented as a percentage of the total offset range. Select 50% to make the near and far offsets equidistant from the focus point. Editable.
- Focus Range field
- Displays the distance the near and far offset. Editble.
- Frame option box
- Select how you want to frame the histogram.
- Zoom field
- Displays a vertical zoom value for the histogram to display. You can zoom horizontally by pressing Ctrl+spacebar and dragging left or right in the histogram. To pan horizontally, click spacebar and drag left or right in the histogram.Editable.
- Z Plot button
- Click to activate the pick cursor. Use to select a pixel in the image to display its depth.
- Z Plot Colour pot
- Displays the colour that indicates the plane on which the plotted value is located.
Use On-Screen Widgets section in the NodeSetup menu to define display settings.
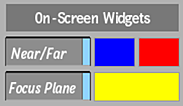
- Near/Far button
- Enable to display the focus offset plane in the image window.
- Near and Far colour pots
- Select the colours that indicate the nearest and furthest points of focus.
- Focus Plane button
- Enable to display the plane on which the focus point lies in the image window.
- Focus Plane colour pot
- Select the colour that indicates the plane on which the focus point is located.
Modifying Depth of Field Gesturally
Depth blur effects can be modified gesturally by dragging the focus, near offset, and far offset planes in the graphic representation of the depth of field. As you drag these elements, the planes are also displayed in the Result view as a preview of the areas that will be in focus. Use the depth control fields to change the gamma and gain, and to change the focus range while keeping the focus plane constant. These parameters are updated in the depth of field display automatically.
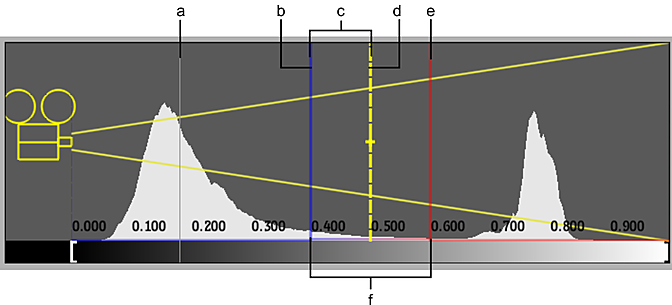
(a) Plot Value Plane (b) Near Focus Offset Plane (c) Focus Offset (d) Focus Plane (e) Far Focus Offset Plane (f) Focus Range
Simulating a Motion Blur Effect
The motion blur simulates the blur created by a fast-moving object or camera. A blur effect can be created with front clip input and a clip with forward motion data input into the Forward Flow tab.
Use the Motion Blur Profile to define the opacity of the blur. The opacity increases at the top of the curve. By default, the blur is more transparent further away from the pixel. The midpoint represents the opacity of the blur at the position of the pixel.
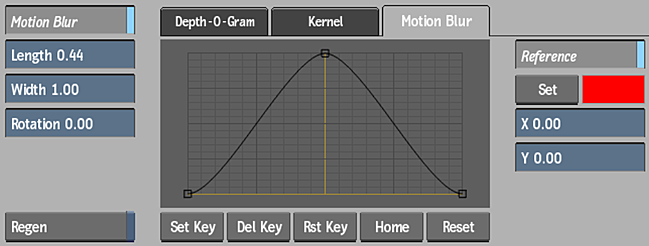
- Motion Blur button
- Enable to activate the motion blur controls and apply the effect to the image.
- Length field
- Displays the amplitude of the motion blur. Editable.
- Width field
- Displays the width of the blur. Editable.
- Rotation field
- Displays the angle of rotation to apply to motion vectors. Motion is rotated counterclockwise. Editable.
- Reference button
- Enable to activate the reference controls and apply the effect to motion blur.
- Set button
- Enable to apply the motion blur to objects that do not have the same relative motion as the selected pixel. Enabled if the X or Y field is edited.
- Set Reference colour pot
- Displays the colour of the crosshair that marks the reference point in the image window.
- X field
- Displays the horizontal position of the pixel to use as a reference point at the selected frame. A reference point can be selected directly in the frame using the cursor. Editable.
- X field
- Displays the vertical position of the pixel to use as a reference point at the selected frame. A reference point can be selected directly in the frame using the cursor. Editable.