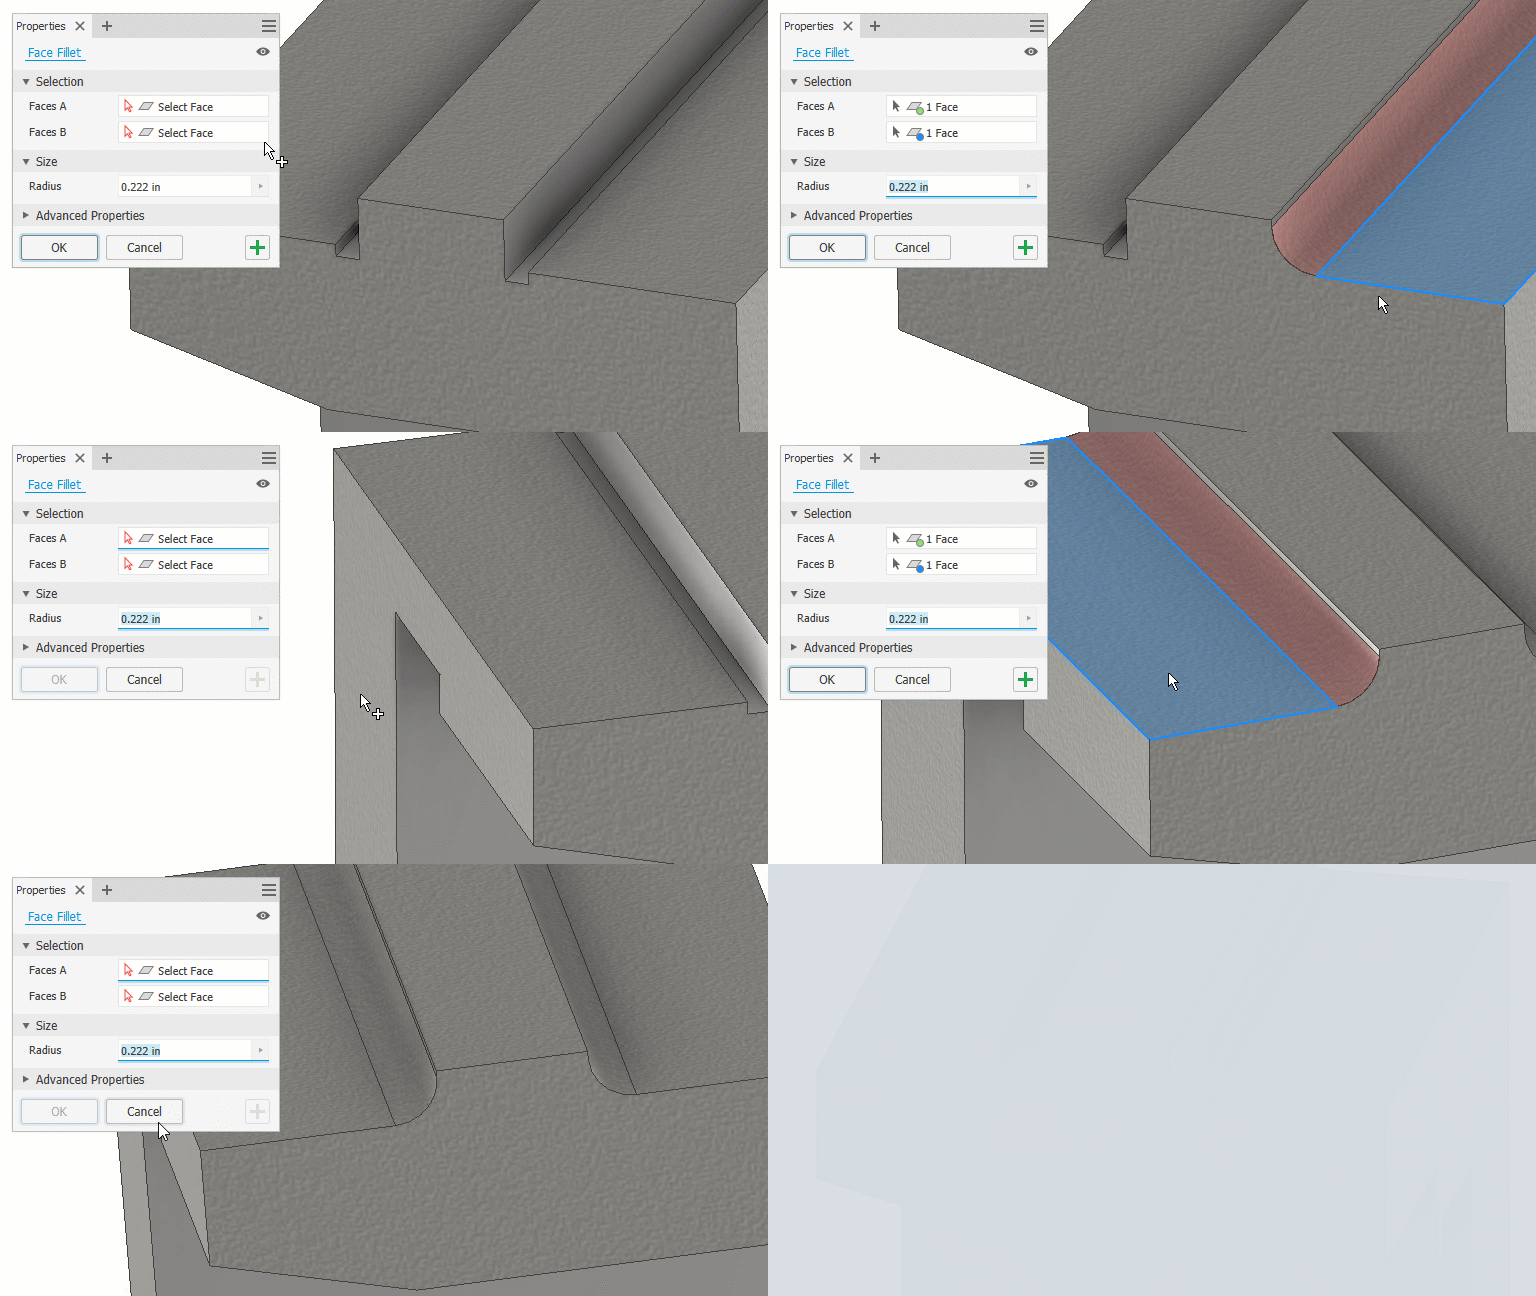
What's New: 2022
Adds a fillet feature between two non-adjacent faces of a single solid. If there are contiguous features, these are capped and filled to create the fillet.


- Click 3D Model tab
 Modify panel
  Fillet
 Face Fillet.
- In the canvas, select the first face or face set.
Note: To select more than one face per face set, clear the check box for Optimize for Single Selection. To finish a particular multiple selection, click on the next face select set or right-click in canvas space and click Continue
- Select the second face or face set.
- Enter a radius.
- Advanced Properties. Select from the following options as needed:
- Preserve All Features. When selected, checks all features that intersect with the fillet. Their intersections calculate during the fillet operation. When not selected, only the edges that are part of the fillet operation calculate during the operation
- Include Tangent Faces. Select to allow the fillet to continue over tangent, adjacent faces automatically. To create the fillet between only selected faces, clear the check box. This option does not add faces to or remove faces from the selection set.
- Optimize for Single Selection. After the first face is selected, the second face selector is activated minimizing the steps for selecting single faces.
- Help Point. In rare conditions, face fillets have multiple solutions. Specifying a help point can help resolve ambiguity, allowing face fillet to provide the appropriate solution. Select to enable help point selection, and then specify a location on a selected face which is nearest to the appropriate fillet. The proximity of the selected point forces the creation of the resulting fillet at the intended location.
- Click
OK to finish and close the property panel. Click
 Apply to continue applying fillets and rounds.