Let's look at what happens when you use the Save or Save as command in Inventor to save an assembly file and it's references on a local drive to a connected drive or to save from a connected drive to a local drive.
- The referenced files are saved in a folder called Related Data. The files aren't saved as a hierarchy based on the project file settings.
- The referenced files aren't immediately uploaded. The referenced files will be uploaded to a folder named Related Data on the connected drive after Inventor is closed.
Note: Also, when you close Inventor, the context of a project files/search path is lost.
To maintain the folder structure, refer to the information below for saving an assembly file to and from a connected drive.
To Save Assembly Files to a Connected Drive
- Save the files, and then close Inventor.
- Then, using Windows Explorer, drag and drop the files from your local drive to your connected drive.
Important: Inventor must be closed for the referenced files to be uploaded/saved with new edits to the connected drive. If you're working concurrently on Inventor files with others, it's important to remember the changes made to a file won't be consumed by others until the person who has made the edits has saved the file and also closed Inventor.
To Save Inventor Files on a Connected Drive to a Local Drive
Use the Export context menu option to export a file to your local drive. The default .ipj for the project is used and all file references are exported to the specified folder.
- Right-click on a file in a connected drive that you want to export and select Export.
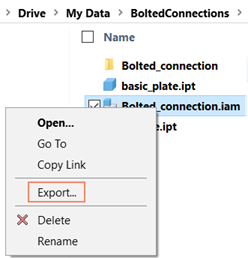
- Navigate to the folder to which you want to export the file and its references and click Select Folder.
The files are placed as a hierarchy based on the project file settings.