You can create, edit, rename, run, and insert snippets into rules.
What's New: 2018.2, 2019, 2019.2 2022.1 2022.1
Create Rule
Before you create a rule, create any parameters that you want to include in the rule.
- On the ribbon, click
Manage tab
 iLogic panel
Add Rule
iLogic panel
Add Rule
 .
.
- In the Rule Name dialog box, enter the name of the new rule, and click OK.
- Use the Edit Rule dialog box to define the rule.
- In a part or drawing document, click a parameter group to display that list of parameters in the Parameters tab on the right. Then, double-click a parameter in the list to insert that name into the rule
text.
In an assembly document, select the 3D Model tab to display the assembly components, or select the File Tree tab to display the subassembly and part files. Expand a part file item to display the parameters and features within that file.
Note: When you click a non-parameter item in the Model tree, its name is listed under the Names tab (next to the Parameters tab). You can double-click an item in this list to insert the name into the rule. Many of the Drawing snippets require a view name. Double-clicking on the appropriate item in the list can provide you with a view name from the current drawing for inclusion into the rule. - Right-click on an item, and select
Capture Current State to insert text into the rule that assigns values to the item.
For example, capture the current state of a parameter to insert the parameter and its current value, such as d0 = 4.0 in.
Parameters are always captured with their units, but units are not required when you write new equations. You can right-click on a parameter group to capture the state of all parameters of a specific type. You can also right-click on a feature or component to capture its current IsActive state (suppressed or unsuppressed).
You can also capture the current state of the following:
- Capture Current State (Components. Add) Generates Components.Add function. Creates a component from the selected file.
- Capture Current State (Components Constraints.Add) Generates the new Constraints.Add function. Creates a constraint from the selected file.
- Use the snippets listed under the System and Custom tab in the Snippets area to add functions which can then be customized for the rule. Double-click a snippet to add it to the rule.
- Use the choices on the editing toolbar above the rule text area to manipulate the appearance of the rule. You can also use the choices to insert conditional statements, keywords, and operators.
- In a part or drawing document, click a parameter group to display that list of parameters in the Parameters tab on the right. Then, double-click a parameter in the list to insert that name into the rule
text.
- Click Save to save your edits and continue editing. Click Save & Run to run the rule.
Edit Rule
- On the ribbon, click
Manage tab
iLogic panel
iLogic Browser if the browser is not currently displayed.

- In the iLogic Browser, click the Rules tab to edit a rule in the open document. Or, click the External Rules tab to edit a rule for the component that is in an external file.
- Double-click the rule, or right-click and select Edit Rule from the context menu.
- Use the Edit Rule dialog box to edit the rule. As you enter text, the appropriate color coding is applied to your text for readability.
- Click Save or enter CTRL +S to save your edits and continue editing. Click Save & Run to run the rule.
Rename Rule
To rename a rule, click twice slowly (two discrete clicks) on the name in the iLogic Browser to enable editing, and then change the existing name.
Copy Rule
- In the iLogic Browser, click the Rules tab.
- Right-click and select Copy from the context menu. Or, use Ctrl+C.
- Use Ctrl+V, or right-click and select paste to paste the rule to the same document.
Copy Rule to another document
- In the iLogic Browser, click the Rules tab.
- Right-click and select Copy from the context menu.
- Switch to a desired document and paste the rule to the Rules tab.
Insert Rule Syntax or Snippet
- In the Edit Rule dialog, position the cursor at the destination in the rule.
- Do one of the following:
- To insert a syntax string, use the drop-down lists on the toolbar above the rule text area.
- To insert a code snippet, click the System or Custom tab in the Snippets area and double-click a snippet.
- Edit the inserted string or snippet as necessary.
Filter Snippets
- Double-click the rule, or right-click and select Edit Rule from the context menu to display the Edit Rule dialog.
- Click the Search icon.
- Type the text to search for.
Work with Collapsible Regions in Rules
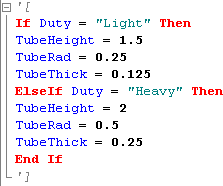
- To define a collapsible code region, begin the code with a single quote and a left square bracket; end the code with a single quote and a right square bracket.
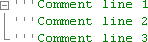
- To define a collapsible comment, insert three single quotes at the beginning of each line of the comment.
- To collapse the code or comment, click the node icon (-).

- To toggle the expansion of the code region or comment at the cursor location, right-click and select
Outlining
Toggle Outlining Expansion.
- To toggle the expansion of all collapsible code regions and comments in the rule, right-click and select
Outlining
Toggle All Outlining
.
- To disable all outlining capabilities and expand any collapsed code regions or comments, right-click and select
Outlining
Stop Outlining
. To reenable outlining capabilities, right-click and select
Outlining
Start Automatic Outlining
.
Run Rules
To run a rule manually, right-click the rule in the iLogic Browser, and select Run Rule.
To ensure that the parameters in the rule are synchronized with the model, right-click and select Regenerate Rule before running the rule. To synchronize the parameters in all rules with your model, select Regenerate All Rules.
To run another rule explicitly within a rule, use the iLogicVb.RunRule function.
Options
To Control How Rules Run
- Open the rule in the Rule Editor.
- On the Options tab, select the desired options:
- Suppressed. Prevents the rule from running automatically. (You can run a suppressed rule manually. You can also suppress a rule in the iLogic Browser.)
- Silent Operation. Runs the rule without displaying Inventor dialogs.
- Fire Dependent Rules Immediately. Runs dependent rules when referenced parameters change value.
Note: By running dependent rules immediately, you can include explicit model updates after you set the parameters. At the time of update, the parameters have changed and the dependent rules have run.
- Don’t Run Automatically. Prevents the rule from running when parameters change. If you select this option, you can run the rule manually or use event triggers or iLogicVB.RunRule to run the rule.
To Share Code Between Rules
- Open the rule in the Rule Editor.
- Select the Options tab.
- Select the check box labeled Straight VB code.
- Click OK.
iLogic does not pre-process the code in a rule identified as Straight VB code; therefore, Inventor parameter names are not recognized in the rule. The rule should contain Classes or Modules that can be called from other rules. Use this option to share code between rules, or as a way to keep code modular. However, note that shared code is more difficult to write.
To Set Font and Syntax Coloring
These options affect the appearance of the rule text in the rule editor.
- Font: Click Select Font and make a selection.
- Syntax Coloring: Click the drop-down arrow and select Modern or Classic.
Select Syntax
This option affects only assemblies, when Capture Current State is used on a parameter in a component within the assembly:
- Open the rule in the Rule Editor.
- Select the Options tab.
- Select the Use component names checkbox to include component names (for example,
Parameter("PartA:1", "d0") = 5.6 in) as part of the syntax. This choice is recommended for portability.
Alternatively, clear the checkbox to exclude the component names (for example, PartA.ipt.d0 = 5.6 in).
- Click OK.
Note: You can insert a parameter into a rule by clicking its name while creating rules at the assembly level. If you later change the component name to something other than its original filename, using parameter syntax makes it easier to find the component.
Delete Rules
- On the ribbon, click
Manage tab. In the
iLogic panel
, do one of the following:
- To delete a rule, display the iLogic Browser; then right-click the rule and select Delete.
- To delete all rules in the document, select Delete All Rules from the iLogic panel’s drop-down menu.
Note: If you use Delete All Rules in an assembly, all rules in the subassemblies and parts are also deleted.
Create External Rule
- Open an existing rule.
- Copy the code.
- From the iLogic Browser’s External Rules tab, create a new external rule and paste the copied code.
- Save external rules as .iLogicVb files (recommended), or as VB or TXT files. Save external rules to a folder that iLogic can find when running them from another rule. iLogic looks for external rule files in the following order:
- The folder in which the current Inventor document is located (allows models to be copied with associated rules).
- The current Inventor Project Workspace folder.
- The list of folders set in iLogic Configuration (generally for work group or company rules).
The iLogic Browser provides a context menu for the top node and for each directory and rule in the tree.
- To create an icon for an external rule that appears in the iLogic browser, create a BMP or PNG file (size 16 x 16 is recommended) with the same name as the rule file, in the same folder. Restart Autodesk Inventor to display the icon.
Edit External Rule
- Open the Edit Rule dialog box, and double-click the rule in the tree to edit it.
- Alternatively, use an external program such as Notepad to edit a rule. After you save the rule, iLogic will automatically detect the changes that were made to the rule files and update to the browser.