The Create Map Book dialog box guides you through all the settings needed for a map book. You can save your settings to use for future map books.
To specify the map book settings
- On the Display Manager tab of the Task Pane, right-click the City_Boundary layer and click Zoom To Extents.
- Save the map file.
You cannot publish a map to any format without saving it first.
- Switch the Task Pane to Map Book and click New
 Map Book.
Each item on the left displays settings on the right.
- In the Create Map Book dialog box, for Source, click Model Space. Optionally, change the Map Book Name.
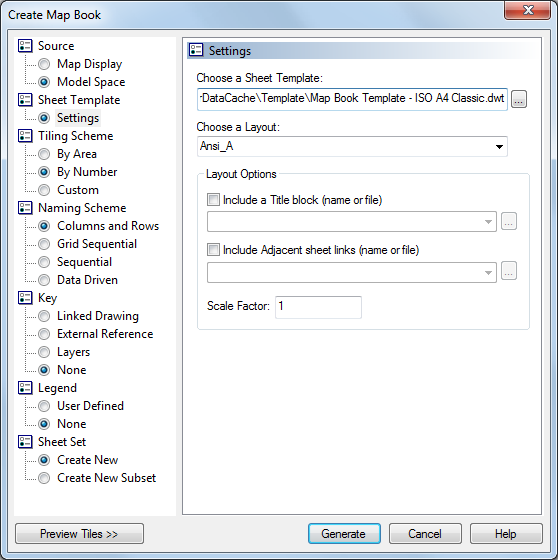
- For Sheet Template, do the following:
- Click Settings.
- Click the browse button for Choose A Sheet Template and navigate to the saved template you created (Map Book Template - Inset.dwt).
If the dialog box does not display the templates directory, navigate to C:\users\your_name\Local Settings\Application Data\Autodesk\AutoCAD Map 3D 2022\R24.1\enu\Template.
- Leave the layout set to Ansi_A.
- For Layout Options, check Include A Title Block (Name Or File) and Include Adjacent Sheet Links (Name Or File).
- For the title block , click the down arrow and click Title Block. For adjacent sheet links, click the down arrow and click Adjacent_Arrow_4.
- Set the scale factor to
5000.
Note: If you do not set the Scale Factor, the map book will comprise a large number of tiles. Be sure to set it to 5000.
- For Tiling Scheme, do the following:
- Click By Area.
- Click Select Area To Tile and drag a rectangle around the extents of the map.
- Leave the other settings set to their defaults.
- For Naming Scheme, click Columns And Rows. Leave the settings set to their defaults.
- For Key, click External Reference. Browse to the
key view map you created in the
previous exercise and select it.
The Key Map viewport will display the key map you generated in the previous exercise.
- For Legend, click User Defined.
The Legend viewport will display the legend you generated in the previous exercise.
- For Sheet Set, click Create New.
Do not generate the map yet. Leave the dialog box open for the next exercise.
To continue this tutorial, go on to Exercise 3: Preview and generate the map book.