You can see how the map book will be divided into tiles before you generate it.
To preview and generate the map book
- With the Create Map Book dialog box still open from the previous exercise, click Preview Tiles.
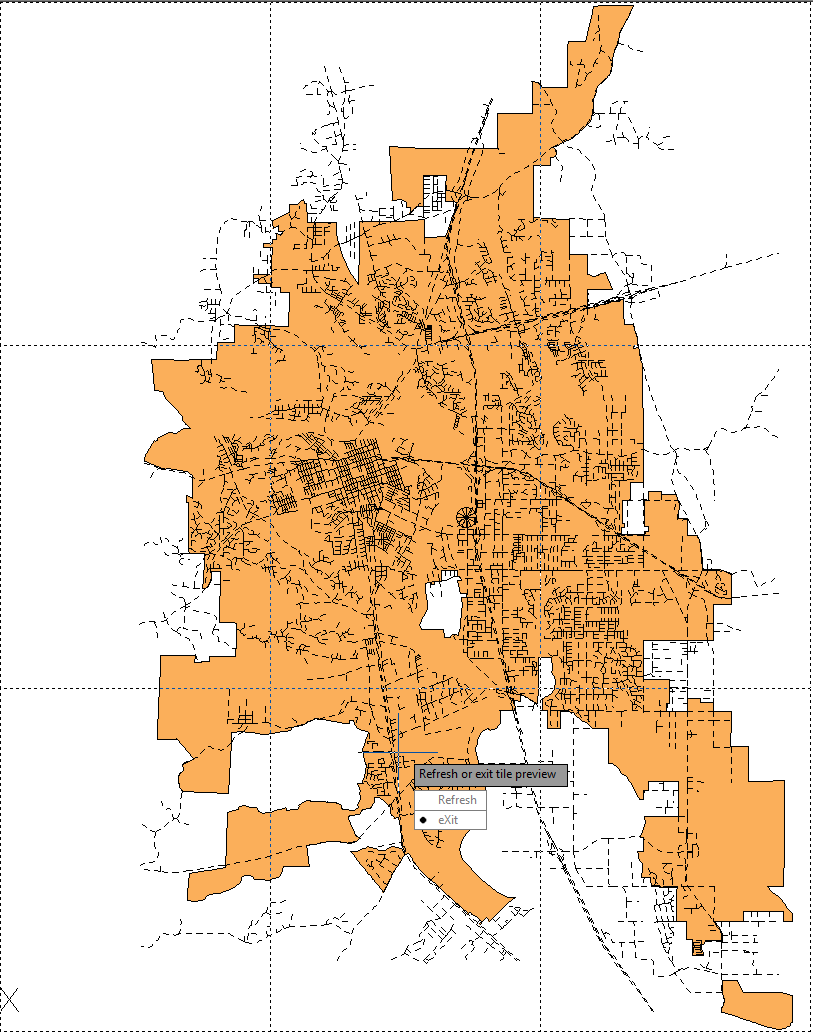
The preview shows how the tile divisions for the map book.
- When you are finished examining the preview, press Enter to select the eXit option and return to the Create Map Book dialog box.
- Click Generate to create the map book.
When you generate the map book, the tiles are listed in the Task Pane, and one layout tab is displayed for each tile.
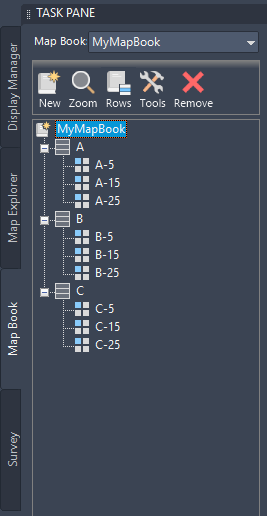
Each letter represents a row of tiles, with the numbered tiles for that row indented below it.

One layout tab is created for each of the map book tiles
- Click one of the new layout tabs to see the portion of the map that it contains.
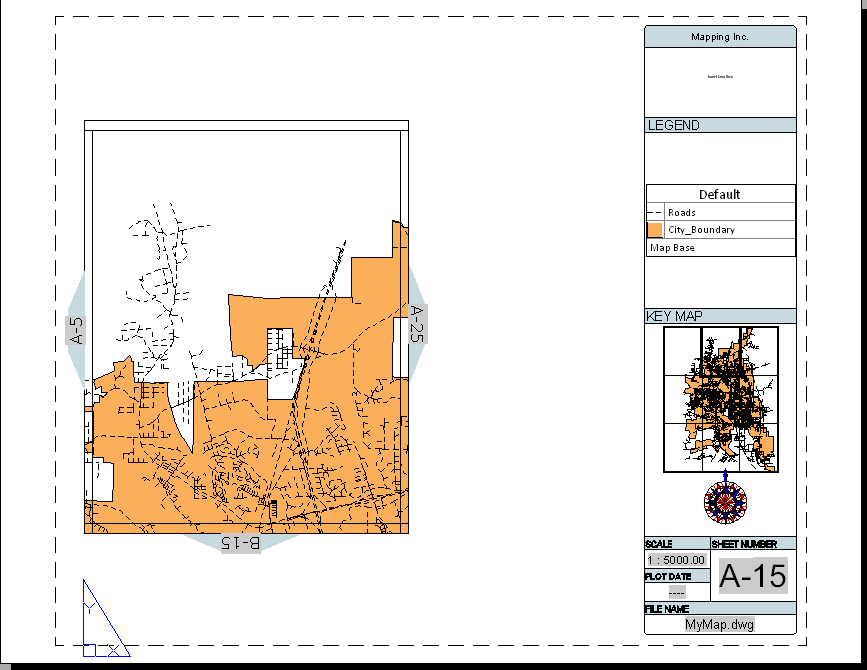
The map tile for the layout tab appears in the main viewport.
- The title block contains the name of your organization.
- The Legend viewport displays the legend for the map.
- The Map Key viewport displays the map as a whole.
- The north arrow is the one you added.
- The File Name is the name of the current map drawing.
- Hold down the Ctrl key and click one of the adjacent arrows.
The view changes to show the adjacent tile.
- To save the map book settings for future use, right-click the map book name on the Map Book tab of the Task Pane. Click Save Settings. Specify a name and location for the settings file.
To use these settings for a different map book, follow these steps:
- Open the map file to publish to a map book.
- Switch to Map Book in the Task Pane.
- Click New
 Map Book From Settings.
- Select the settings file you saved.
Where you are now
You previewed and generated the map book, producing multiple tiles that each contain a portion of the original map. You used the layout tabs to view individual tiles, and the adjacent arrows to move between tiles.
To continue this tutorial, go to Lesson 4: Create The Inset.