A workflow automates a set of processes. You can specify the parameters for the processes, or fill them in when you (or others) run the workflow.
In this lesson, you edit the predefined workflow that creates Display Manager layers from a folder full of SDF files and saves them to .layer files. You create a group to hold the layers, and you move the layers into the new group.
To edit the workflow
- In
AutoCAD Map 3D toolset, create a map.
- Click

 New Drawing.
- Select the map2d.dwt template and click Open.
- Click
- Open a sample workflow.
- Click .
- On the , click Open Workflow From File in the drop-down list.
- Navigate to the sample workflow included as part of the sample data for this tutorial. Open Batch Save Layer.xoml.
- Click
 (Edit).
- In the Workflow Designer, make sure the
AutoCAD Map 3D toolset toolbox is expanded in the activity panel on the right.
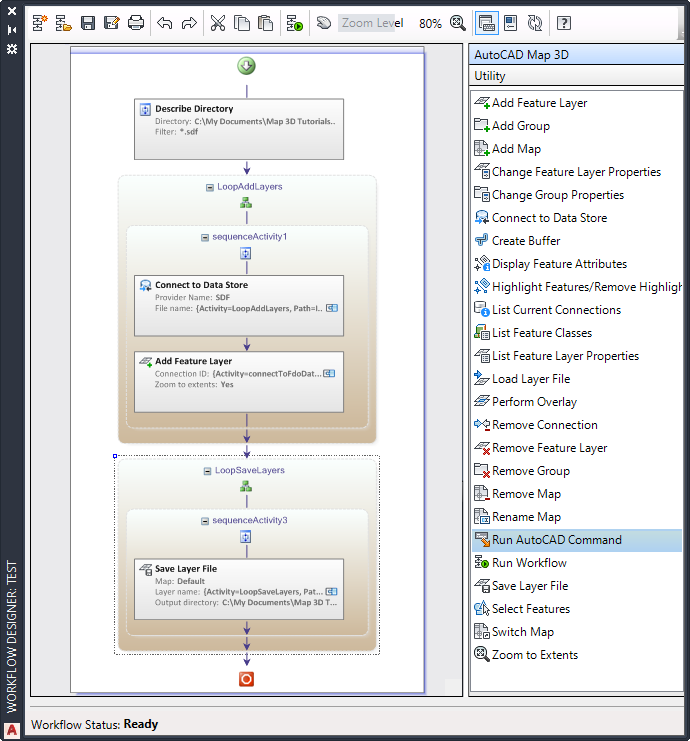
Expand the AutoCAD Map 3D toolset activities on the right. Click Fit To Screen Size to see all activities at once.
- Double-click the Expose Directory Contents activity to open the input editor.
This activity searches the specified folder for files based on the specified filter, in this case, for all SDF files.
- Specify a folder containing SDF files.
Select a folder that contains two or three SDF files. If you do not have a folder of SDF files, you can use the sample SDF files that come with the tutorials to create one.
- Drag the Add Group activity from the activity panel and place it just before the LoopAddLayers activity. (Since you need only a single group, you place it outside the LoopAddLayers activity.)
LoopAddLayers is a ForEach activity, which iterates a specified action on a specified collection of items. This type of activity is found in the Utility toolbox.
In this case, the ForEach activity has been renamed “LoopAddLayers” to describe what it does. The activity examines each SDF file in the folder designated in the Expose Directory Contents activity. For each iteration, it connects to an SDF file and adds a feature layer to Display Manager.
The new Add Group activity creates a group to hold the new layers. Since the LoopAddLayers activity adds layers to the group, the group must be created before the looped activity begins.
- Double-click the new Add Group activity to see its input editor. Set its parameters as follows and then click OK:
- Name the new group SDFLayers.
- Under Show Optional Parameters, name the activity Add SDFLayersGroup.
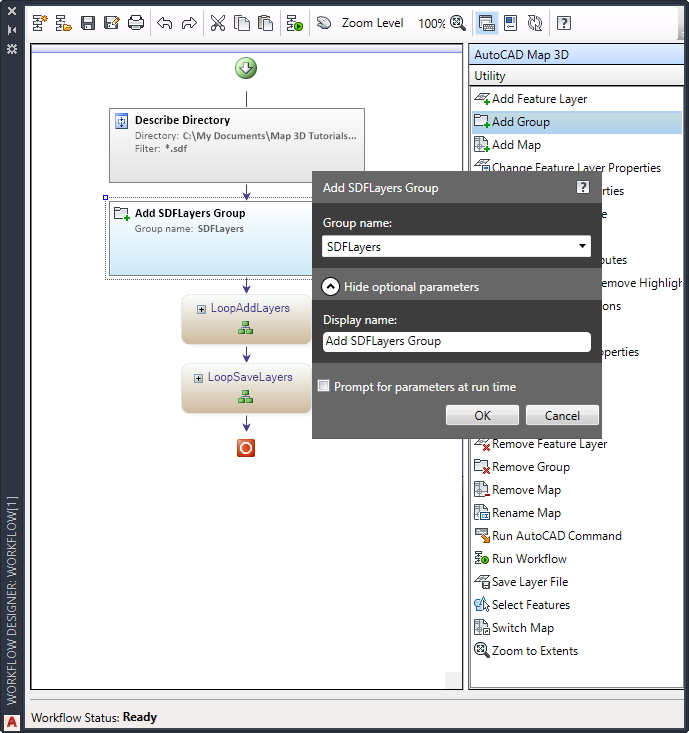
Drag the Add Group activity just above the LoopAddLayers activity and change its parameters.
- Expand the LoopAddLayers activity by clicking its plus sign.
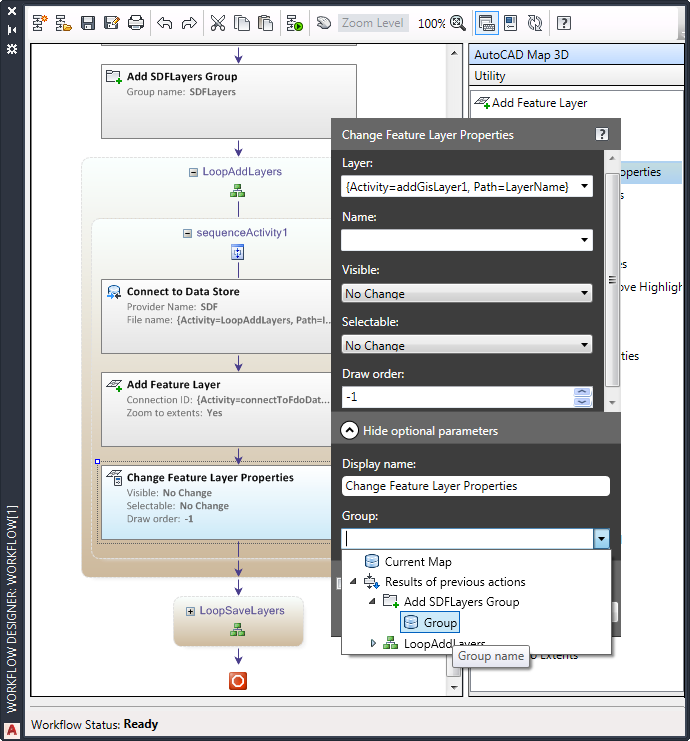
- Drag the Change Feature Layer Properties activity from the activity panel and place it inside the LoopAddLayers activity, under Create Layer.
Because you want to change the Group property for each layer you add, place this activity inside the ForEach activity called “LoopAddLayers.”
- Double-click the new Change Feature Layer Properties activity. Set its parameters as follows and click OK:
- For Layer, select the output of the Create Layer activity.
By selecting the output of a previous activity, you are “binding” the current activity to its predecessor. The result of the previous activity does not yet exist in the current map. Binding allows you to specify a layer that will be created when the workflow is run.
Click the down arrow next to the Layer field and, under Results Of Previous Actions, expand the Create Layer activity and select Layer.
- For
Group, select the output of the Add SDFLayers Group activity.
Expand the Show Optional Parameters section. Click the down arrow next to the Group field and, under Results Of Previous Actions, expand the Add SDFLayers Group activity and select Group.
Drag the Change Feature Layer Properties activity inside the LoopAddLayers activity and place it just after Create Layer. Change its parameters to specify the layers to change and the group for the layers.
- Change the Display Name for the activity to Add SDF Layers to Group.
- For Layer, select the output of the Create Layer activity.
- Save the edited workflow with a different name.
- Use Save As
 instead of Save so you do not overwrite the predefined workflow.
- Enter a location and a name for the workflow. Call the new workflow Batch Save Layer Expanded.
- Click Save.
- Use Save As
To continue this tutorial, go to Exercise 2: Automate AutoCAD commands.