To complete the workflow definition, add the layers to a group and automate an AutoCAD command. Then save and test the workflow.
This exercise uses the workflow you modified in Exercise 1: Automate grouping layers.
To complete the workflow definition
- If the workflow you started in Exercise 1: Automate grouping layers is not still open, open it.
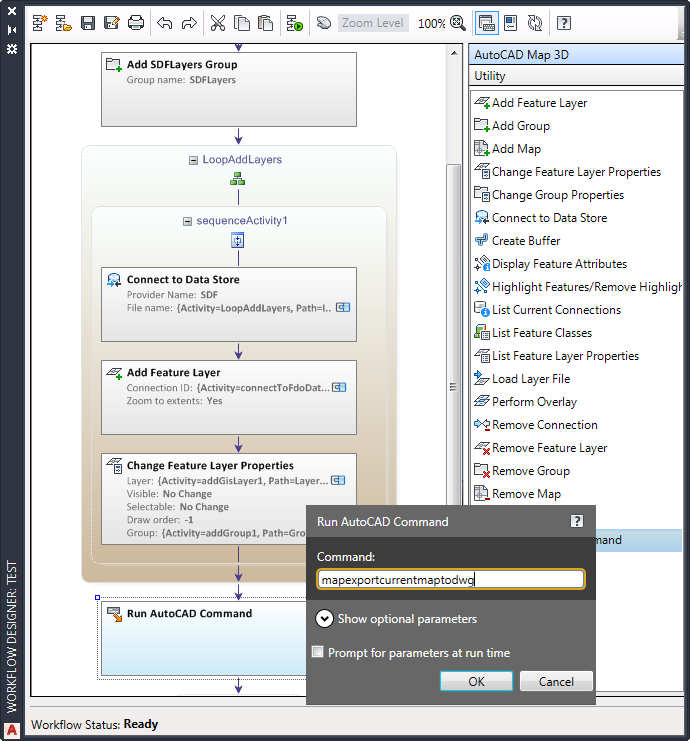
- Drag the Run AutoCAD Command activity from the activity panel and place it just after the LoopAddLayers activity in the workflow.
Use a command line option to save the current map as a separate DWG file. You can run any command that you can enter on the command line.
Because this activity applies to the entire map, it does not have to loop. Therefore, you place it outside the LoopAddLayers activity
- Double-click the Run AutoCAD Command activity and set its parameters as follows:
- For Command, enter mapexportcurrentmaptodwg.
- Under Show Optional Parameters, change the Display Name to Save The Map As A DWG File.
Add the Run AutoCAD Command activity just before the LoopSaveLayers activity. Enter the command name.
When you run the workflow, it prompts you for a location and file name for the DWG file. If you wanted to, you could specify those parameters as part of the workflow.
- Expand the LoopSaveLayers activity.
This activity saves each layer in the current map as a .layer file in the specified folder
- Double-click the Save Layer File activity and specify a folder for the .layer files. Click OK.
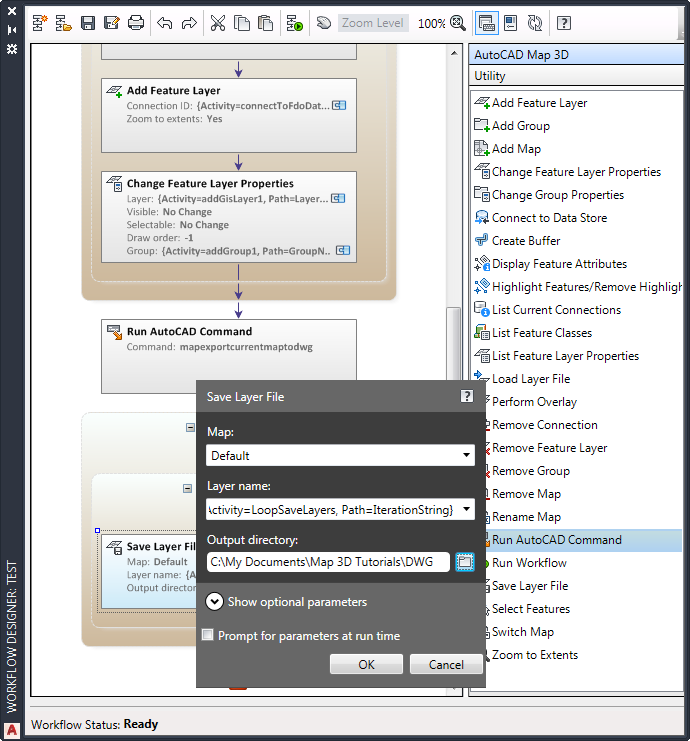
Change the output directory for the Save Layer File activity.
- Save the workflow.
- Leave the Workflow Designer open.
To continue this tutorial, go to Exercise 3: Run the workflow.