The Time Editor interprets animation timing with two different concepts: Global and Local.
Because the Time Editor is a Non Linear Editor (NLE), it lets you edit animation data using effects that affect the animation timing, such as Trim, Scale, Loop, and so on. These timing effects act like filters that sit on top of the data to produce the desired result without destroying the original animation. It is helpful to know about how the Time Editor sees clip timing in terms of Global and Local time.
Global Time represents the overall world time of a scene, and Local time is the timing of an individual clip. Most times, there is no difference between the two, but sometimes there is a discrepancy created when you use Group clips, or Time Warps and Speed Curves. These features let you override the Local time of an individual clip with timing effects set on top of it.
When you apply timing effects to an animation clip in the Time Editor, the result displays in the Maya Scene.


The difference between Global and Local timing becomes important when you want to edit the Local time (200 frame) of the animation clip. You may want to access the original "Local" 200-frame length of the clip inside the Group. To edit the Local length of the animation clip without removing it from the Group clip, create a Local Time Tab. To do this, see Create Local Time Tabs for Group clips.
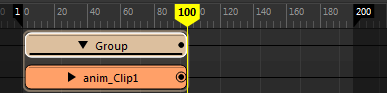
- The Time Editor Current Time Marker is black viewing the Group clip contents to indicate that you are in Local Time.
- The Current Time Marker is frozen and cannot be scrubbed when in Local Time.
- Animation starts on frame 1 instead of frame 0 in a Local Time tab.