Driven keys create an association between pairs of attributes, where one attribute value (or multiple attributes values) drive the value of another. See also Driven keys.
To link attribute values with Set Driven Key
- Select the object with attributes you want to be driven, then select
Key > Set Driven Key > Set (from the
Animation menu set).
The Set Driven Key window appears, listing the selected object as the driven object.
- Select the object with attributes you want to act as the driver, then click
Load Driver in the
Set Driven Key window.
Note: The driven and driver objects can be the same object.
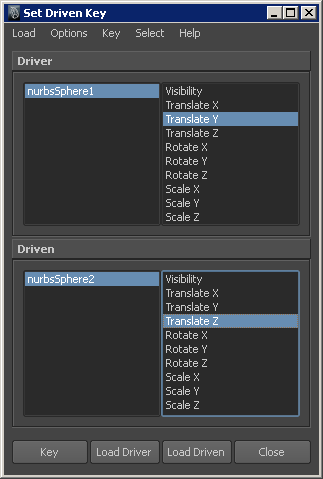
- Select an attribute from the
Driver list, then select an attribute from the
Driven list, and click
Key.
This creates an association between the selected attributes at the current values.
- Change the driver object attribute values, and repeat the step above as many times as you like, creating as many different associations as you need between the pair of attributes. (See also Set Driven Key example.)
Linking multiple attributes
You can use two or more driver attributes to control a single driven attribute, or drive more than one driven attribute with the same driver. For example, you can make a muscle bulge when an elbow joint rotates, but make it bulge even more when the wrist rotates.
The technique is similar to linking two attributes, with the following limitations:
- You can’t select two driver attributes at the same time in the Set Driven Key window. You can set a key for only one driver attribute at a time, so you have to key each driver attribute to a driven attribute separately. You can select and key multiple attributes in a driven object.
- When you load two or more objects into the Driver or Driven lists, no attributes appear for the objects. Click an object in either list to select it and see its attributes.