
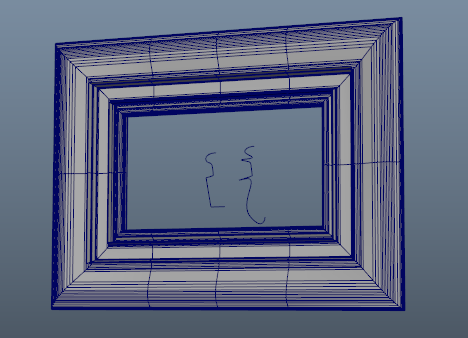
This example shows you how to create a picture frame using a Custom Sweep from the Sweep Mesh tool. You can use these setting to create quick crown moldings, doors, frames, and so on.
Create a basic frame with Sweep Mesh
- Start with a simple 2-dimensional square. (To create a quick square, select . Set the Curve Degree setting in EP Curve Tool Options to Linear.
- In the Viewport, draw three sides of your rectangle and select to add the missing side.
- Have a Profile Curve you want to use as your pattern at the origin. This is what you use to define the shape of your extrusion.
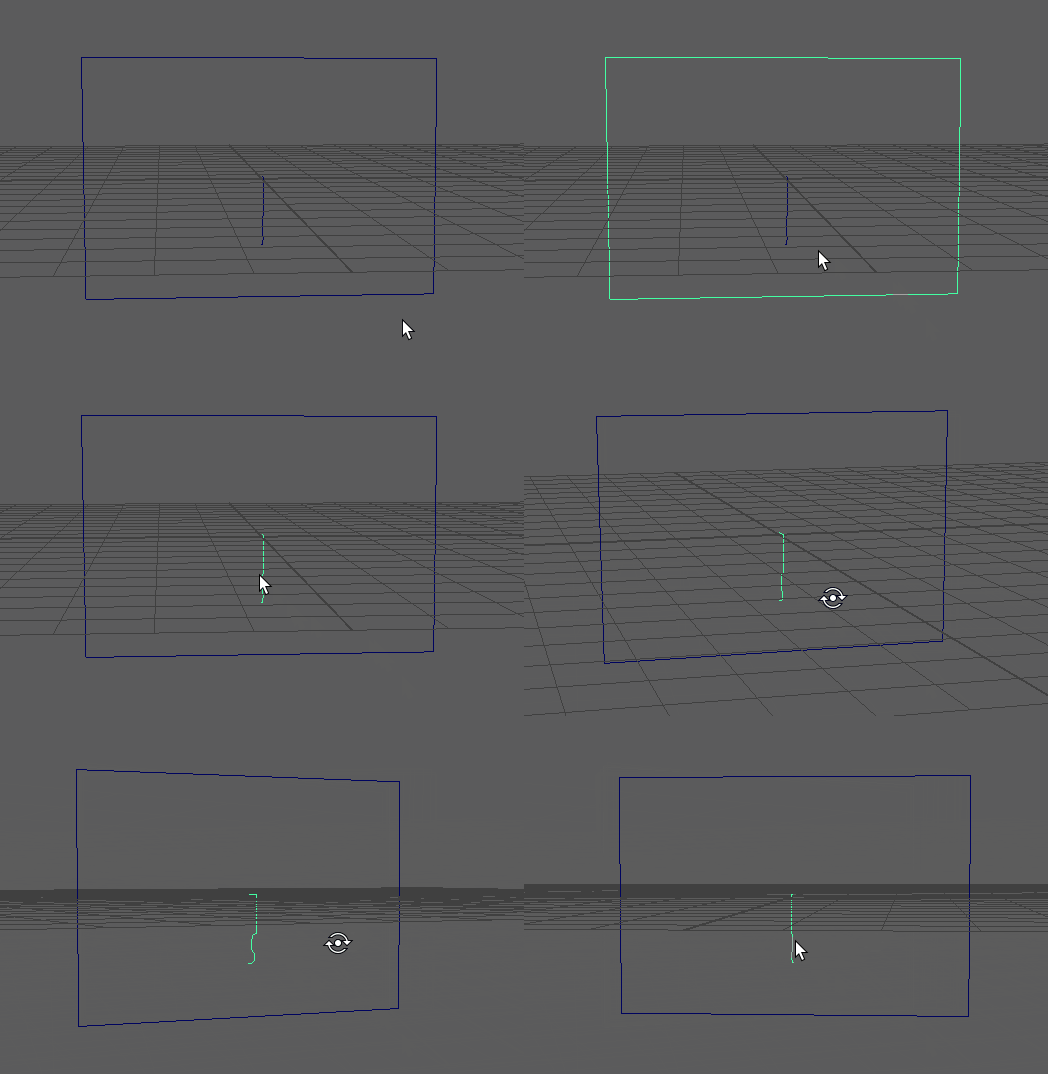
- Select the square and choose
Sweep Mesh
 from the Poly Modeling shelf or
in the
main Maya Menu. The
Sweep Mesh options appear. A default sweep mesh of a frame with rounded corners is created.
- Set the Sweep Profile to Rectangle.
- Reduce the
Corner Radius to create sharp corners.
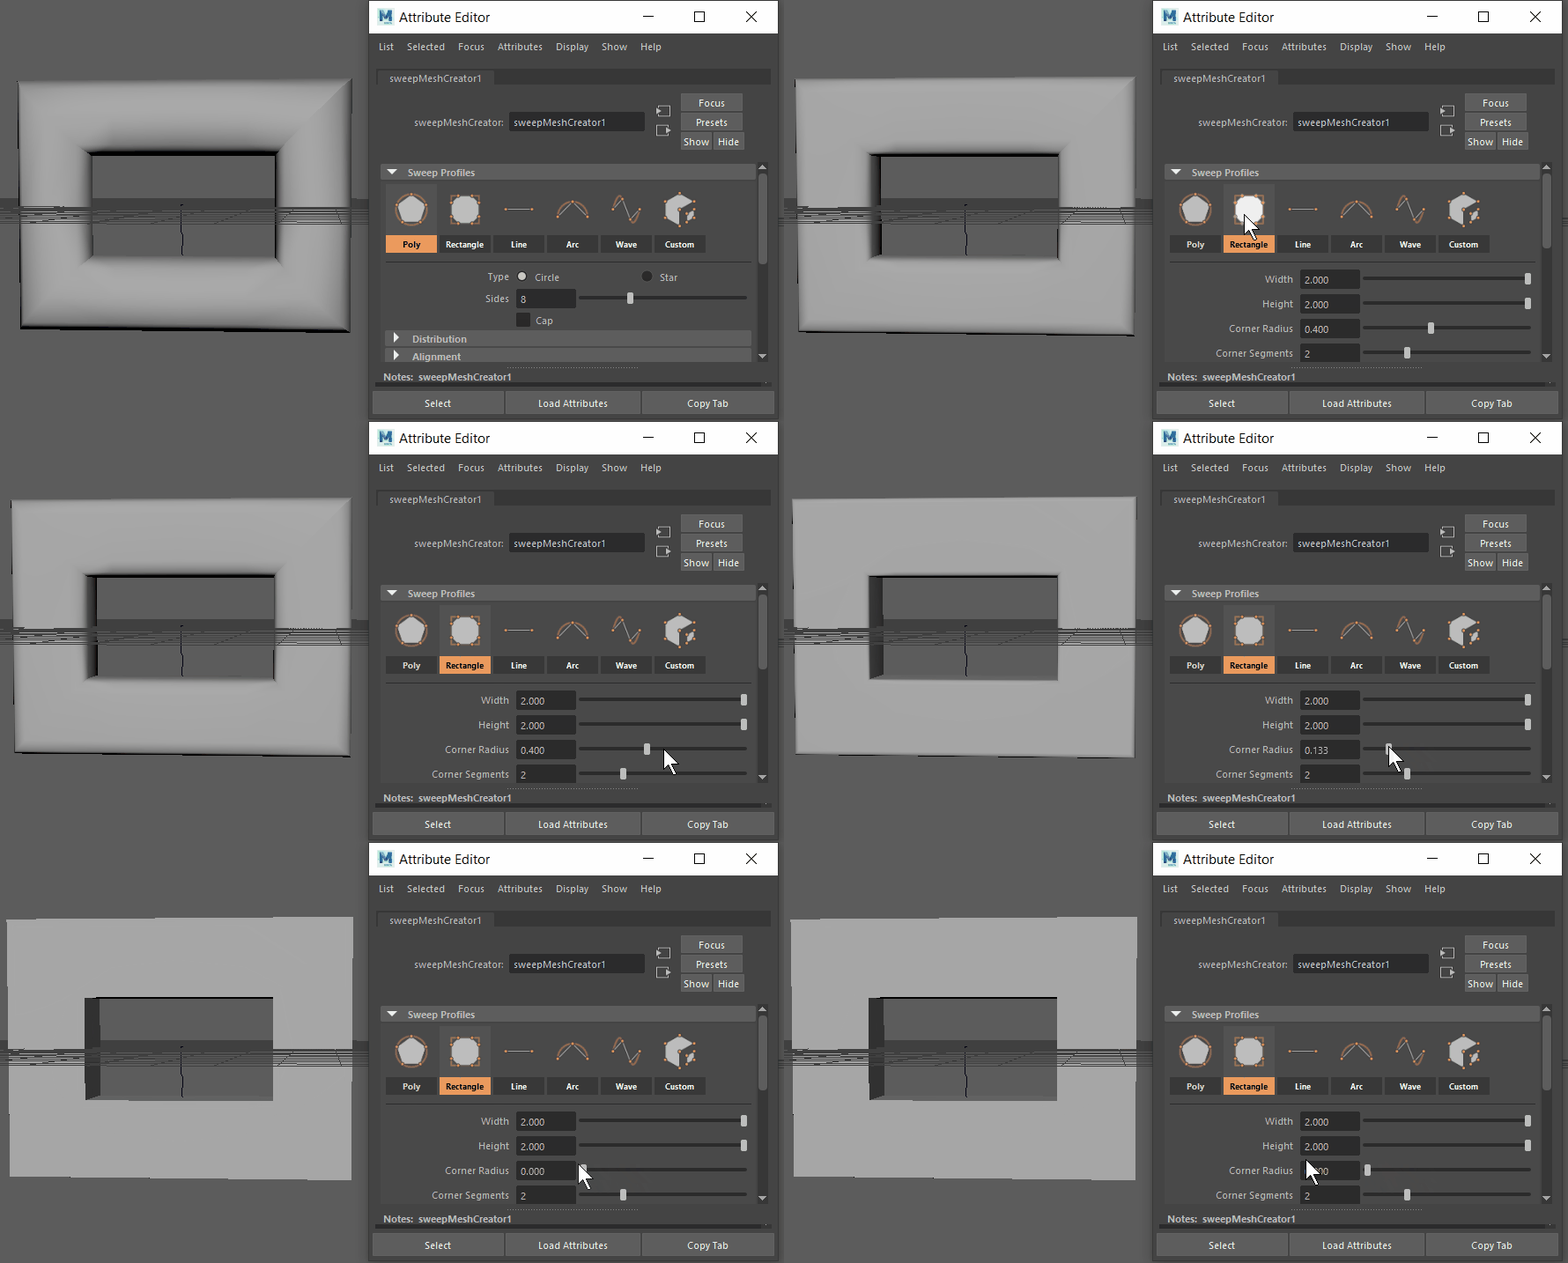
- Adjust the Height and Width settings to change the overall size of the frame.
In the next set of steps, you can use a Profile Curve to add more detail to the frame.
Use a Profile Curve and Custom Sweep
- Using the basic frame shape created in the steps above, in the
Sweep Mesh tool, choose
Custom. The
Custom Sweep Profile dialog opens.
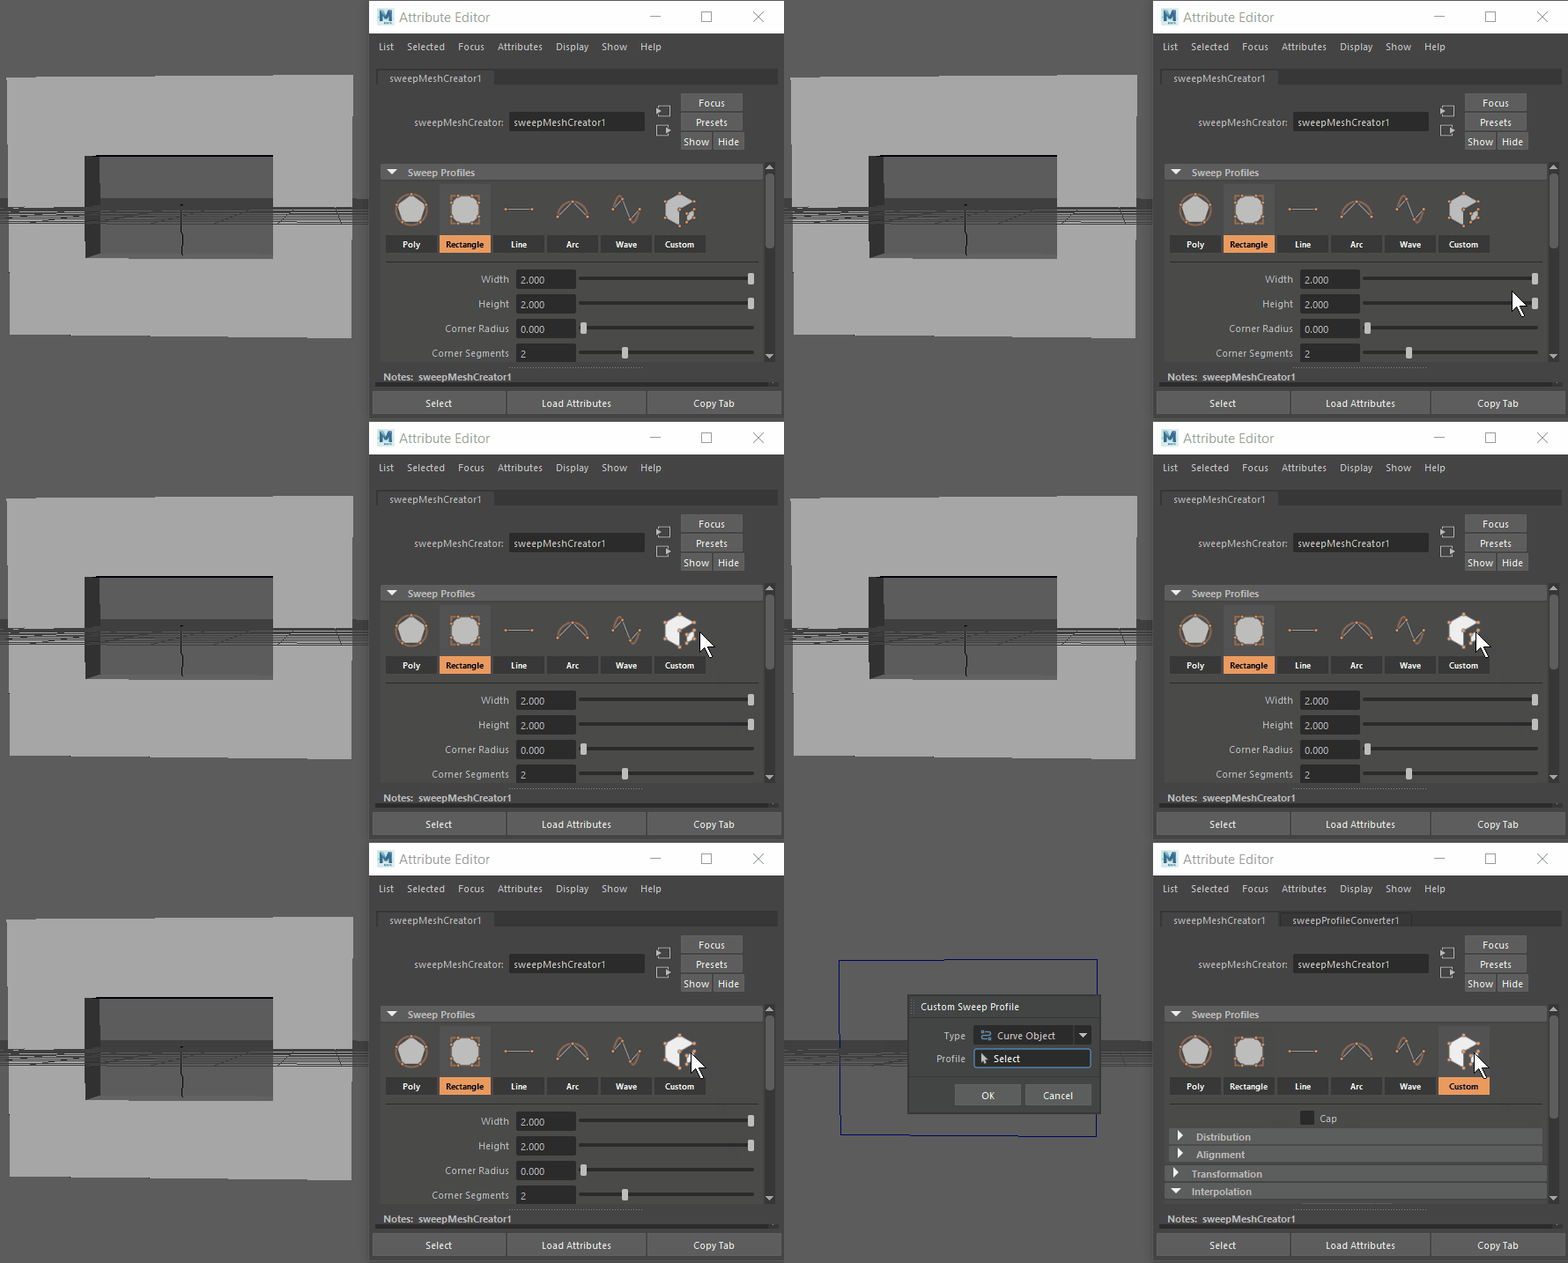
- Make sure the
Type is set to
Curve Object, and click the Profile Curve.
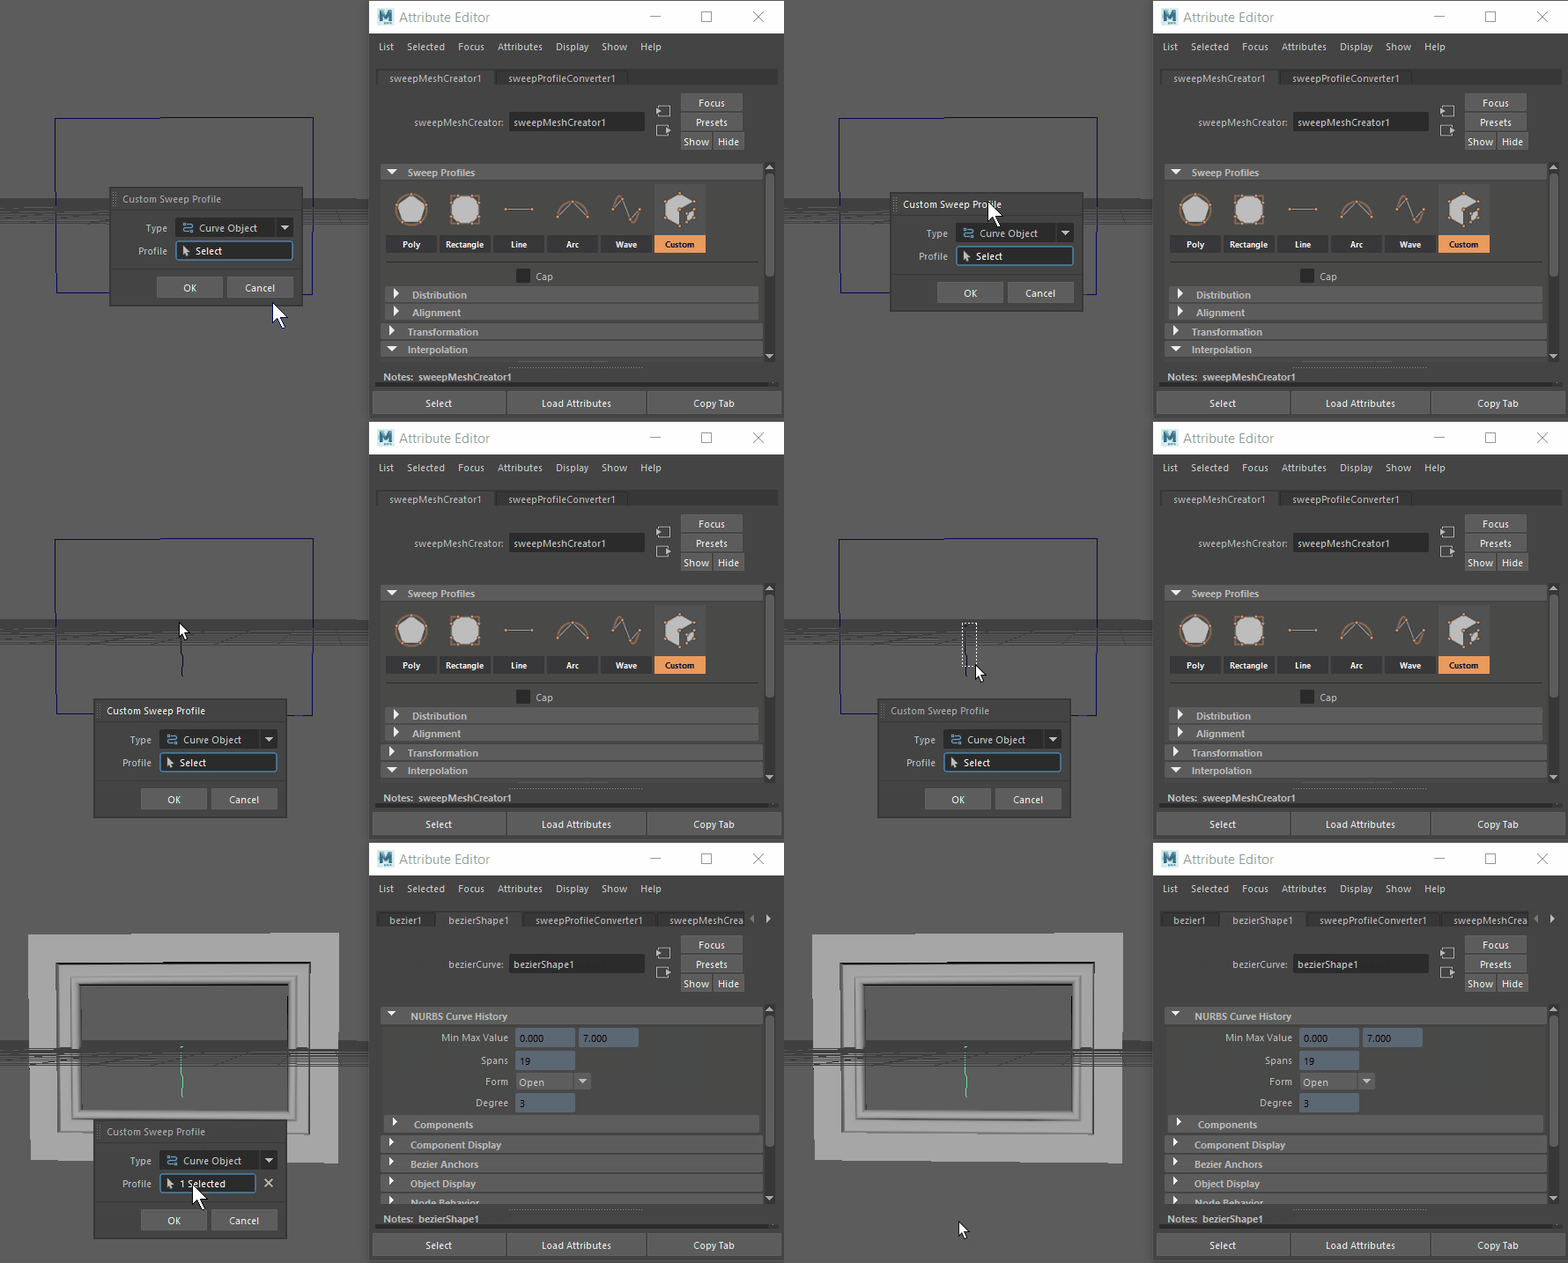
- The orientation of the profile curve affects the result on the mesh. Rotate the Profile Curve in different directions to see various results.
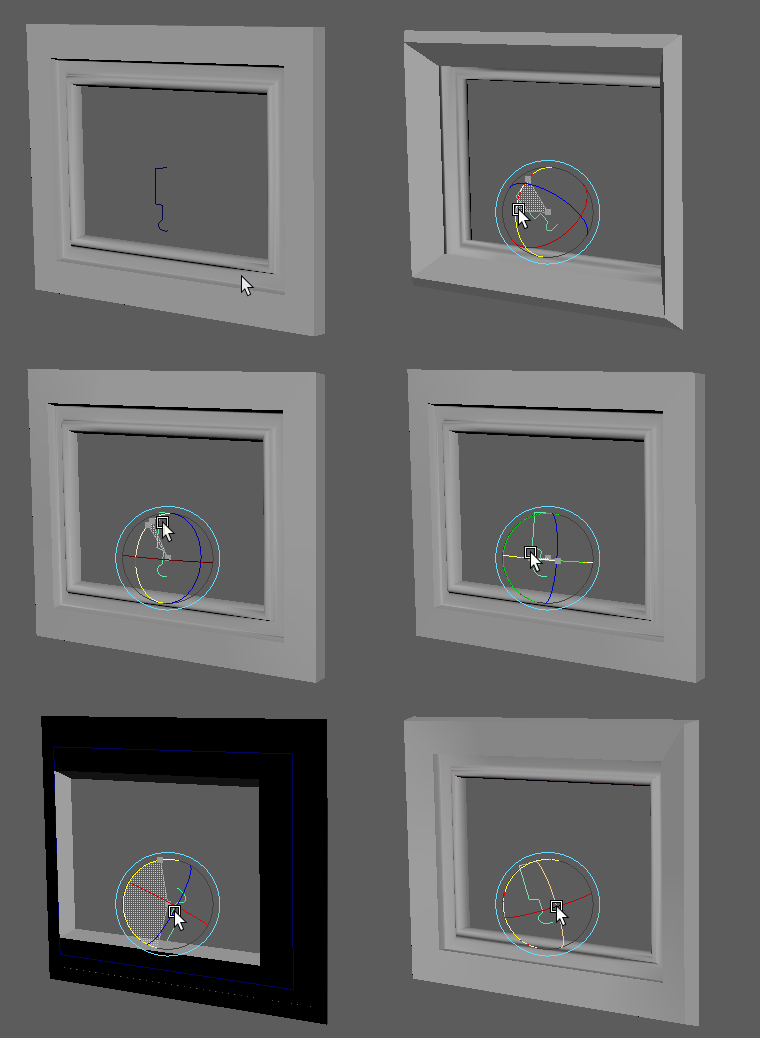
- When the frame looks right, click OK in the Custom Sweep Profile dialog. Clicking OK sets the current Profile Curve orientation.
- Scale the frame mesh to change its dimensions.
The Sweep Mesh keeps a live link to the Profile Curve, so that changes to it also change the resulting mesh. This lets you tweak results as you work. See the following workflow for a demonstration of this effect.
Changing a custom Sweep Mesh by modifying the Profile Curve
- Using the Profile Curve from the example above, duplicate (Ctrl +
D) the Profile Curve and move it next to the original.
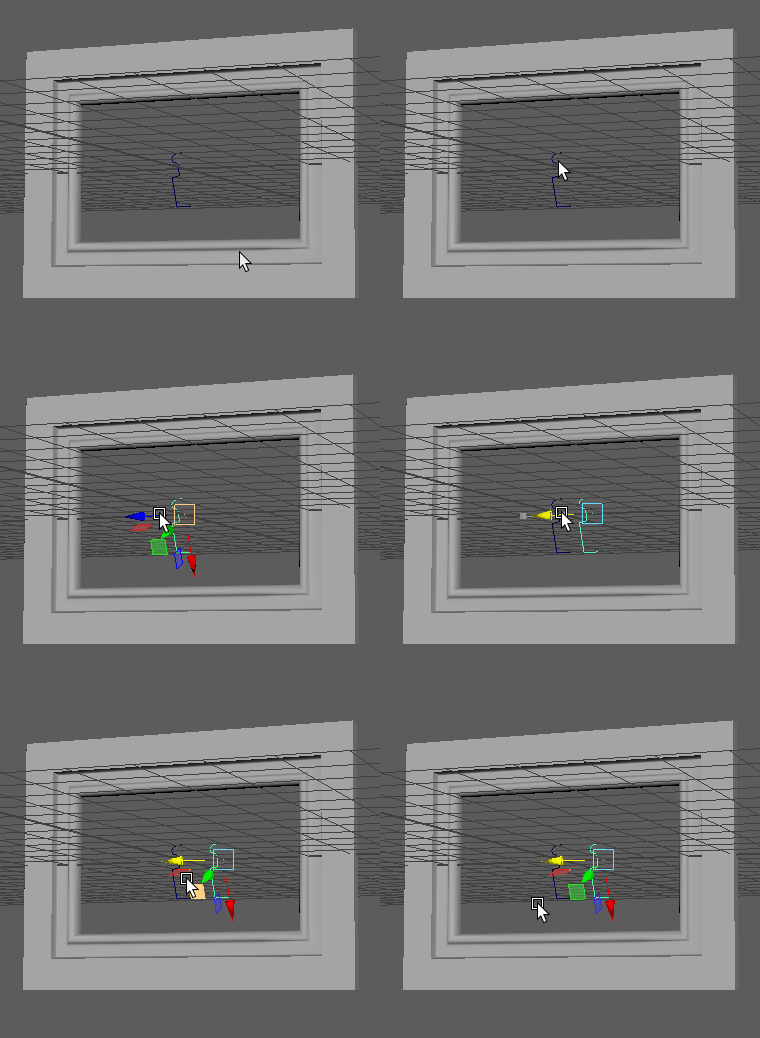
- Select the frame, and the choose Sweep Mesh Creator1 in the Attribute Editor to view the Sweep Mesh tool.
- Click Custom in the Sweep Mesh options and the Custom Sweep Profile dialog opens.
- Select the duplicated Profile Curve and click
OK in the
Custom Sweep Profile dialog to set the second Profile Curve as the driver of the frame.
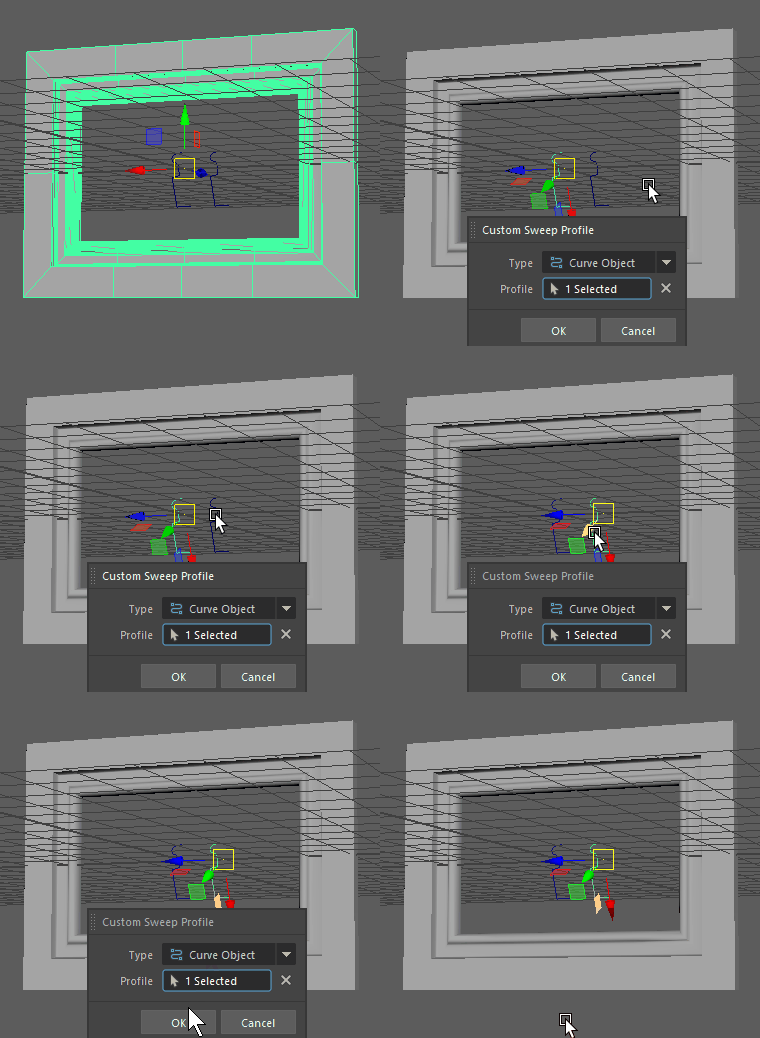
- Modify the second Profile Curve. For example, scale it, or right-click it, choose
Control Vertex, and then move the points.
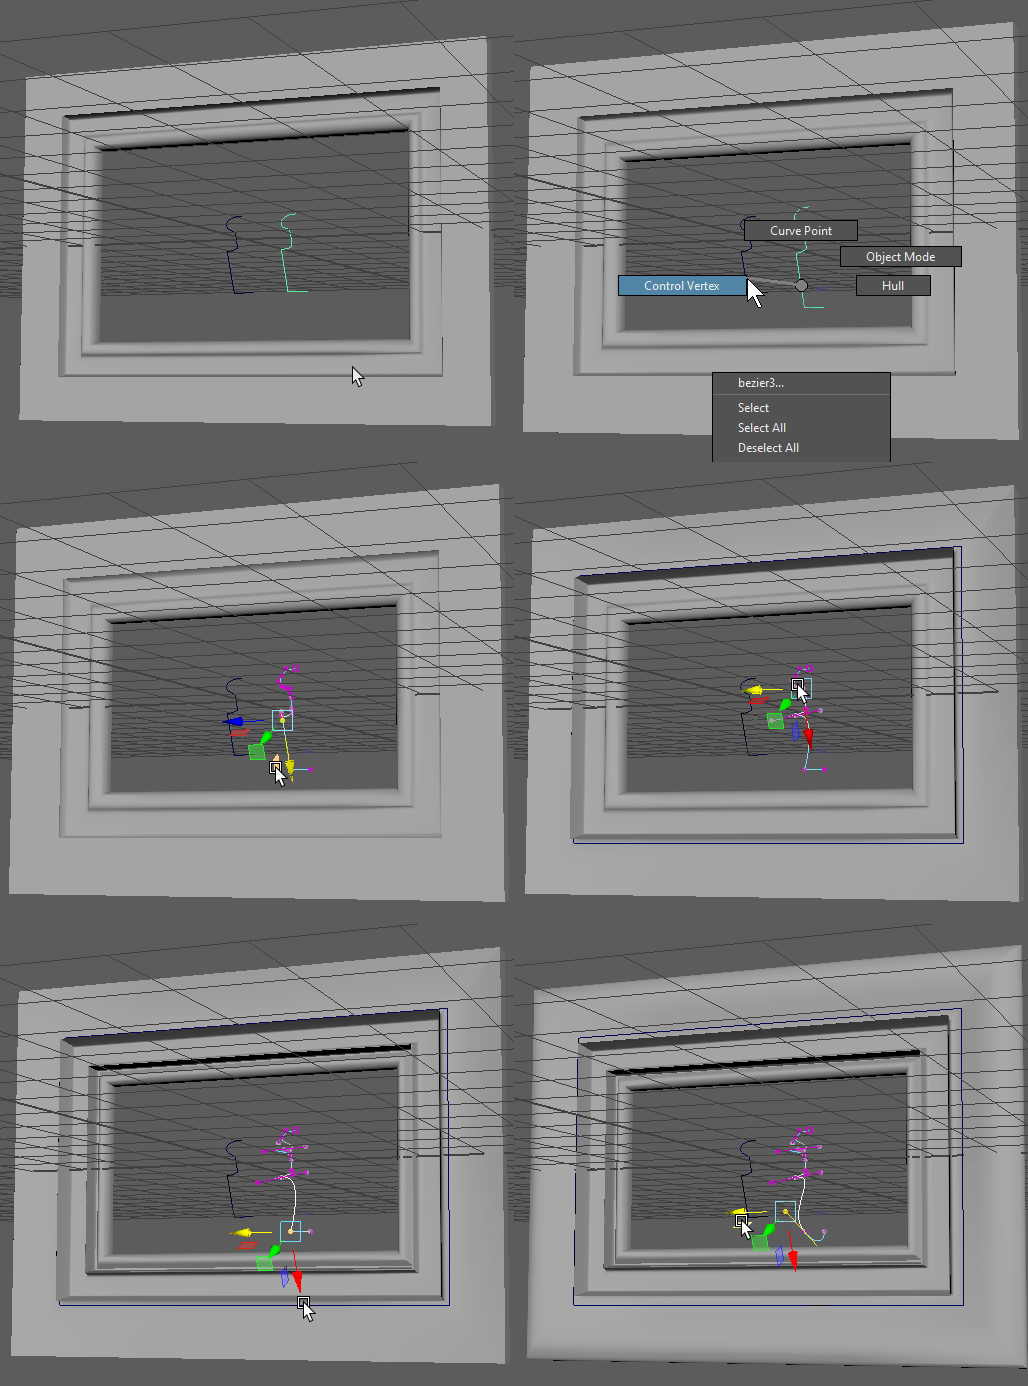
By default, the original frame curve (the square shape) is buried in the center of the mesh, which can make it hard to select. You can select the curve in the Outliner, or change this in the Sweep Mesh tooll Alignment settings by changing the Horizontal setting to Top or Bottom and the Vertical setting to Left or Right.
The workflow uses the frame mesh and Profile example in the workflows above to demonstrate how Sweep Mesh is connected the Profile Curve and updates wherever you make changes.