Make a permanent hole from an external face
You can use the Make Hole Tool to create a hole in a selected polygon face in the shape of a different face.
Making a hole in a face does not increase the number of faces in your polygonal model or change the component indexing for its vertices, edges, or faces. This can be especially important when applying color-per-vertex, or when importing foreign polygonal objects.

You can also make a hole in a face as you draw it. See Create a polygon face with a hole.
To make a hole in the shape of a second face
- Select Mesh Tools > Make Hole >
 .
. In the Tool Settings dialog, optionally set the way in which the hole will interact with the faces. See Make Hole Tool Options.
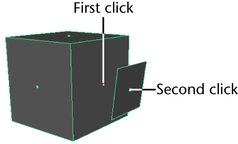
- Click the face indicator in the center of the face where you want to make a hole.
- Click the face indicator in the center of the face that represents the shape of the hole.
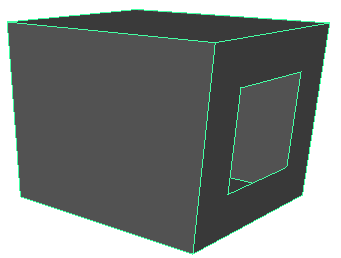
- Press Enter to make the hole.
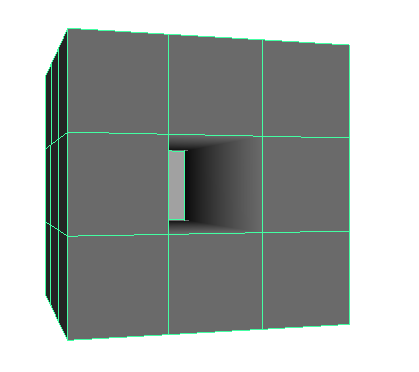
You can also create a hole in a single object by selecting faces on either side.
To create a hole in a polygon as you draw it
- Select .
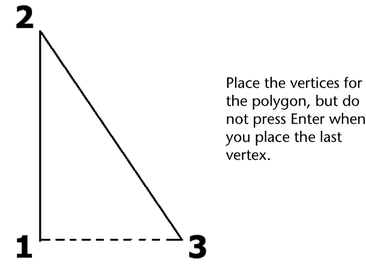
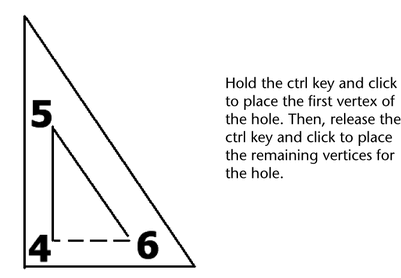
- In the scene view, click to place the polygon vertices, but do not press Enter when you place the last polygon vertex. Instead, do the following:
- Hold the Ctrl key and click to place the first vertex of the hole.
- Release the Ctrl key and click to place the remaining vertices for the hole.
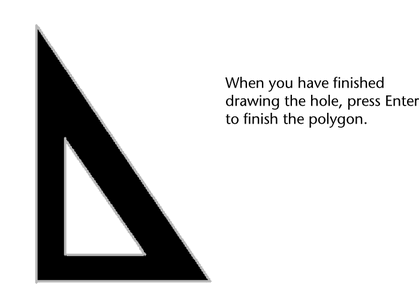
- When you have finished drawing the hole, press Enter to finish the polygon.
You can also make a hole in an existing face with the Make Hole Tool.
Make a face invisible
Rather than actually creating a hole in your polygon, you can also make a face invisible. This is useful when you need a hole to appear in the geometry, yet want to maintain the overall shape when using subdivision operations (such as Smooth).
To assign faces as invisible
- Select the faces you want to make invisible.
- Select Edit Mesh > Assign Invisible Faces >
 .
. The Assign Invisible Faces Options window appears.
- Select Assign.
- Click Create.
Depending on your settings, the face may or may not disappear. If it doesn’t disappear, select .
Unlike real holes in the geometry, you can still select and perform operations on invisible faces when in Face selection mode. If you subdivide the mesh (for example, using the Smooth operation), the subdivisions respect that the face is still there.
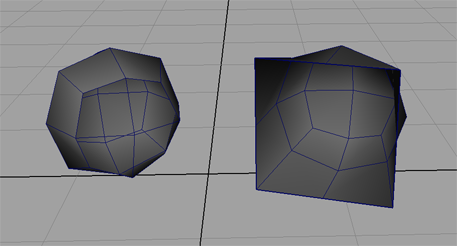
For example, the image below shows two cubes after being smoothed. The front face on the cube on the left was made invisible prior to the smoothing, while the same face on the cube on the right was deleted.
To unassign faces as invisible
- Select the faces you want to unassign.
- Select Edit Mesh > Assign Invisible Faces >
.
The Assign Invisible Faces Options window appears.
- Select Unassign.
- Click Create.
Any of the previously assigned invisible faces are made visible again.