The following example demonstrates how changing the
Weight solver towards option in the
Unfold UVs options in combination with pinning and aligning UVs helps to control the unfolded UV layout and the texture mapping that results.
- A barrel shaped polygonal object is texture-mapped with a checker texture. Performing an initial unfold operation with the
Weight solver towards option set to 0 (the default) initially produces a tapered UV layout in the
UV Texture Editor. The resulting texture map is skewed and distorted on the object.

- A second unfold operation is performed with the
Weight solver towards
option set to 0.6. This unfolds the UVs in a more global manner and reduces the tapering that previously occurred. The UV layout is more predictable, but there is some overlap of UVs in the lower left corner of the UV mesh resulting in overlap on the texture.

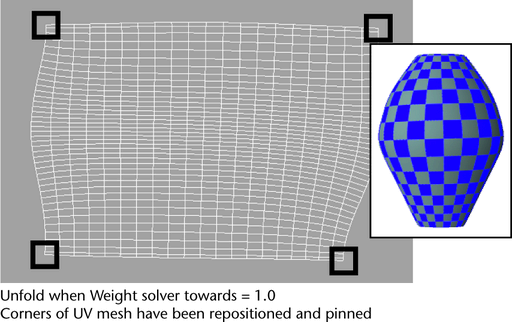
- Repositioning and pinning the corners of the UV mesh and performing another unfold with the
Weight solver towards set to 0 further relaxes the UVs and removes the overlapping region.

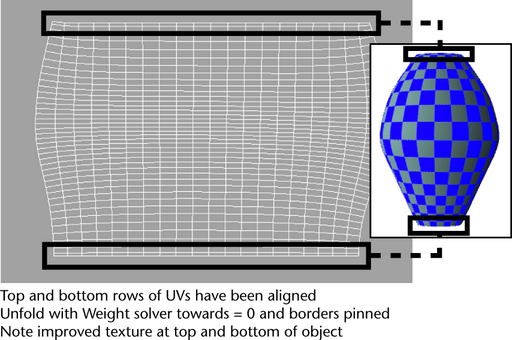
- The top and bottom rows of UVs are aligned and a final unfold operation is performed with the
Weight solver towards option set to 0 with the borders pinned.
