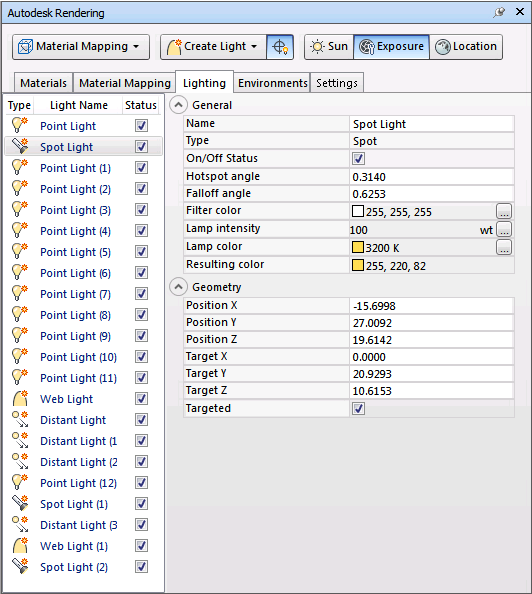
Use the Lighting tab to manage lights in your model.

The Lights View
Each light you add to the model is listed in the Lights view by name and type. The Status check box enables you to turn the lights on and off. Right-clicking a light displays a context menu. Clicking a light, selects it, and displays its properties in the Properties view. The sun and sky light is not included but you can adjust the sun and the sky properties on the Environments tab.
When a light is selected in the list, it is selected in the model and vice versa. When a light is selected in the model, you can use gizmos to move the light and change some other properties, for example, the hotspot and falloff cone in spot lights. You can also adjust the light's settings directly in the Properties view. You can see the effect on the model as you change the properties of a light.
The Properties View
The Properties view shows the properties for the currently selected light. The properties of the lights in the list are saved per file. Full descriptions of the controls is provided separately for each light type. The information below is common to all lights.
- General properties:
-
- Name. Specifies the name assigned to the light.
- Type. Specifies the type of light: point light, spotlight, distant light, or web.
- On/Off Status. Controls whether the light is turned on or off.
- Filter color. Sets the color of the emitted light.
-
- Geometry properties control the location of the light. If the light is a spot light, or web light additional target point properties are available.