The Find Items window is a dockable window that enables you to search for items having a common property or combination of properties.
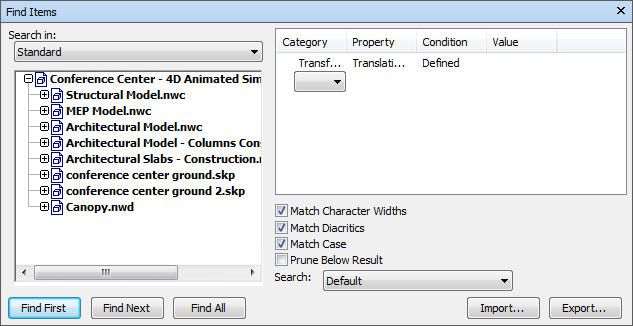
The left pane contains the Find Selection Tree with a drop-down list at the top, and enables you to select the level of item to start searching at; this can be a file, a layer, an instance, a selection set, and so on.
The drop-down list options are the same as on the Selection Tree window:
- Standard. Displays the default tree hierarchy, including all instancing.
- Compact. Displays a simplified version of the tree hierarchy.
- Properties. Displays the hierarchy based on the items’ properties.
- Sets. Displays a list of selection and search sets. If no selection and search sets have been created, this option is not shown. Note: The list of the items on the Sets option is exactly the same as the list on the Sets window.
The right pane enables you to add the search statements (or conditions). And the buttons enable you to find the qualifying items in your scene, and import and export your search parameters as XML files.
Defining Search Statements
A search statement contains a property (a combination of category name and property name), a condition operator, and a value to be tested against the selected property. For example, you can search for Material that ContainsChrome.
By default, all items that match your statement criteria are found (for example, all objects that use chrome material). You can also negate a statement, in which case, all items that do not match your statement criteria are found instead (for example, all objects that do not use chrome material).
Each category and property name has two parts - a user string which is shown in the Autodesk Navisworks interface, and an internal string which is not shown, and is mainly used by the API. By default, the items are matched on both parts, but you can instruct Autodesk Navisworks to match only on one part, if necessary. For example, you can ignore user names in searches, and match items on their internal names only. This can be useful when you plan on sharing your saved searches with other users who may be running localized versions of Autodesk Navisworks.
The statements that do not use default settings are identified by this icon: ![]() . It appears, for example, when you negate a statement, or choose to ignore the upper and lower cases in property values.
. It appears, for example, when you negate a statement, or choose to ignore the upper and lower cases in property values.
Combining Search Statements
Search statements are read from left to right. By default, all statements are ANDed. For example: “A AND B”, “A AND B AND C”.
You can arrange your statements into groups. For example, “(A AND B) OR (C AND D)”. ORed statements are identified by a plus icon: ![]() . All statements preceding the ORed statement are ANDed, and all statements following the ORed statement are ANDed. So to create two groups in the previous example, you need to mark statement C as ORed.
. All statements preceding the ORed statement are ANDed, and all statements following the ORed statement are ANDed. So to create two groups in the previous example, you need to mark statement C as ORed.
There are no parentheses to visually show you the way the statements are read. Simple statements such as “A OR B” will not be misinterpreted. For complex searches, the order and groupings of the statements is more important, especially if you choose to negate some statements. For example, “(A AND B) OR (C AND NOT D)”. When search conditions are evaluated, NOT is applied before AND, and AND is applied before OR.