This example shows you how to use Sorting for Feature machining. Other examples show how to use sorting for Model Area Clearance machining and Drilling Strategies. This uses the 2D_Wireframe.dgk model in the Examples folder.
- Create a 10 mm End Mill tool.
- From the Feature Groups context menu, select Feature Editor. This displays the Feature Editor tab.
- Graphically select the wireframe pockets.
- From the
Feature Editor tab:
- Click Edit tab > Create 2D Features panel > Pocket > Freeform Pocket.
The Create Freeform Pocket Features dialog is displayed.
- Enter Create Features in the Name field.
- Enter a Height of 25.
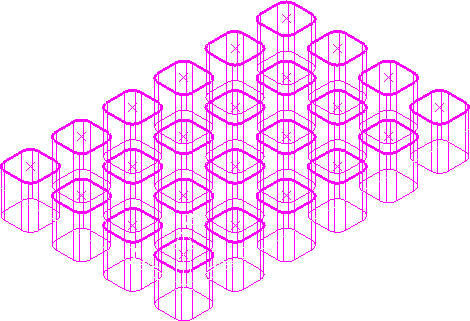
- Click Apply. The features are created from the wireframe.
- Click Accept to close the dialog.
- Click Edit tab > Create 2D Features panel > Pocket > Freeform Pocket.
- Click Edit tab > Finish panel > Accept.
- Click Home tab > Create Toolpaths panel > Toolpaths to display the Strategy Selector dialog, and from the Feature Machining category, select the Feature Pocket Profile strategy and click OK.
- Select the
Block page :
- Select a Type of Feature.
- Click Calculate.
- Select the Start point page on the Feature Pocket Profile dialog and select Absolute from the Use list.
- In the
Coordinates area enter:
- X 0
- Y 0
- Z 10.
- Select the
Order page on the
Feature Pocket Profile dialog:
- Select Pocket from the Order by list.
- In the
Sorting list, select the method as
 .
.
- On the Feature Pocket Profile strategy dialog, click Calculate.
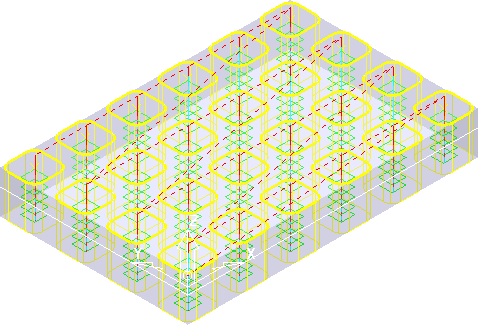
The link moves show the effect of the sorting option.
The sorting process is identical to that of the Model Machining and Drilling strategies. If the other examples were repeated for feature machining, the outcome would be the same for those too.