This example shows you how to create a shank for a specific tool. The shank profile is generated outside PowerMill and imported as a pattern. You can create a form tool profile, routing tool profile, and tool holder in the same way.
To create the pattern:
- Click Pattern tab > Create panel > Pattern to create a new pattern.
- From the individual pattern context menu, select Insert > File. This displays the Open Pattern dialog.
- Click
 to display the Examples file and then click on the Patterns folder.
 - Select sample_shank.dgk and click Open.

- Click
To create the shank:
- Create a 10 mm Ball Nosed Tool.
The Ball Nosed Tool dialog is displayed.
- Select the Shank tab.
- Click Pick a Pattern
 and then select the pattern you have just inserted into the project.
 - Click the Create shank from pattern
 button.
The shank is added to the tool tip.
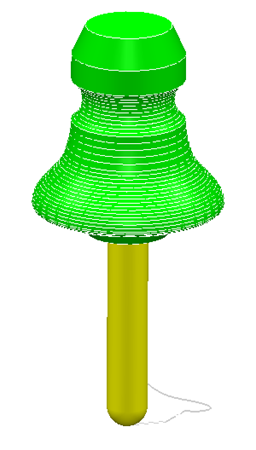
Because tool shanks cannot contain negative Y moves, PowerMill removes them from the pattern when creating the shank.
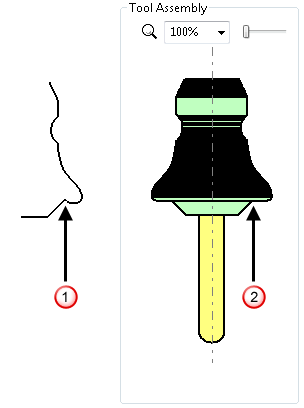
 Pattern with negative Y move.
 Shank created from the pattern with only positive Y moves.