Select an option from the View tab > Appearance panel > Shade menu to display a specific shaded representation of a Model:
-
Plain — Click to shade the model using the colour selected in the Shade Colour option on the Model Drawing Options dialog.
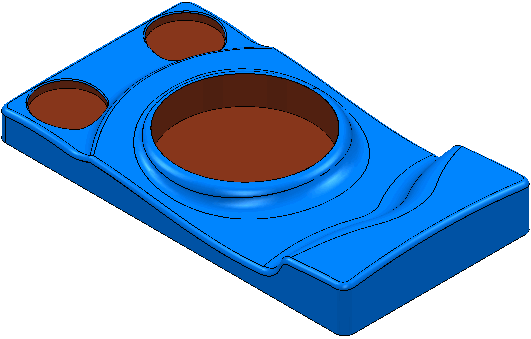
-
Draft Angle — Click to shade the model using different colours that relate to a specified draft angle. This is useful to help identify undercut areas. It is sensitive to the surface orientation.
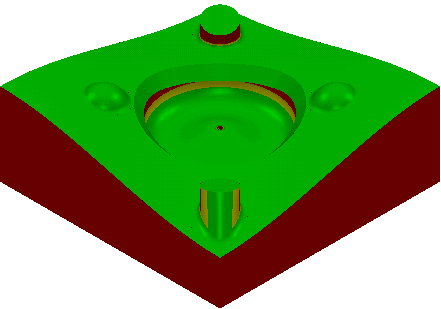
The red indicates areas that are less than the Draft Angle, and the yellow indicates areas that are within the Warning Angle.
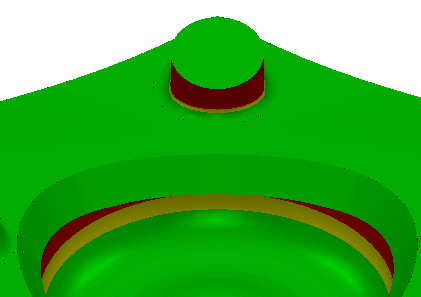
To change the draft angle used in the shading, edit the Draft Angle on the Model Drawing Optionsdialog.
-
Minimum Radius — Click to help identify the most suitably sized cutting tool. This works irrespective of the surface orientation.
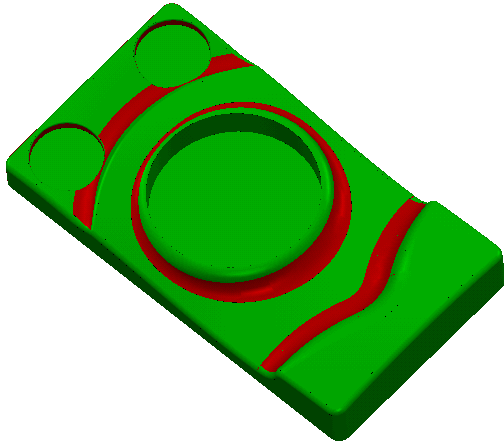
Areas shaded in red cannot be machined using the specified tool. To change the minimum radius used in the calculation, edit the Minimum Tool Radius on the Model Drawing Optionsdialog.
You can use this option only on DGK models. Other models are shaded white because normal and curvature information is not available.
-
Multicolour — Click to shade the model in the same colour as the wireframe:
-
Wireframe:
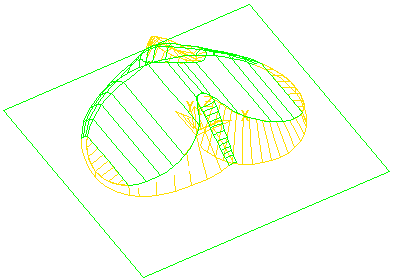
-
Multi-Colour Shade:
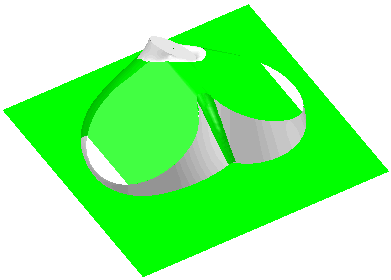
-
Wireframe:
-
Toolpath Thickness — Click to shade the components of a model by the toolpath thickness, as described in the Component Thickness dialog.
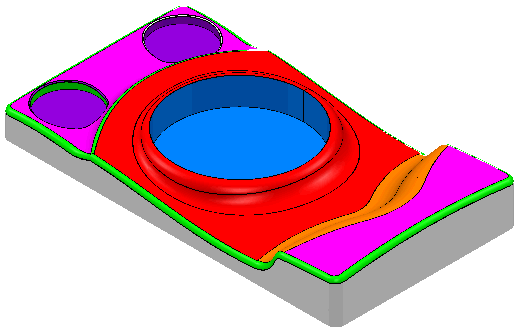
- Default Thickness Shade — Click to shade the components of a model by the toolpath thickness as specified in the Surface Defaults tab of the Component Thickness dialog.
-
Toolpath Machining Mode — Click to shade the components of a model by their Toolpath Machining Mode specified in the Surfaces tab of the Component Thickness dialog for the specific toolpath. The different options are shaded in different colours.
- Components that use the Machining mode of Machine are shaded the Model Shading Colour.
- Components that use the Machining mode of Collision are shaded yellow by default.
- Components that use the Machining mode of Ignore are shaded red by default.
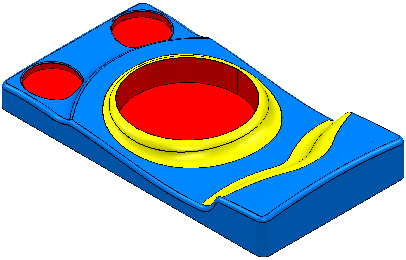
-
Default Machining Mode — Click to shade the components of a model by their Machining Mode specified in the Surfaces Defaults tab of the Component Thickness dialog. The different options are shaded a different colour:
- Components that use the Machining mode of Machine are shaded the Model Shading Colour.
- Components that use the Machining mode of Collision are shaded yellow by default.
- Components that use the Machining mode of Ignore are shaded red by default.
%%% ELT These bullet points are the same as the ones with the graphic above? both were in EBs, not sure if both are needed, or if one is incorrect? ELT %%%
- Verification Mode — Click to shade the components of a model according to the toolpath Verification Thickness of the components.
- Verification Machining Mode — Click to shade the components of a model according to the verification machining mode of the components.
- Boundary Thickness — Click to shade the components of a model by their boundary thickness, as described in the Component Thickness dialog.
- Boundary Machining Mode — Click to shade the components of a model by their Boundary Machining Mode specified in the Surfaces tab in the Component Thickness dialog for the specific boundary. The different options are shaded in different colours.