This example shows you how to nest three different parts in a sheet:

- Click Edit tab > Transform panel > Nesting to display the Nesting dialog.
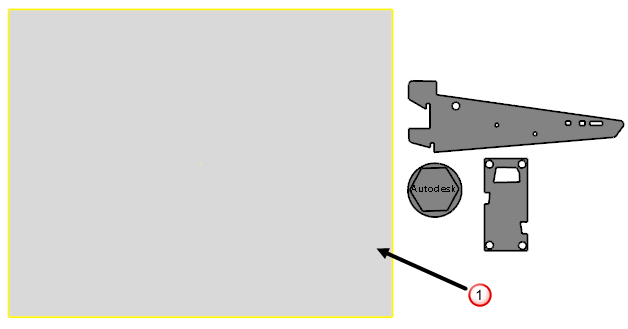
- Select the sheet
 .
.
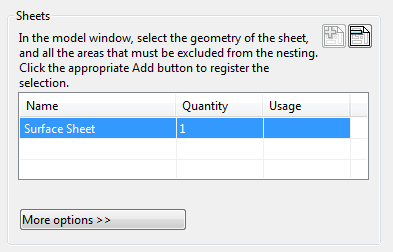
- Click the
Add as organised sheets
 button. The sheet is added to the Sheets list on the
Nesting
dialog:
button. The sheet is added to the Sheets list on the
Nesting
dialog:
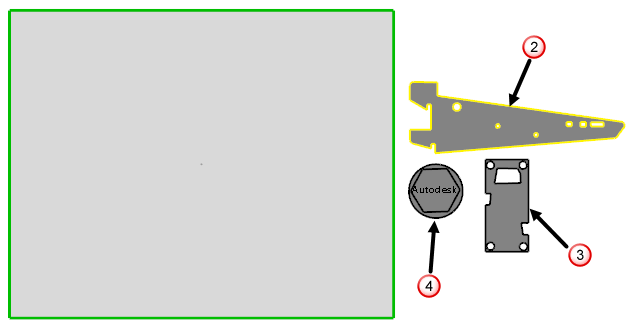
- Select the
Surface 'Bracket'
part
 .
.
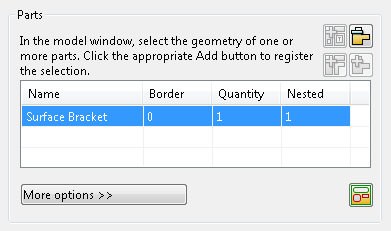
- Click the
Add as a single part
 button. The part is added to the
Parts list on the
Nesting dialog:
button. The part is added to the
Parts list on the
Nesting dialog:
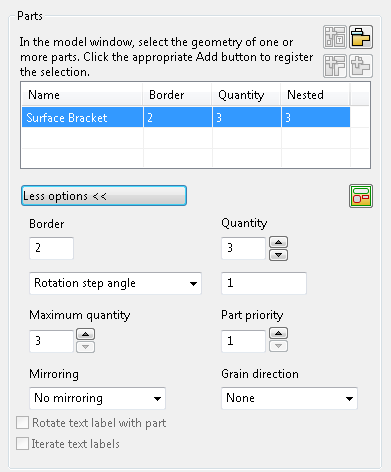
- Set the following values for the part in the
Parts list:
- Border: 2
- Quantity:3
- Click More options.
- Set the following additional values for the part:
- Rotation step angle: 1
- Part Priority:1
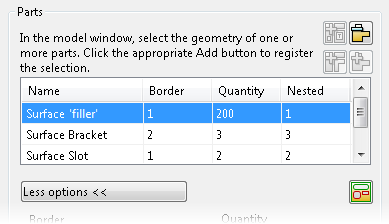
- Repeat steps 4-8 for the remaining two parts as follows:
-
Surface 'Slot' part
 using values;
Border
1,
Quantity
2,
Rotation step angle
1,
Priority
2
using values;
Border
1,
Quantity
2,
Rotation step angle
1,
Priority
2
-
Surface 'filler' part
 using values;
Border
1,
Quantity
200,
Rotation step angle
1,
Priority
3, and ensure the Rotate text label with part check box is selected.
using values;
Border
1,
Quantity
200,
Rotation step angle
1,
Priority
3, and ensure the Rotate text label with part check box is selected.
Note: This option is selected by default.The Parts list should appear as shown below:
 Note: Alternatively, you can select all three parts and click the Add as organised parts
 button to add them all at once. You can then set the values for each part by highlighting each one in the
Parts list.
button to add them all at once. You can then set the values for each part by highlighting each one in the
Parts list.
-
Surface 'Slot' part
- Click
Apply. The parts are nested according to the values you have entered:
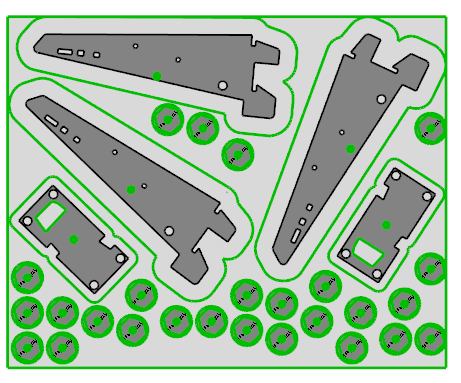
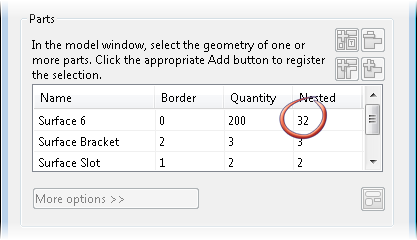
The Parts list is updated to show the number of each part nested:
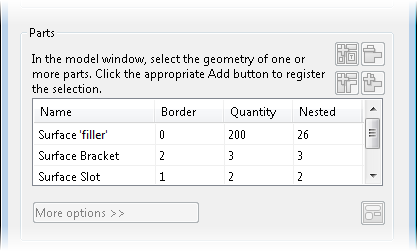
This shows that:
- all the required Surface 'Bracket' (priority 1) parts have been nested.
- both of the Surface 'Slot' (priority 2) parts have been nested.
- 26 of the Surface 'filler' (priority 3) parts have been nested.
- Click and drag one of the
Surface 'Slot' parts. As you move the part, overlapping parts turn red:
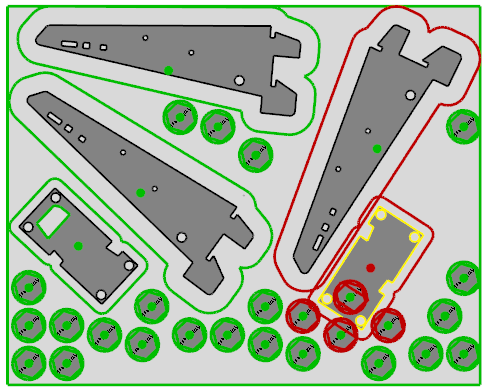 Tip: You can also rotate a part by selecting and dragging the border outline.
 - Click
Apply
to rearrange the parts based on the new position of the
Surface 'Slot' part.
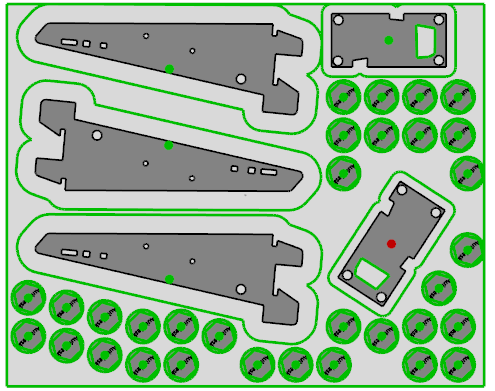
The parts are rearranged and the number of Surface 'filler' parts that can be nested has increased:
Tip: When you reposition an item manually, the item is locked in the new position and any subsequent nesting operations do not reposition the part. This is indicated by a red dot in the centre of the item. You can unlock a locked part by toggling the red dot to green.